• Menu
  • Skip to right header navigation
  • Skip to main content
  • Skip to secondary navigation
  • Skip to primary sidebar
  • Skip to footer

Before Header

  • Facebook
  • Instagram
  • Pinterest
  • RSS
  • Twitter

Turning for Profit | Woodturning | Lathe |

Helping woodturners make more money

  • Blog
  • Projects
    • Library
      • Turned Bowls
      • Christmas Projects
  • Inspiration
  • Make Money
  • Woodturning Techniques
  • Workshop Expertise
    • Splinters
  • Shop
  • Blog
  • Projects
    • Library
      • Turned Bowls
      • Christmas Projects
  • Inspiration
  • Make Money
  • Woodturning Techniques
  • Workshop Expertise
    • Splinters
  • Shop
You are here: Home / Technique / Sanding Your Wood Turnings
Sanding - title

Sanding Your Wood Turnings

By //  by Robin 18 Comments

divider
This post contains affiliate links. If you use these links to buy something we may earn a commission. Thanks.

Different colored sand paper on a wooden table
a collection of sandpaper and sanding blocks

Sanding your turnings can be a chore or an element that sets your turning apart from the ordinary.  As I have focused on achieving a smoother finish my turnings look and feel that much better.  Sanding is a process that most turnings should go through.

Different colored sand paper on a wooden table

Sand Paper and Sanding in General

Sand paper or glass paper comes in different grits.  The number of particles per square inch is the grit number of the sand paper.  So 120 grit sandpaper has 120 particles per square inch.  Therefore the higher the number the finer the size the particle is that does the sanding.

Even though it feels smoother used sandpaper does not become equivalent to a higher grit.  One turner has said: “Sand your work as if someone else paid for the sand paper.”

The sanding process for turning is similar to regular woodworking.  You start with a sanding grit that removes tool marks and sands the wood to its finished shape.  For major changes in shape you would start with a low grit of 50 or 80.  Depending on how your tools have finished the turning you can start with higher grits.

A general rule of thumb for increasing the grit of your sand paper is to limit your jump to 1.5x the current paper.  So if you are using 120 grit sandpaper you would move to 180 grit.  It is a rough guideline to follow.  Standard grits are as follows: 50, 80, 120, 150, 180, 220, 320, 400, 600, and 800.

The reason that you don’t jump too far to reach the next grit of sandpaper is that you want each grade of sandpaper to remove the marks of the previous grade.  If you jump too far your particle size will be too small to remove the marks from the previous sandpaper.

Each time you use a piece of sandpaper you leave grit and sawdust on your turning.  After each grit remember to wipe the turning down with a soft cloth or paper towel.  This removes any grit that has fallen off of your sandpaper so that you don’t accidentally make scratch marks on your turning when you use the next grade of sandpaper.  That can be very frustrating.

Sanding Safety

Sanding on the lathe produces sawdust.  This dust is hazardous to your lungs and you should always wear a dust mask or respirator.  Some woods are toxic and may need to be wet sanded.  That is a topic for a future post.

Sanding Organization and Efficiency

I organize my sand paper into stacks that move progressively through each grit size.  I find that 1/4 sheet works well.  They are easy to hold and shape to fit my turnings.  I cut the sandpaper into four quarters.  Fold the paper together so that the grit is on the outside then use a sharp knife to cut the paper not the particles.  When you cut your paper if the printed grit size is not visible quickly write it in on the back of the paper.  It is not easy to judge what size grit is on an unlabelled piece of sand paper.

As I go through the grits I rebuild the stack.  Once I am done sanding I flip the stack over and I’m ready to go on the next section.  This keeps the paper in order and I don’t have to always check the grit size that I’ve grabbed.  I’ve used clothes pegs to keep the papers altogether between sessions.

These little tips increase the efficiency of your sanding so that you can quickly move on to your next project.

Sanding your turnings

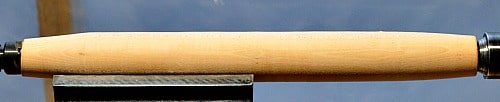
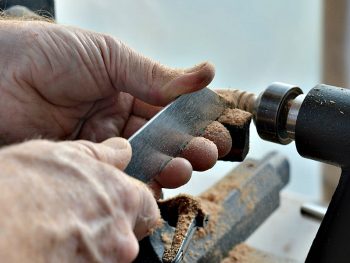
For this post I have turned a rolling pin.  My last cuts on the pin were made very lightly with a skew chisel.  This gives me a very good finish and I’m ready to start sanding with 320 grit sand paper.

sanding - rolling pin finished with skew chisel

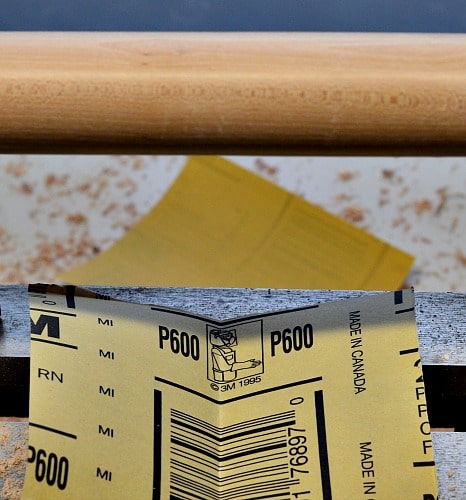
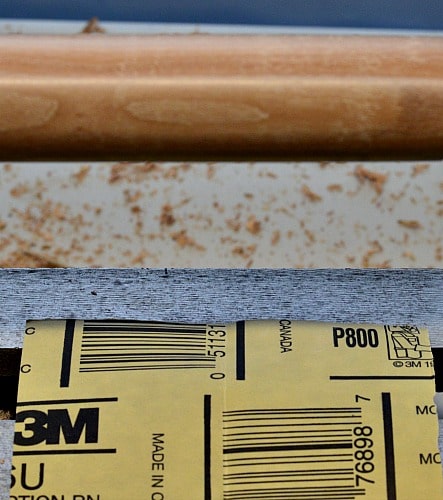
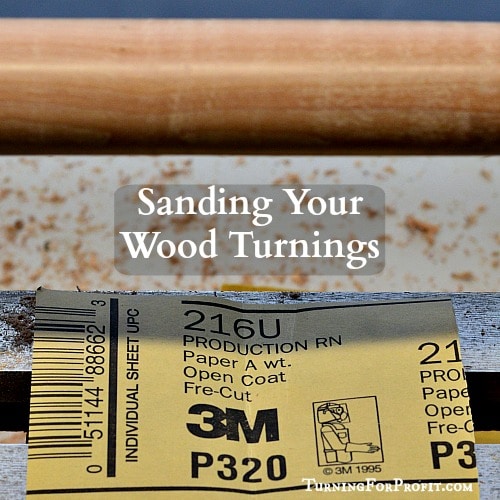
These are the four grits of sandpaper that I will use.  320, 400, 600, 800.

sanding - the grits I am using

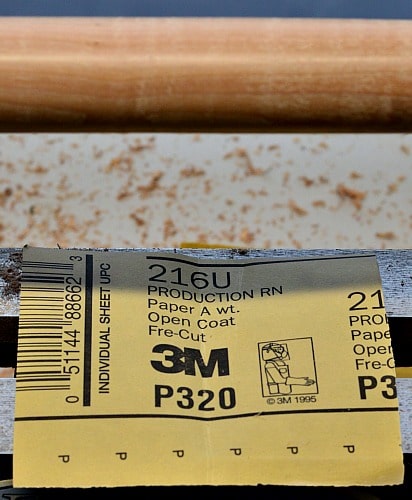
Here is the rolling pin sanded with 320 grit sandpaper.  If you compare the previous image with this one you can see the difference the first sanding makes.

sanding - after using 320 grit paper

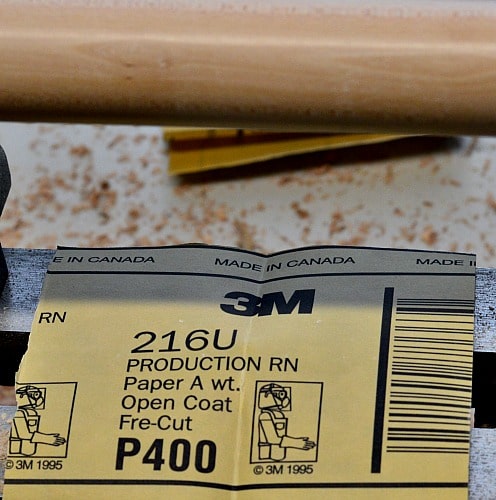
At this point I decided to add burn lines to the rolling pin.  Using 400 grit sandpaper is the next stage.

sanding - after using 400 grit paper

Two more grits are left.  Use the 600 grit sandpaper.

sanding - after using 600 grit paper

Finally the last grit is 800 grit sandpaper.  There is no magic to using 800 grit sandpaper and you can actually keep sanding to even higher grits.  This is what I am used to and I like the feel that this grit gives my turnings.  Depending on what the turning is to be used for you can sand to a different grit size.

sanding - after using 800 grit paper

At this point you add your finish or wax to your turning project.  As this is a rolling pin I used a food safe wood polish as the finish.

sanding - all finished with a food safe wood polish

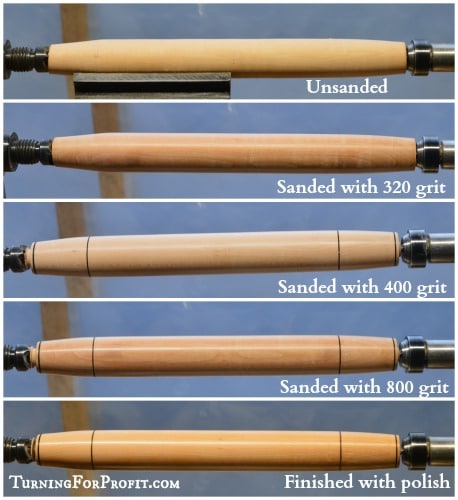
To show you the impact that sanding makes here is a collage of the rolling pin as I sanded through each grit.  (I accidentally missed 600 grit.)

sanding - entire sequence of grits and finish

I would love to let you hold the rolling pin.  Your fingers are very sensitive and will let you know if there are any imperfections.  This is important with the first grit you select.  If you find that the turning is still rough to the touch, or the transitions on the curves feel abrupt rather than smooth, then try a lower grit sand paper.  It is at the start that you set the foundation for your turning.

Depending on the item you are turning you will need to go through the sanding process multiple times on the project.  With a box or a bowl you will be able to use the spinning lathe to help you sand at specific stages in the turning process.  Remember to go through all the grits in order each time you sand a section of your turning.  Turning a coin bank required sanding at different points in the turning process.

Sanding paper and a rolling pin

Sanding is the boring part of turning.  There is always part of a job that is mundane.  If I defined what I did by the amount of time it took I would be a wood sander not a wood turner!

You may have to ask local woodworkers where they get their higher grit sandpaper.  In my town I buy it from the auto supply store.  The hardware stores don’t carry much selection and usually don’t go higher than 320 grit.  It may take a bit of effort but the results are well worth it.

To get a good finish on your turning, sand progressively through the grits, and wipe with a soft cloth between each change in grit size.  If you have a turning that you particularly proud of please share it with me.  I would be glad to see it.

Please sign up for my free newsletter.  It comes out weekly with projects and other information that I think you will find useful.

Filed Under: Technique, Workshop Tagged With: beginner turners, production of artisan work, small turnings, turning tips, wood turning projects

Related Posts:

You may also be interested in these posts:
Christmas Projects Title

Christmas Ornaments: Build Your Inventory Fast

Turning Blanks: How to cut dimensional lumber on your table saw to make turning blanks

Turning Blanks from your Table Saw

Shop notes are a great aid in your woodturning projects

Woodturning Shop Notes

Woodturner Shop Safety

9 Shop Safety Tips for Woodturners

Before you start teaching woodturning to children ask yourself 3 important questions

Teaching woodturning to children – 3 preliminary questions

Parting tool is versatile

Parting Tool – More versatile than you thought

Previous Post: « Healthy Snacks for Shows and Events 5 Healthy Snacks for Shows and Events
Next Post: 7 Gifts for Mom Made on the Lathe Mothers Day Gifts - Title »

Reader Interactions

Trackbacks

  1. Woodturning - How to use a Captive Ring Tool - Turning for Profit says:
    June 2, 2016 at 9:14 am

    […] you have shaped the rings then go through the sanding process to your finest grit.  Having the rings attached to the blank will speed up the sanding process.  […]

    Reply
  2. Turning for the Garden: A Garden Dibbler - Turning for Profit says:
    June 8, 2016 at 2:11 pm

    […] then use a coarse grit like 80 or 120 to quickly smooth out those challenges. Go through the regular sanding process from coarse to fine grit sandpaper.  Remember to wipe the dibbler down with a paper towel or soft […]

    Reply
  3. Kraut Pounder - A Woodturning Project - Turning for Profit says:
    June 21, 2016 at 11:36 pm

    […] increased the lathe speed again, then proceeded to sand the kraut pounder.  I did my usual sanding routine.  For this project I did not include any burn lines or other ornamentation that would make it […]

    Reply
  4. How to Sharpen Your Competitive Edge - Turning for Profit says:
    June 27, 2016 at 4:13 pm

    […] are also posts on specific techniques that you use when you are turning.  So far there are posts on Sanding, Adding a Burn Line, and Using a Captive Ring […]

    Reply
  5. Tea Lights - A Woodturning Project - Turning for Profit says:
    July 1, 2016 at 3:22 pm

    […] and finish the top of the candle holder.  I used my normal sanding technique.  Any finish that you are comfortable with could be used here.  It is not used for food so food […]

    Reply
  6. Tea Light - A Woodturning Project - Turning for Profit says:
    July 12, 2016 at 5:20 pm

    […] me to take very fine shavings off of the wood and get a very smooth surface.  I followed my usual sanding technique and sanded from 150 grit to 800 grit. I also applied carnauba wax as the finish at this […]

    Reply
  7. Jar Lid: A Woodturning Project - Turning for Profit says:
    September 13, 2016 at 4:50 pm

    […] and finish the bottom or underside of the lid at this point.  I used my normal sanding technique going to 800 grit sandpaper for the final finish.  Finish the lid with a food grade finish if it […]

    Reply
  8. Mini Decorations - A Woodturning Project - Turning for Profit says:
    December 1, 2016 at 11:39 pm

    […] Next sand and finish your mini tree.  I turned the top of the tree down to about 1/8” in diameter.  Then I parted off the base of the tree.  I did this project between centers so both ends of the project had to be shaped with a knife and sandpaper. […]

    Reply
  9. Roughing Gouge - Turning Technique - Turning for Profit says:
    December 14, 2016 at 11:51 pm

    […] Sanding your Turnings […]

    Reply
  10. Wooden Grommet - Turning for the home office - Turning for Profit says:
    January 3, 2017 at 10:10 pm

    […] of your grommet.  At this point sand the inside of the grommet and the outside portion as well.  How to sand your turnings explains my usual sanding […]

    Reply
  11. How to top a good wine - Turning for Profit says:
    February 27, 2017 at 10:30 pm

    […] insert a bit rough so that it grips the insert.  For the body of the stopper I sand using my normal sanding procedure.  I sand through the sanding grits from 220 to 800 in steps.  Then I apply the wood polish to the […]

    Reply
  12. Diz: A Turned Fiber Tool Project - Turning for Profit says:
    April 3, 2017 at 9:43 pm

    […] are about half way through on the back, stop and sand / finish the turning.  (Here is more on my sanding process.)  Sand through to your finest grit remembering to wipe the turning off between each size of sand […]

    Reply
  13. Turn a Fidget Stick for Kids 5 to 85 - Turning for Profit says:
    December 21, 2017 at 10:02 pm

    […] to sand your stick.  I started with 220 grit sandpaper and worked my way progressively up to 800 grit.  Don’t be […]

    Reply
  14. How to Turn a Lidded Box - A Woodturning Project - Turning for Profit says:
    January 8, 2018 at 12:41 am

    […] this point the cap is mounted and you can sand and finish the cap.  Remember to move through your sandpaper grits from coarse to fine.  In between each grit size wipe the turning off with a soft cloth.  Complete […]

    Reply
  15. Ring Holder - A Woodturning Project - Turningforprofit.com says:
    January 29, 2018 at 9:55 pm

    […] my sanding but the grain on cedar tends to undulate and this will smooth it out.  I continued sanding through 220, 320, 400, 600, and 800 grit sandpapers.  Remember to wipe the turning with a soft cloth between […]

    Reply
  16. Cremation Urn - A Woodturning Project | Turning for Profit says:
    February 20, 2018 at 10:53 am

    […] a wood polish.  I did sand the inside with 120 and 180 grit papers.  The outside was sanded up to 800 grit like I usually do. While the lid kept a good friction fit even after a couple of days it really wasn’t important in […]

    Reply
  17. Wooden Handle - A woodturning project | Turning for Profit says:
    February 27, 2018 at 12:50 pm

    […] on the lathe.  Remember to move progressively through the different grits of sand paper.  Here is how I do most of my sanding.  On this project I had a good surface from the tools and I started with 220 grit sandpaper.  […]

    Reply
  18. Turned Weed Pot - A woodturning project | Turning for Profit says:
    February 27, 2018 at 12:52 pm

    […] the insert and sand your weed pot.  I generally sand from 220 grit up to 800 grit.  Be sure to wipe your turning with a soft cloth or paper towel every time you change grit […]

    Reply

Leave a Reply Cancel reply

Your email address will not be published. Required fields are marked *

CAPTCHA
Refresh

*

Primary Sidebar

Welcome

About me:

Welcome to the Turning For Profit Community! I'm Robin. Turning for Profit is about helping you find hope and joy in your woodturning hobby. It's about projects that fill your inventory and inspire your creativity. It's business help to get you set up and making a profit quickly. If you've always wanted to work from home playing with wood, let me help you realize your dream of Turning for Profit. Read More…

Help for Beginner Woodturners

Learn to use 5 different wood turning tools, with confidence, while you turn 7 projects, building your wood turning skills sequentially.  Includes tips and ideas for marketing your wood turning, when you are ready to move forward.


Footer

Inspiration:

You don’t have to be good to start.  You just have to START to be good. — Joe Sabah

Handmade with Care Stamp

7 Gifts for Men Made on the Lathe

7 Gifts for Men Made on the Lathe
Christmas Projects Title

Christmas Ornaments: Build Your Inventory Fast

Christmas Ornaments: Build Your Inventory Fast
Finished Niddy Noddy with yarn.

Niddy Noddy – A Woodturning Project

Niddy Noddy – A Woodturning Project
  • Start Here
  • About me
  • Contact
  • Privacy Policy
  • Terms and Conditions
  • Disclosure

Site Footer

  • Email
  • Facebook
  • Instagram
  • Pinterest
  • RSS
  • Twitter

Copyright © 2023 · Mai Lifestyle Pro On Genesis Framework · WordPress · Log in