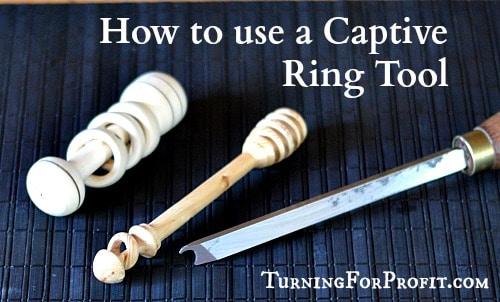
A captive ring tool is used by turners to create a captive wooden ring that is decorative and / or functional on a turning, and is a puzzle to those who don’t know how it is created.
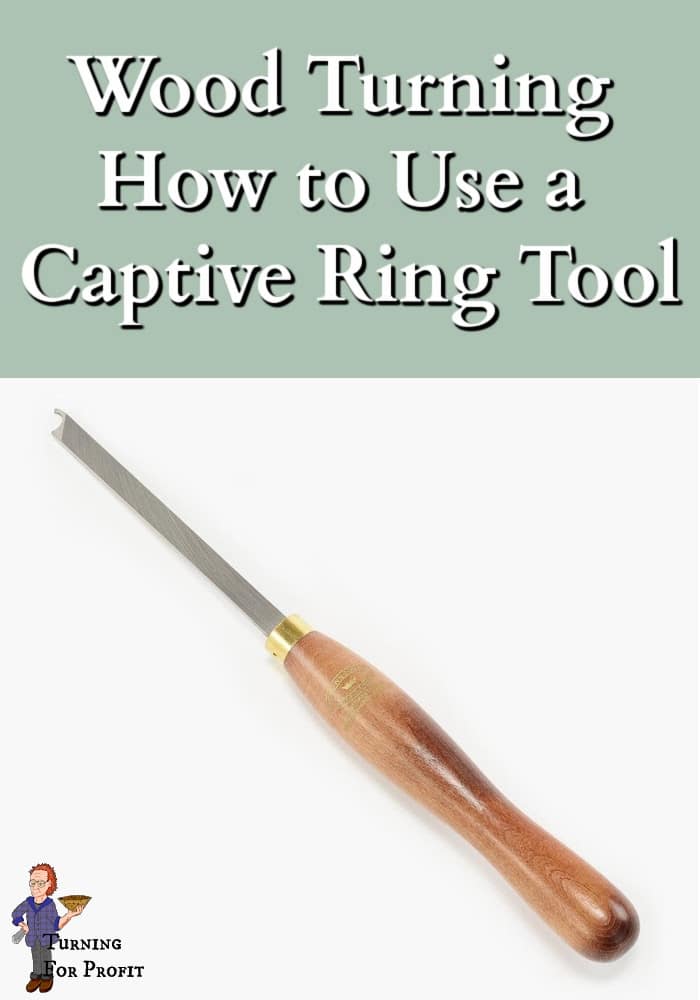
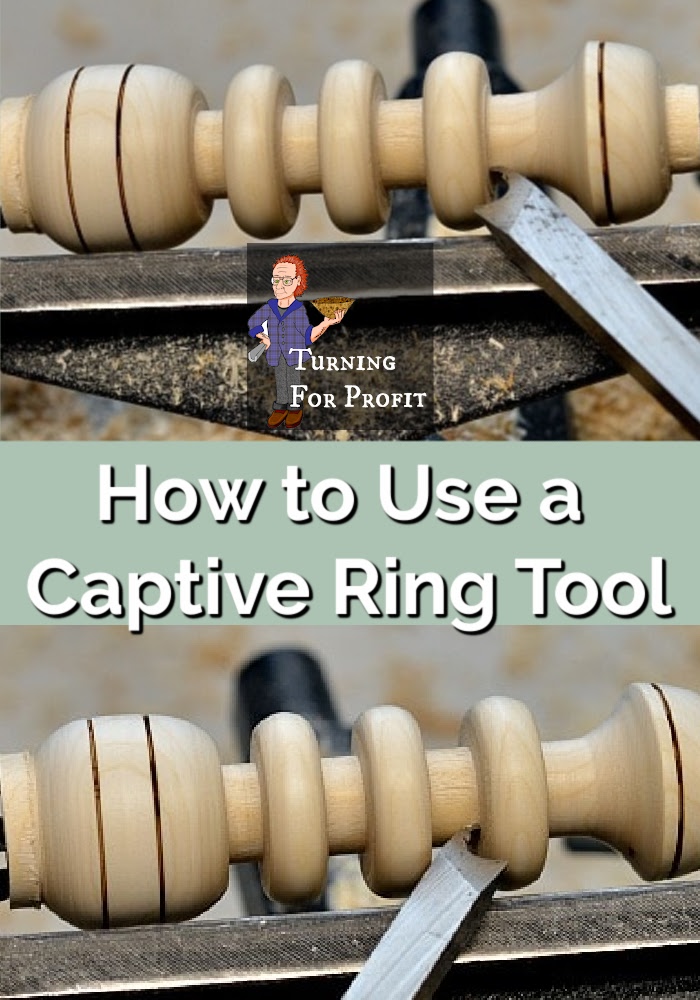
A Captive Ring Tool
I have turned Captive rings on numerous spindle turnings which include Honey dippers, crochet hooks, bottle stoppers, and baby rattles. The rings on a baby rattle are there to make noise; otherwise the captive ring is more decorative than utilitarian. On the honey dipper and crochet hook the ring is small and delicate to add interest to the utensil and not get in the way of proper use.
You can turn a captive ring with regular turning tools. Skew chisels and spindle gouges would work. However to reach the underside of the ring you would need room to manipulate the tool. Using the regular tools would limit the number of rings you could turn on a baby rattle. There simply wouldn’t be enough room to maneuver the tool. That is where the captive ring tool fits the bill.
The captive ring tool is a small scraper. So like all scrapers keep the tool flat on the tool rest and cut so that if there is a catch your tool moves into air not wood. That is, your tool rest should be slightly higher than the mid point of the blank and you should be using the ring tool / scraper just above the mid point as well. This way the turning of the wood pushes the tool down and you push up a little bit in order to scrape the wood.
This tool makes it very easy to turn a captive ring. The captive ring tool only cuts the underside of the captive ring.
Woodturning Design Considerations
Generally if the item is used by an adult then the ring can be quite thin and delicate. If there is a chance for the ring to be banged or damaged then err on the thicker side for the ring. For the baby rattle you want the rings loose enough to make a good noise and thick enough to withstand being played with. Think about what your turning will be used for and how the ring will enhance it. Then turn the ring as best fits your project.
This post will show you how to turn a captive ring with a captive ring tool, and guide you step by step.
Procedure for Turning a Captive Ring
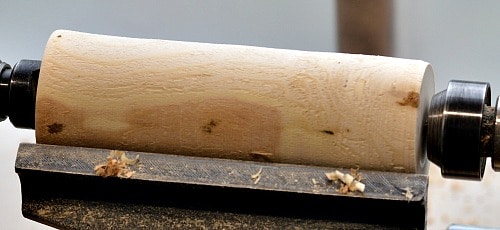
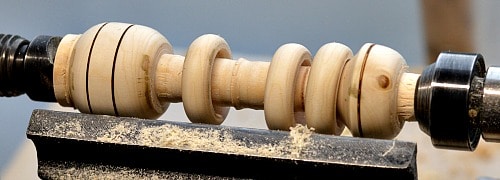
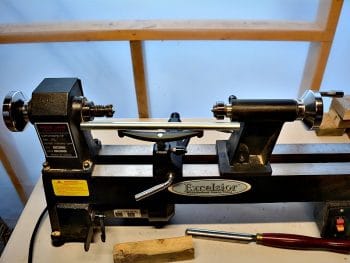
For this project I am turning a baby rattle and focusing on the captive ring portion. You can apply the captive ring instructions to the project that you are turning. I am turning Douglas Maple for this project. Turn your blank round between centers.
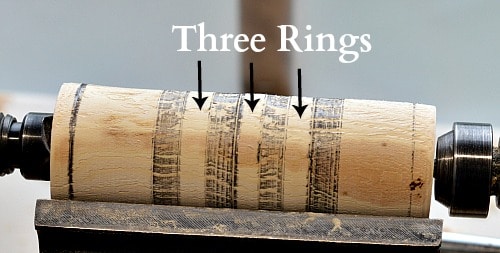
Mark the placement of rings and other features on your blank. The two thin areas at the ends of the blank are waste wood. The big sections are for the top and bottom of the rattle. The shaded sections in the middle will be turned away leaving three narrow bands to turn the captive rings from.
To get a feel for the size and shape of the rings you want shape the body of your project. Here I have turned the two ends of the rattle. The captive rings will come out of the middle section.
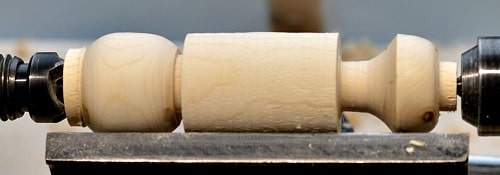
At this point I also added burn lines as an additional decorative feature.
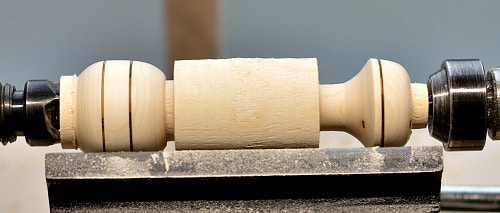
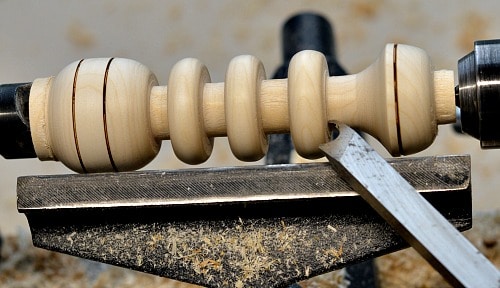
Now we start to separate the rings. Use a parting tool to remove the wood between each of the rings.
Turn the sections between the rings. What is the final diameter of the center portion on your project? If you want a 1/2″ diameter then when you part between the rings turn down to 5/8″. Make sure you are larger than your final diameter. This will give you some wood to remove after you have released your rings. It will improve the look and feel of the center portion of your project.

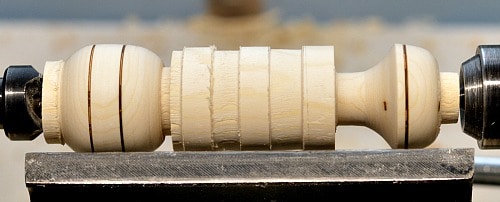
At this point take the time to finish the sides and tops of the rings. With the rings attached to the blank you can use your skew chisel or spindle gouge to shape the top of the ring. If you wanted to this would be the time to add a decorative burn line.
Once you have shaped the rings then go through the sanding process to your finest grit. Having the rings attached to the blank will speed up the sanding process. If you forget and separate the rings first it will be tedious to sand and finish them by hand. Put a finish on your rings as well. This part of the rings will be seen and touched so make them shine!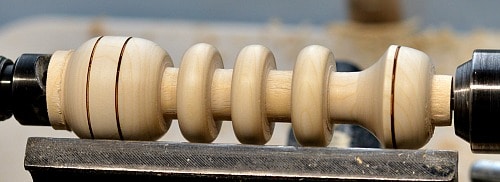
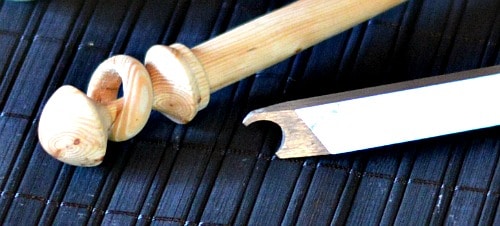
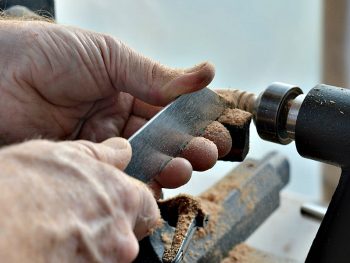
The captive ring tool is basically a scraper. It is the little point at the end that can be flipped to be pointing left or right. When you use the scraper make sure that it is resting flat on your tool rest. If you lift the tool tip up you will get a catch that might break your rings.
Work on the right side of the ring. Start by placing the tool against the bottom of the groove the tip of the tool pointing to the left to go under the ring. With the tool flat on the tool rest move the tip parallel to the blank in and under the ring. Watch the top of the curved section of the tool so that you do not mar your finished surface.
Your ring has to be small enough to fit into the curved section of the captive ring tool. If you do touch the top of your ring stop separating and touch up your ring. Move the tip of the tool so that it scrapes around the ring to give it a circular shape. When you are about half way through stop and do the left side of the ring.
The left side is done by flipping the tool so the tip now points to the right. Repeat the same process you did on the right side.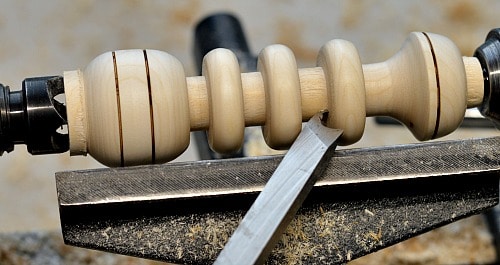
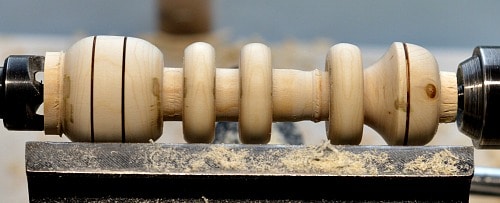
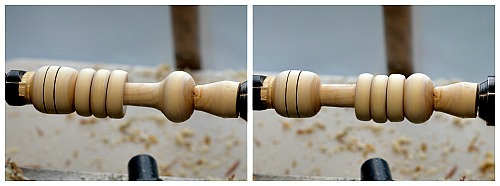
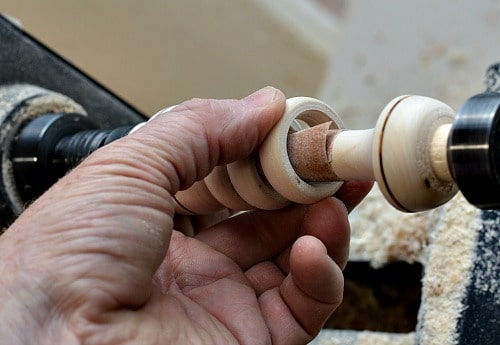
Separating the ring will not break the ring. As soon as it is released from the blank it will simply spin with the lathe and bounce around a little bit. It usually takes a few flips back and forth before you complete the separation. It is hard to judge where the tip is as you are working with the wood. In this image the right side is just about complete and you can see the shaping of the underside of the ring.

Here the 1st ring is released. You can see that the central part is fairly rough. The tip of the ring tool is not the best for a smooth finish. Your focus is on shaping a good ring and the central portion is finished later.
Proceed to separate the remaining rings on your project. If the bouncing rings affect your turning; you can tape them to one side to keep them out of the way.
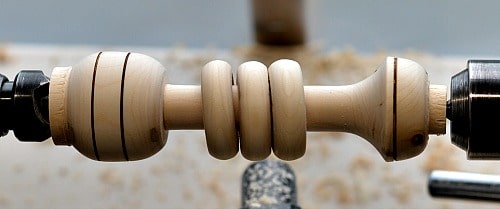
To smooth the center portion you will need to use a tool that will fit between your captive rings. While I like a skew chisel to make a smooth surface I had to use a spindle gouge here because there was not enough room for the skew.
Once you have the center portion of your project nice and smooth then you can sand and finish the body of your project. Here are the three rings separated and the body finished on the baby rattle.
The final step is to sand the underside of the rings. To do this you can tape a small strip of sandpaper to the body of your project in the center so that all rings can be sanded. You can see how the tape is towards you and the sandpaper to the back of the lathe.
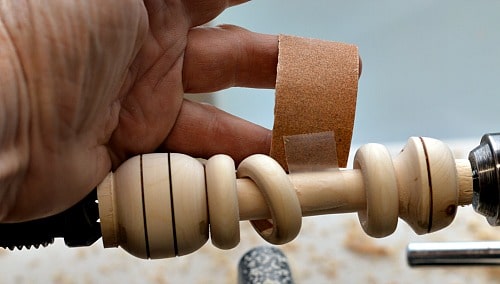
Wrap the sandpaper down and around the body of the project. You can see in the image the flap of the sandpaper. When the lathe is turned on it rotates towards you which prevents the sandpaper from flying off the lathe.
My tape did not work very well. I switched to double sided tape. Take a small piece of double sided tape and wrap it around your project. Then take your strip of sandpaper and wrap it in the same way around the project over the tape. Press the sandpaper into the tape. This held much better than regular scotch tape.
You have to move each ring over the sandpaper to finish the underside. Sand the ring both flat and wiggling it around the sides. Attach your lowest grit first and proceed through to your higher grits. You may have a lot of shaping to do depending on how your ring separated. I started with 150 grit sandpaper. Since the underside of the ring is not visible on a baby rattle I sanded with 150, 220, and 320 grit sandpaper. You will have to apply your finish to the underside of the rings by hand.
A captive ring tool is perfect for turning the underside of captive rings.
You can now add a captive ring to your turnings. I hope you enjoyed this technique post.
If you are interested in turning projects here is a project listing. Please sign up to receive my newsletter. It will keep you informed of new posts on this sight and other information that I think will help you turn your hobby into a business.


Hi Robin
have you turned any chess sets? I am looking g into but trying to figure out what kind of money they could be sold for. Of course this depends on the quality
I made replicas for pieces that have been lost or broken
any suggestions would be appreciated
enjoy your news letter as well
Hugh
Thanks for your comment Hugh. Pricing a chess set with 32 pieces plus the board would be a challenge. I have not turned anything related to a chess set yet. I would suggest a pinterest search on chess. This will give you design ideas and possibly some pricing as well.
You read my mind Robin! I did my first captive ring a couple of days ago, with a skew and couldnt figure out how to sand the underside. The ring is on a piece if scrap as im still practicing the basics but became impatient (& had ideas beyond my skill level).
The pointers in the correct way to make the ring, and how to finish it wilp come in very handy thank you.
Robin – thanks for the detailed instructions (much better than Sorby). I bought the captive ring set that has several cutters of different diameters. I’m have troubles getting this tool to work on a captured ring goblet. It either burns, doesn’t cut, or cuts aggressively and pulls the tool in and hits the outside of my nice ring. I’m cheating and using a beading tool to form the outside of the ring. I put my tool rest at a height to have the top edge of the cutter on center when tool is level. I ended up using a parting tool to cut the rings loose.
I see you state “That is, your tool rest should be slightly higher than the mid point of the blank and you should be using the ring tool / scraper just below the mid point.”, do you really mean scraper is just above the mid point? If just below and it catches seems to me (relatively new turner) that you will dig into wood but if just above center a small catch will put you in air???
I see you cut down to a diameter to support the OD of the tool. I cut deeper so no support. Is this my big issue?
Thanks,
Mike
Thanks Mike for “catching” this. You are correct and I have changed the wording in the post. You want the tool rest higher than the tip of the tool so that the wood will push down on the tool tip. You want the tip above center otherwise it will not present the scraping edge to the wood in order to scrape. However, this is different than using a scraper in a bowl, there is no free air under the scraper to move into like on a bowl. The ring tool is presenting a very small section of the tool for scraping, and you are taking only a little bit off at a time, so there should be no catches. Turning a bowl you want tool rest above center, scraper tip below center, then you are in a position for the tool to move into air if it catches. Hope this helps and thanks for your excellent comment.
Is there a way to sharpen a captive ring tool or is it simply going to be kind of crude?
The captive ring tool is a small scraper. It is not cutting the wood. You could hone the flat surface of the tool on a whet stone. I would keep it clean but don’t expect a super fine cut. I don’t think there is a way to burnish the small point of the tool like a scraper could be. Hope this helps.