This second tea light holder project, is an upside down bowl. It is easy to turn because you use the hole for the tea light to enable you to hollow out the bowl. The outside of a bowl is usually quite easy to turn and to make smooth and shiny. For beginning turners the inside of the bowl can sometimes present a challenge. Turning the inside of the tea light holder lightens the holder and gives you practice on turning bowls.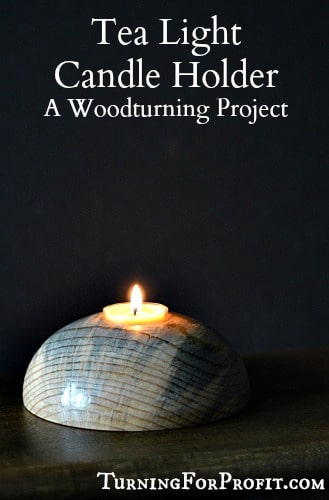
This project gives you the opportunity to practice you bowl turning skills and produces a candle holder at the same time. The first Tea Lights project used between centers turning to make two tea light holders out of a branch.
The trick is using the hollow for the tea light as a jam chuck to hold the bowl in place for hollowing. Many times I’ve seen woodturners flip the bowl over to see how the turner chucked the underside. Well in this case the hole for the jam chuck serves a useful purpose.
Tea Light – Design Considerations
Practical concerns suggest that you want a good stable base for the candle holder. A tea light doesn’t weigh very much and your candle holder does not need to be weighted down. An upside down bowl will be very stable as a candle holder. I need to use two hands to pick this up when the candle is lit.
The hole for the candle is a little bit shorter than the candle itself. This reduces the chance of the wood being affected by the candle. Remember to always be present if you have a lit candle. While this candle holder won’t tip over, something else might fall on to it.
Tea Light – Wood Selection
I had the idea for an upside down bowl as a tea light holder. To do this project I used a face plate and a 1 1/2″ forstner drill bit. Mark the center point of the blank at the intersection of two lines drawn from corner to corner. The corners of the blank were trimmed on my bandsaw to make it easier to turn on the lathe.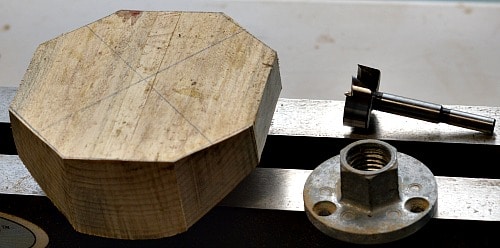
The wood for this project is Jack Pine or Lodgepole Pine. This is a common two needle pine of southern BC. This piece of wood is from my property and shows the effect of the Mountain Pine Beetle. The fungus that enters the wood, as a result of the beetle, leaves a blue stain. Pine is also a soft wood and needs to be gently worked, taking very fine shavings, if you are going to get a smooth surface without grain tear out.
Center your faceplate on the wood based on your lines, and attach with wood screws. Then mount the faceplate on your headstock.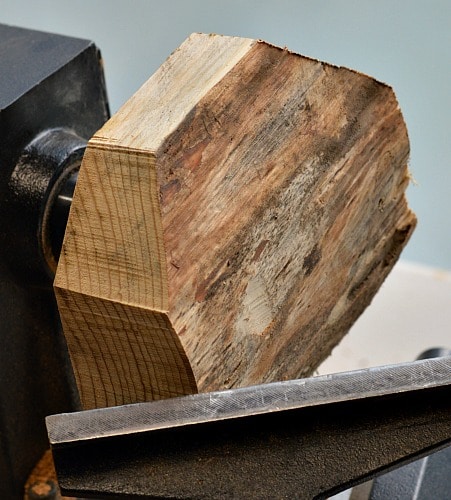
Tea Light – Turning the Candle Holder
Turn your blank round using your bowl gouge. At this point you want the blank to be round. Finer cuts will be done later to smooth out the rough sections that you can see here.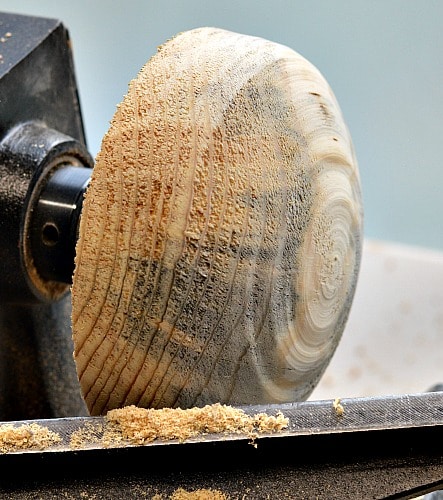
Put your 1 1/2″ forstner bit into a collet chuck. Insert the collet chuck into your tailstock. (You’ll have to remove your live center first.) Position the bit just in front of the blank.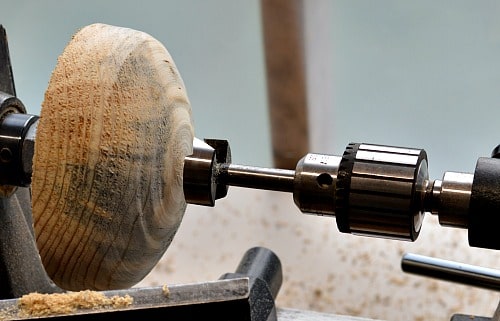
With the lathe turned on, advance the quill of your tail stock. This will result in you drilling a hole into your wood blank. My forstner bit was just a tad shorter than the candle. I drilled in just beyond the thickness of the drill bit.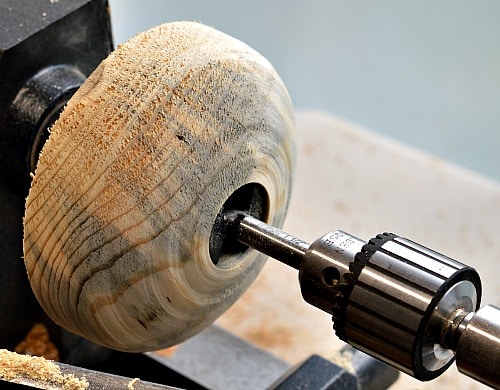
The 1 1/2” hole was too tight for the tea light. I touched the edge up slightly with a bowl gouge and sanded the hole a bit as well. This enlarged the hole sufficiently for the tea light to fit. The tea light is proud of the hole so that if it did get stuck a pair of pliers could be used to get it out.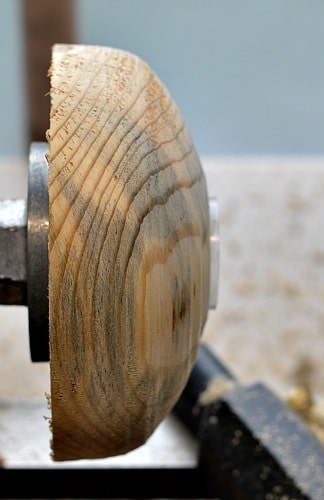
At this point look at the surface of your blank and decide on what shape and contours you want it to have. I increased the speed of my lathe. This allowed me to take very fine shavings off of the wood and get a very smooth surface. I followed my usual sanding technique and sanded from 150 grit to 800 grit. I also applied carnauba wax as the finish at this point.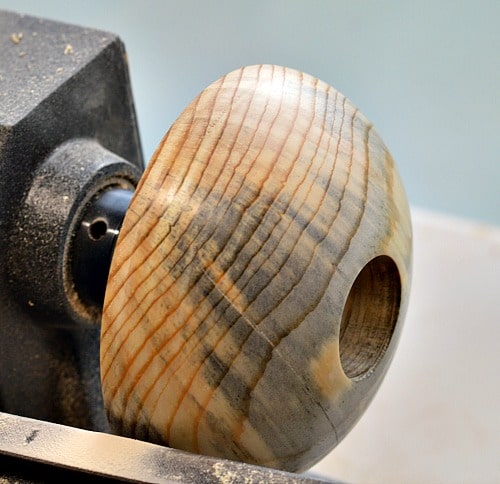
To turn the inside of the “bowl” I needed to turn a jam chuck. The name says it all. You turn a spigot on a scrap piece of wood and “jam” the wood your are turning onto it. This is the initial wood for the jam chuck held in my multi-jaw chuck you could also use a piece of wood attached to another face plate as well.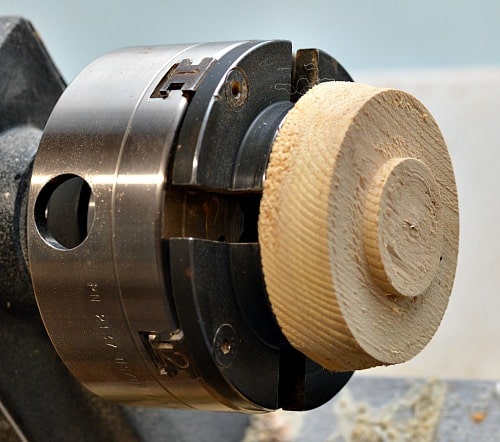
I turned the wood down to the depth of the candle hole. I reached the right dimension faster than I thought I would. If by chance you do turn it a bit small you can wrap the spigot with a paper towel and it will hold very well. This jam chuck is now ready for as many tea lights as I would like to turn.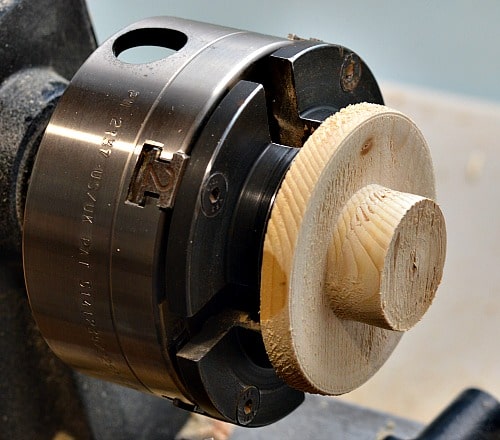
Remove the faceplate from your tea light holder. Flip it around so the jam chuck goes into the hole for the candle. The pressure on the outside of the wood when you are hollowing out a bowl is quite a bit. So I brought my tail stock up and used it for extra support.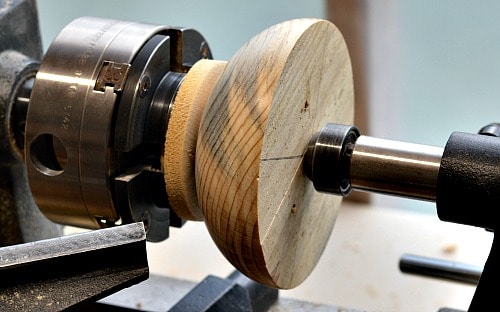
As a result I have a supporting piece of wood in the center of the bowl. This will be removed later. At this point I am halfway down the bowl.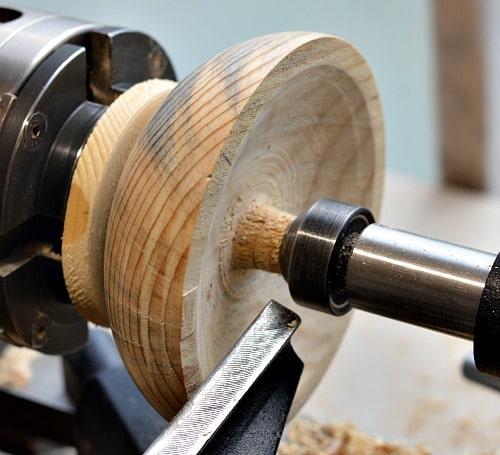
Now I’ve reached the bottom and I have shaped the edge of the bowl to the desired thickness. I used a bowl gouge and scrapers to work the inside of the bowl. Since Pine is a soft wood I wanted about a 1/2″ thickness between the bottom of the hole for the candle and the bottom of the bowl. If I was turning a hard wood I could go to a 1/4″ thickness.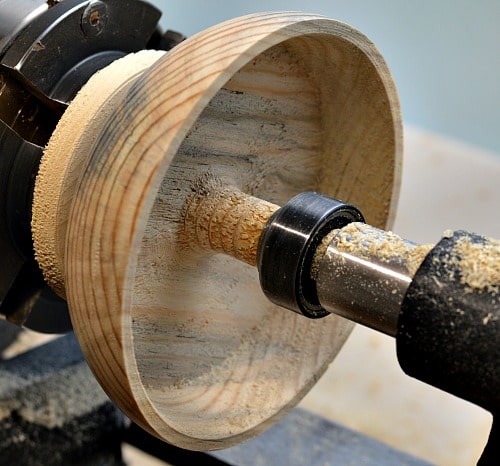
I removed the tailstock in order to finish the inside of the bowl. Taking very light cuts I nibbled down the support column using my bowl gouge. I then cleaned up the bottom with the bowl gouge and scraper. Sanding the inside the same as the outside and adding the finish at the same time. If you wanted to you can flip the candle holder over and use it as a shallow bowl.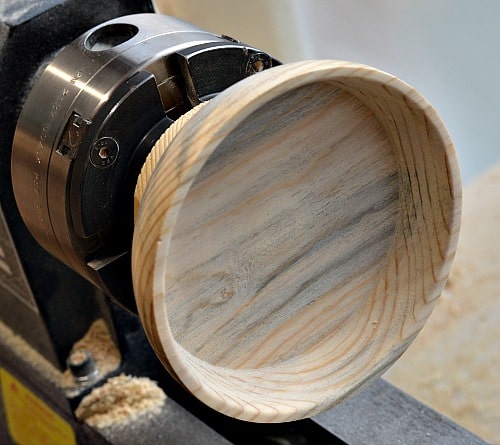
Tea Light – Production
In producing this candle holder you could use the same jam chuck for each tea light. Making the candle holes 1 1/2″ in diameter and a consistent depth makes this production work possible. The challenge would be to not rush the turning of the holder. If you are using softwood such as 2×6 dimensioned lumber then the cost of the wood is lower than using exotic wood but you have to be very delicate to achieve a good smooth surface.
Tea Light – Marketing
Tea light holders are a fairly small project and should not take too long to turn with a little practice and repetition. I would recommend selling your tea light candle holders with a tea light candle. You can buy paraffin candles or you could make your own tea light candle from beeswax. For more specific marketing ideas check out the first Tea Lights project.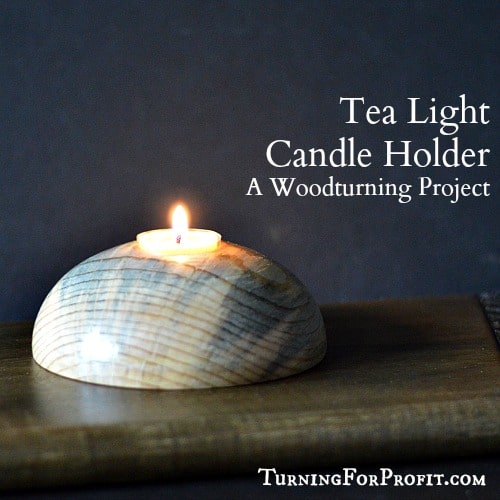
I hope you like this tea light project. Other projects that would be suitable for beginning turners interested in expanding their bowl turning techniques would include shawl pins, a bird feeder, and a regular bowl. You can click on the projects tab above for recent projects, or click on build your inventory for a listing of all the projects on the site.
Please sign up for my newsletter. (The sign up box is at the top of the right side bar.) This will allow me to keep you up to date on my latest project or business post. When I can, I also let you know of woodturning sales and events. Remember to turn safely.


Like your idea of a bowl/candle holder, a new project for me when it’s warmer.