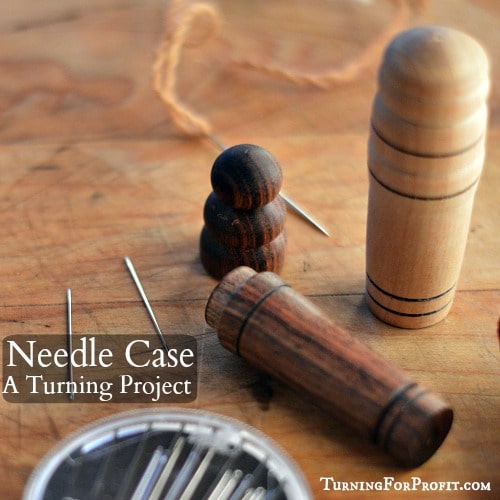
A needle case is a small container to hold needles in. Making the case out of wood protects the needles, won’t get broken like plastic, is nice to look at, and lets you show off your turning skills. Not bad for one little project.
A needle case is a great accessory for anyone working with fabric or fibre. You can design the case anyway you want and make it as deep as your drill bits allow. Plain wooden cases work just as well as cases with beads and coves on them. For me I like adding burn lines as a distinctive feature. Adding different decorations will allow you to have variation in the prices you charge for each needle case.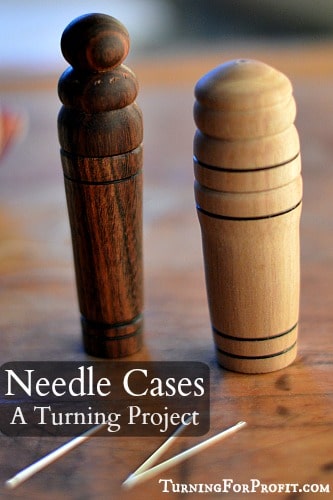
Extra Equipment for a Needle Case
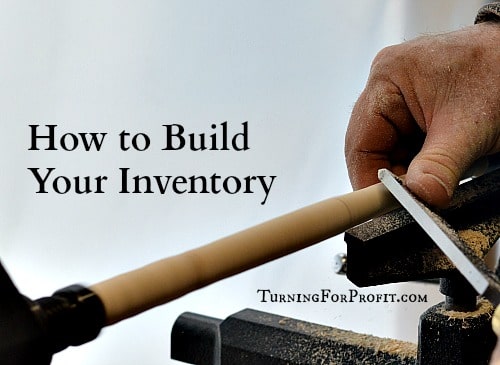
Two pieces of equipment make turning a needle case real easy. The first is a multi-jawed chuck. This lets you hold the blank secure while allowing you to drill into the wood. The second is a collet chuck that fits into your tail stock. This turns your lathe into a sideways drill press. Insert the drill into the collet chuck, insert the chuck into the tail stock, advance the tail stock to the turning, and extend the tail stock as the lathe is running.
When I first started turning I wanted to make a needle case. Turning between centers allowed me to shape the needle case and do a simple top where the tenon was the same diameter as the drill bit. However I had to drill the hole off of the lathe. No matter how hard I tried I could not get the hole centered. While the end result is okay I would have been happier turning it all on the lathe. This project is way easier.
Design Considerations
Generally a needle case is fairly small and fits well in a purse or sewing basket. In turning a needle case you are working with both the inside and outside of the piece of wood. The main concern is to not turn the wood too thin, or have the drill go too far and come out the bottom or the top of the needle case.
A snug fit of the cap on the body is essential. Turning these from the same, or similar, pen blanks, should give you enough stability. Take your time fitting the cap to the body and you will have a great needle case. Everyone likes the popping sound it makes!
The decorations and tapering of the needle case have to be larger than the diameter of your drill bit. I could have drilled with a 1/2″ forstner bit but the resulting wall thickness was a bit thin for my liking. I didn’t change much but I used a 15/32” brad point bit instead. It just gave me a little bit extra room to work with.
For this project I used a pen blank. The blank was 1” x 1” and 5.25” long. After I had turned it round the diameter was about 7/8”. This would leave me with 3/8” of wood with a 1/2″ diameter hole. However the 3/8” goes around the hole so your actual thickness is only 3/16”. That’s why I went for a slightly smaller diameter drill bit.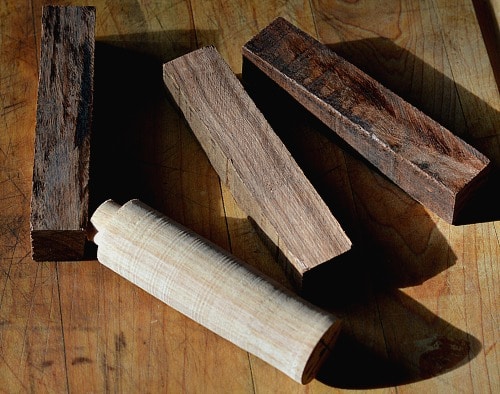
Here’s a bit more math. My blank was 5.25” but my finished needle case was 3.5”. 1 3/4″ was needed for waste wood for tenons and parting off the lathe and for the overlap of the cap on the body of the needle case. I could have been more conservative on parting off of the lathe. I would leave the tenons at 3/8” for a secure grip by the jaws of the chuck.
If you are making a needle case for felting needles, rather than sewing needles, then your length will be quite a bit longer. The felting needles also have a right angle bend at the top so you will need a larger diameter hole as well.
Turning Process for a Needle Case
1. Preparation of blank
Find the center of your blank by drawing a line between opposite corners on your pen blank. Use an awl to make a hole at the intersection. Put a drive spur and a live center on your lathe and load the blank.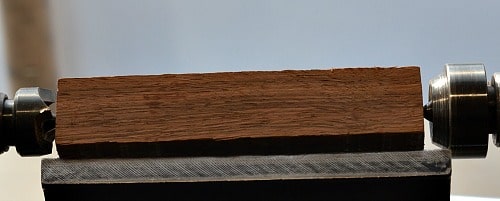
2. Turning blank round
Turn the blank round and then turn a tenon on each end about 3/8” deep.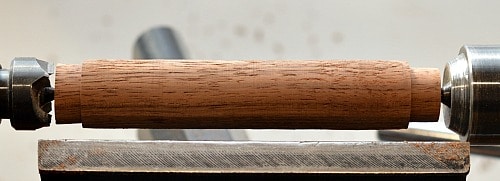
3. Remount in a multi-jawed chuck
Evaluate the pen blank and choose which end will be the cap. Mount that end in your multi-jawed chuck.
4. Marking and design choices
Mark the waste areas for parting off both the cap and the body of the needle case. Indicate how large the cap will be and mark off the width of your parting gauge. You may also want to measure and mark how deep you are going to drill in the cap and the body of the needle case.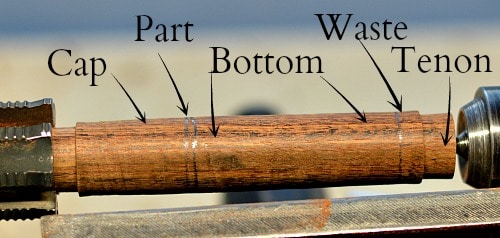
5. Shaping of the cap
Turn the shape of the cap and decorate it as you wish. I used a 1/16” parting tool to show where I was going to part off the cap. I uses a spindle gouge for all of my shaping on this project. As you are going to drill into the cap you do not want to go too far in shaping the top portion of the cap. You can finish the shaping of the cap later after you fit it onto the body of the needle case.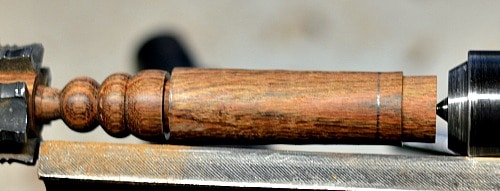
6. Part the Cap and the Body
Use the narrowest parting gauge you have and part between the cap and the body. Remember to catch the body in your free hand. (Hint, move the tail stock back away from the blank.) Use a spindle gouge or skew chisel to touch up the nib in the middle of the cap.
7. Drill into the Cap
Insert your drill bit into the collet chuck. Mount the collet chuck on the tail stock. Move the tail stock up to the cap. As you turn the handle on your tail stock (extending the quill) the drill bit will move into the cap. Make sure the lathe is on or this is not going to work.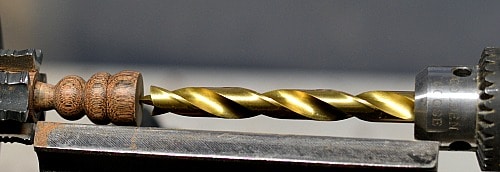
8. Inside joint on Cap
Take your time with this part of the project. You are going to turn away the inside of the cap so that it can slip on top of the body of the needle case. Position your tool rest so that the scraper will connect in the top left quadrant of the cap. My square scraper is 1/2″ wide so it just fit in the cap.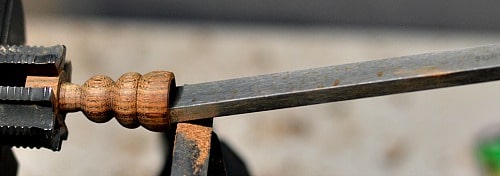
Carefully scrape away the wood on the inside of the cap. Roughly half of the thickness needs to be scraped away. The depth is 1/4″. So on the bottom we will turn a 1/4” tang to fit into the cap.
9. Drill bottom of needle case
Mount the bottom blank in your multi-jawed chuck. Repeat the process to drill out the bottom part of the case. Remember to back the drill bit out often to get rid of the sawdust. You can see tape on the drill bit that tells me how far to drill.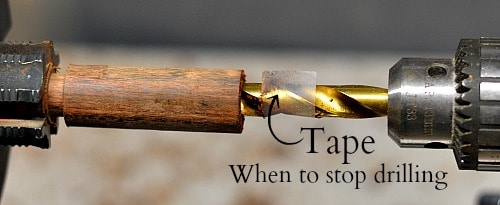
10. Fit the Cap to the Bottom
Measure 1/4″ on the bottom of the case. I used a parting tool to slowly narrow the wood so that I would have a good friction fit for the cap. Once you get the cap on then you can see to shape the body of the needle case. If the tang is too long I would use sand paper to wear away the wood slowly. Take your time as a snug fitting cap really makes a good needle case.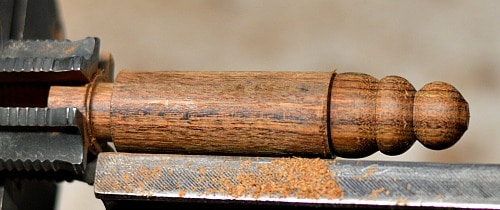
11. Shape the bottom of the needle case
I used a spindle gouge to shape the body of the case. I first shaped the joint between body and cap then I tapered the needle case. I checked the taper to make sure the walls were not getting too thin.
With the cap on the case do your final shaping and sanding of the project. I sanded from 220, 320, 400, 600, to 800 grit. Remember to wipe the needle case off with a soft cloth after each grit is completed. I then finished the needle case with a nice wood polish.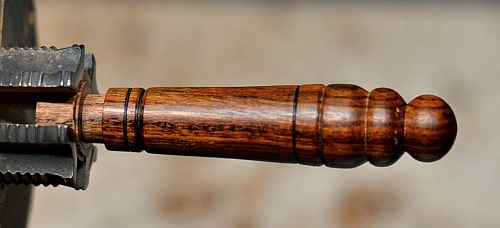
12. Final work to be done
Take the cap off of the project. Now part the body off of the lathe. I used my narrow parting tool (1/16”). Once off of the lathe sand the bottom in the same way that you finished the rest of the needle case.
Production options
To speed up the process I would turn several blanks round with the tenons at the same time. This allows you to only have to change between your drive spur and the multi-jawed chucks once.
Having the right diameter drill bit in your collet chuck, or several similar bits, will make the process easier. On my mini-lathe I can slide the tail stock off of the bed really easy. That way I don’t prick my arm or hand with the end of the drill bit as I am scraping the cap or other stuff. If you can’t remove your tail stock at least remove the collet chuck from your tail stock as you do the other turning steps.
You could turn two needle cases with contrasting bodies and caps. First turn the caps then turn the bodies to fit.
Marketing / Business implications
The turned needle cases are complementary to other fiber art tools like a ball winder or a sett gauge. If you were to use a darning needle with the Knitting Nancy then you could make a needle holder to match.
I would place a needle case in a lower price level. It should be higher than a sett gauge because there is more skill in the turning and more steps involved in the process. You could also have a price range based on the type of wood, exotic or domestic, and the amount of decoration that you added.
It is going to be the look and feel of the wood that sells your needle cases. Take the time to get a good fit on the cap and a super finish on the case.
I hope you had fun with this project. I would be happy to see what you have turned.
If you are not quite ready for a needle case I would suggest a Sett Gauge for a fibre related project. Looking for a straightforward turning project, how about turning wooden icicles for Christmas?
Each week I post a wood turning project and a post related to the business of turning for profit. Don’t miss a single post. Sign up for my email list and get a weekly newsletter with my recent posts.
If you are following me on Facebook, that’s great. I post a link to a turning project every day. On Pinterest I share great looking pictures about wood and turning in particular.


Robin, just a quick note to say thank you for all the good info and projects you post.
Thank you David. I am very glad that you like them. Please share with your other woodturning friends. Thanks.