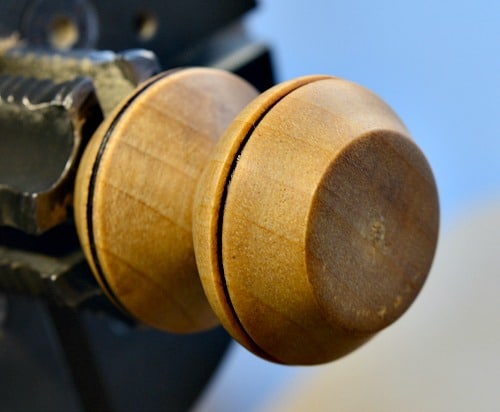
A wood turned bottle stopper is a great accent to a good bottle of wine. This gives you a chance to try different turning techniques like adding burn lines or a captive ring. This is a small project that does not require special wood or specialized turning tools. Be creative and make different shapes with different wood. Have fun with your turning and remember to open the wine after the lathe is off for the day!
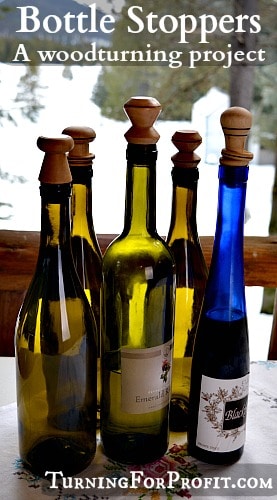
They are quick and easy to turn and can use up some of the smaller pieces of wood from your shop. This is a great time to try out new techniques since you are turning smaller pieces of wood if it doesn’t work you can start right over again.
Instructions for turning a bottle stopper.
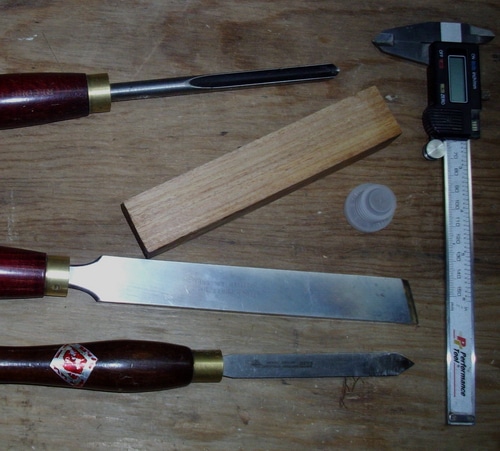
These are the tools and supplies for this project. The wood should be at least 1.25″ square to keep the stopper the same diameter as the neck of the bottle.
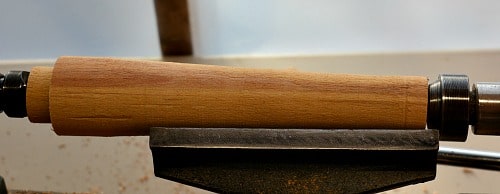
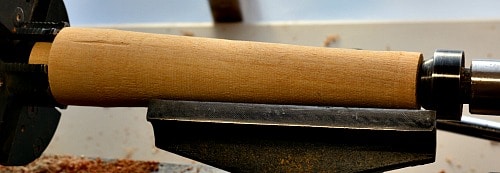
Step 1 – Turn your wood round
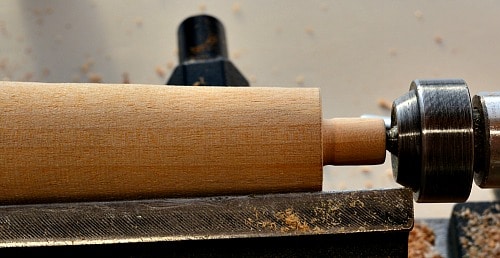
True the blank on the lathe. If you need help using your roughing gouge to turn a blank round you can check on this post: “How to use your Roughing Gouge“. There is also a small tenon at the head stock, turned with the parting tool, that will fit into a multi-jawed chuck.
To enable the wine to go into the fridge the stopper needs to be fairly short. The first bottle stopper that I bought was over 3″ in length. Any tall bottle of wine would not fit in the fridge with that stopper. So the ones that I turn are shorter. I also try to make the bottle stopper so that it can be gripped securely to uncork the bottle.
Step 2 – Secure the blank in a multi-jawed chuck
The turning blank is now held securely with the multi-jawed chuck. Use the tail stock if you need extra support at any time.
However, this will allow us to turn a tenon on the tail stock side to make sure our plastic insert fits.
Step 3 – Turn the tenon for the plastic insert
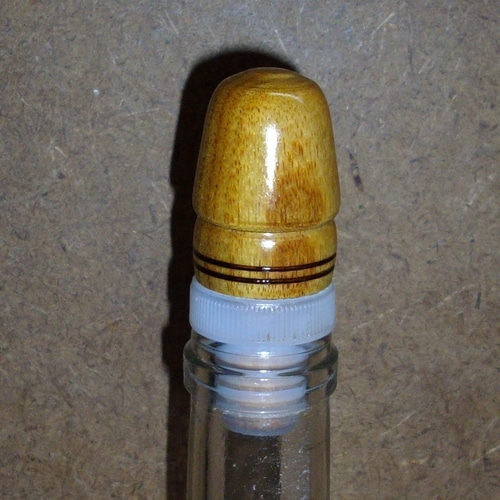
The plastic insert that I am using was bought at the local grocery store in their winemaking section. These plastic stoppers for wine bottles come in a package of 20 and are quite inexpensive. You can also order plastic bottle stoppers from Amazon. Use a sharp carving knife to cut the insert as shown.
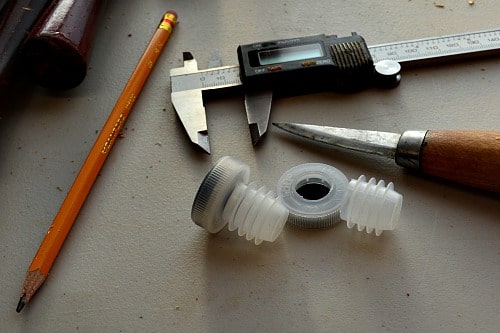
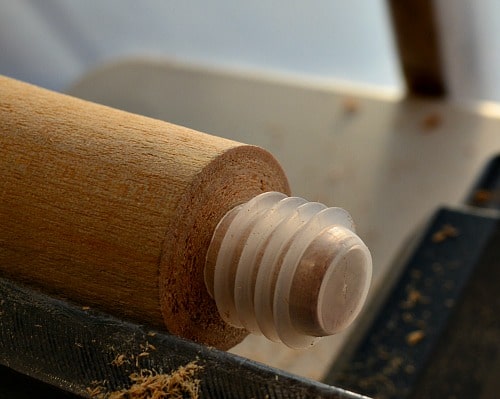
The calipers are handy to measure the length and diameter of the tenon needed. The plastic is soft and flexible so you can stretch the insert to go on a good-sized tenon. I have also used a 9/16th wrench to judge the size of the tenon, it was easier than using the calipers.
A parting tool was used to create the tenon. The leading edge of the tenon is rounded over to make it easier to slide the wood into the plastic insert.
Now you can remove the tail stock and do a test fit of the insert on the tenon.
Step 4 – Shape and decorate the body of the bottle stopper
I often take a pencil and mark out the rough sections of the project I am turning. Even if these marks are removed in the turning process it gives me a perspective on the spacing and design of the project. The double lines on the left indicate where I will part the bottle stopper from the lathe.
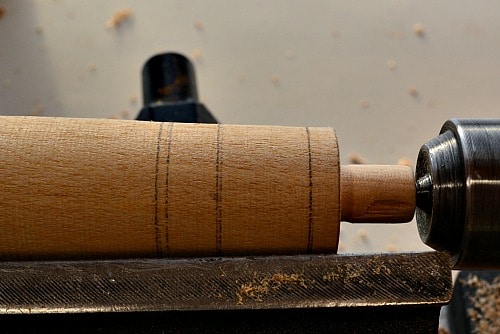
Use either a spindle gouge, or skew chisel, or both, to shape the body of the stopper. I like shaping my stoppers so that they are easy to get a good grip on and pull the cork out of the bottle.
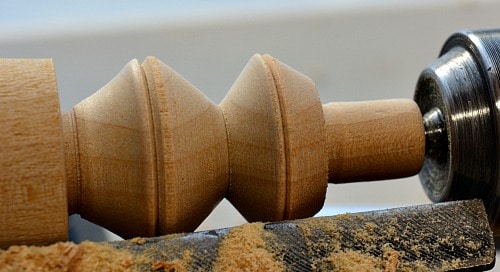
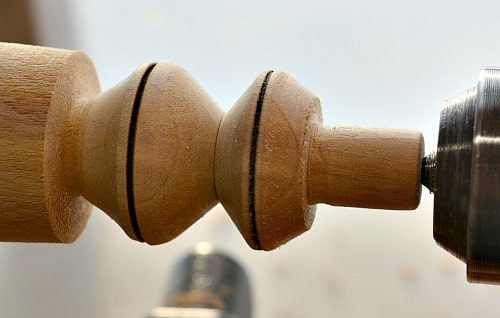
I used the skew chisel to indicate where two burn lines would be placed. Burn lines are a great way to decorate small turnings. I show the steps in this post “Woodturning – Add a burn line“.
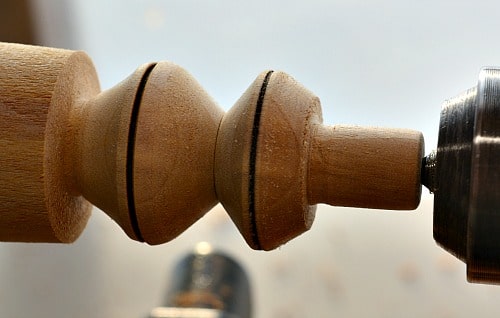
Now is the time to sand and finish your bottle stopper. I leave the tenon for the plastic insert a bit rough so that it grips the insert. For the body of the stopper, I sand using my normal sanding procedure. I sand through the sanding grits from 220 to 800 in steps. Then I apply the wood polish to the stopper.
Step 5 Part the Bottle Stopper off the lathe and rechuck to finish the top
Part the stopper off of the lathe and wrap the tenon in a folded paper towel. This will allow you to grab the bottle stopper with your multi-jawed chuck.
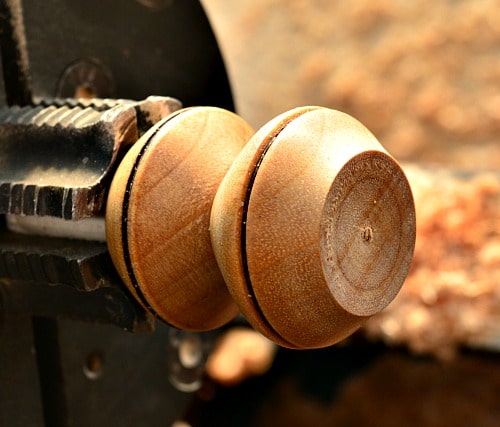
With your spindle gouge or a small bowl gouge, you can finish the top of your stopper. Don’t forget to sand and finish the same way as the body.
This process had you flip the bottle stopper to finish the top. You can turn the stopper with the top portion towards the tail stock like it is in this image. In this case, you will have to turn the tenon for the plastic insert towards the headstock. You can get the length with your calipers and if you have done one bottle stopper the other way then you know what size to turn the tenon. This will cut down on the production time if you don’t have to fiddle with your chuck as much.
Design Options for a Bottle Stopper
The shape of the bottle stopper is completely up to you. You can be creative with the shape, finishes, and type of wood that you use. I have seen a lot of tall bottle stoppers for sale and they look great on a bottle on a table. Getting them in the fridge is a different story. This is an old bottle stopper that I turned. I should have cut more of the plastic off, but more important was that the shape made it difficult to pull the stopper out of the bottle.
There are also many different ways of stopping the wine bottle. For example, Lee Valley Tools has three types of hardware for making stoppers. A cork and a screw cost $ 1.90 while a steel cone and O-ring is $ 9.90. The last option is a collar and a cork for $ 10.80. If you want them out of stainless steel then the prices are higher. The challenge in selling your wine stoppers is that you need to recover the cost of the materials including the wood that you use and get paid for your time in turning the stopper. I have more about that in, The Nuts and Bolts of Pricing Your Work.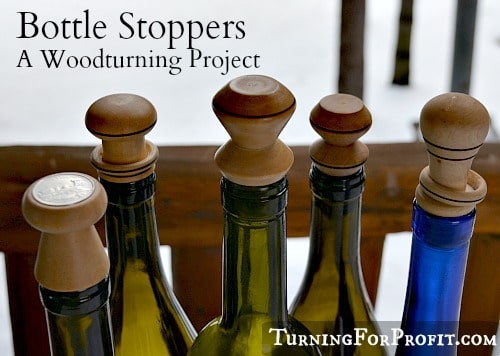
It also makes a lower priced item for selling at Christmas Craft fairs or wine tastings. Other products that would work at a Christmas Craft Fair would be wooden icicles or honey dippers.
Turning For Profit
If you have any questions about turning bottle stoppers, turning in general, or the business of turning, please leave me a comment at the bottom of the page.
These posts are for you, the woodturner. If you like turning projects or articles related to the business of turning then please sign up for the Turning For Profit newsletter. Generally, it comes out once a week and has links to the current articles, a bit on what I am up to, and usually a question for your response. You can sign up on the right sidebar or just a little lower on the page.
I love woodturning and sharing with you. You can follow me on Facebook as well. Thank you for joining me on this woodturning journey. Have fun and remember to turn safely


Robin,
I have another way. Drill a hole into the blank large enough to pass the neck of the wine bottle, then round the blank and shape the top. The hole should be deep enough to completely hide a wine cork. Chuck a Philips screw driver (#2 size) in the head stock. Turn the lathe all the way down. Wear leather gloves. Grip the cork loosely in the gloved hand and thread it onto a stainless steel screw positioned on the tip of the screwdriver. Screw is long enough to pass thru the cork plus some extra. take every thing off the lathe, then drive the screw plus cork into a waste block. turn (taper) the cork small end toward the head of the screw. Remove from the waste block and insert into the Wine stopper blank, tighten by hand. When done properly the old cork replaces the plastic part you are buying AND the wine stopper requires no stand. It stands upright on its own.
Thank you for your newsletter–so much great info. I won’t know much about wine bottles: Do all wine bottles require the same size stoppers?
Thanks for the comment and the question. A quick google search indicated that most wine bottles have the same sized openings. Apparently there are a couple of odd sized specialty European wines that are different but that is about it. So once you find a stopper that fits, you should be good to go.
This is good article and a good plan. However, you don’t say how you keep the plastic part on the tenon. Is it glued? There’s no way that if it’s snug in the bottle and you pull it out, the likelihood of the plastic staying in the bottle is huge. How are you keeping the plastic on the tenon?
I had the same question.
Hi Chris and Tony. The plastic part is a smooth tube and the wooden tenon completely touches plastic for the full length. This will have a lot of friction. The ribs of the plastic part (4 in the image above) are flexible and will bend. So when you pull the cork out the ribs bend and actually increase the friction on the dowel. I’ve not had a tight fitting (plastic on wood) bottle stopper ever slip off and stay in the bottle. If that does happen a pair of needle nosed pliers will get it out quickly.
Hello, I am looking for a book on the wine stoppers, where can I buy it? Thank you
I would look at turning books at your favorite on-line store!