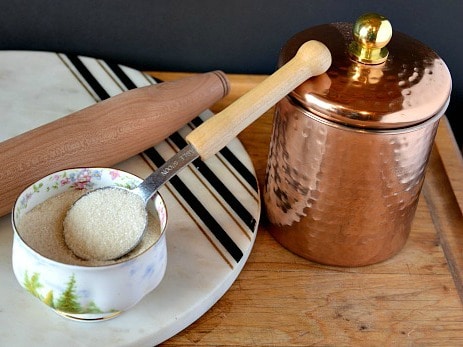
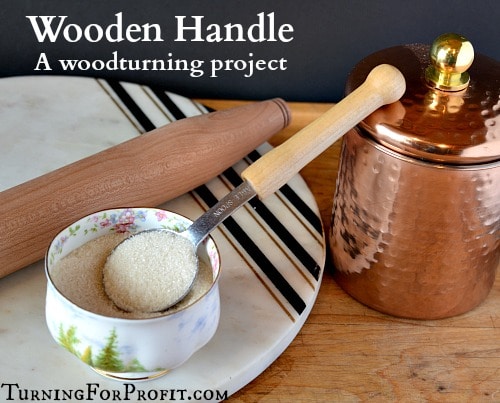
My wife is great in the kitchen. I love to turn projects that she then uses to create culinary delights that I get to eat. One day she asked if I could make a wooden handle for her tablespoon measure. The metal spoon had lasted longer than the plastic handle. I think it suffered contact with a stovetop burner at some point. Anyway, a new wooden handle was the order of the day.
As I went to my shop with a spoon in my hand and little else to go by I was thinking how do I go about making a handle. It needs to fit my wife’s hand (not too large), the spoon has to be securely attached (large enough the wood does not split) and I want it to look and feel good as well.
Design Considerations
When doing any woodturning project I either draw out the plans (bird feeder) or I mark sections off on the turning blank once it is round (weed pot). With simple projects, I want to get a sense of where each part of the turning is on the turning blank. In this case, since I want the spoon to be well attached, I drew out a simple diagram of the spoon.
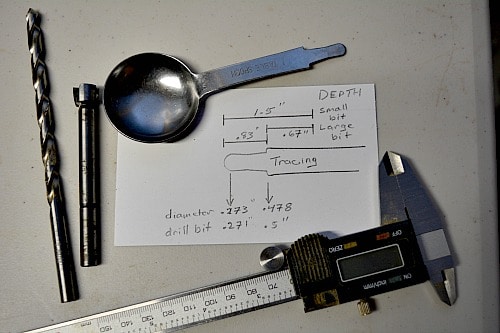
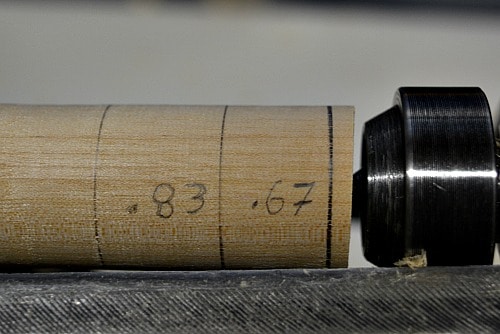
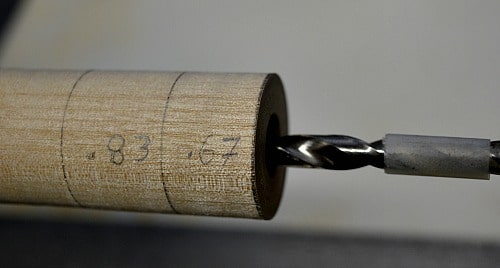
Drilling out the hole for the spoon required specific measurements from the spoon. The wide part was 1/2″ wide and the narrow tang was .273” (digital calipers). I wanted 1 1/2″ for the length of the total depth of the spoon into the handle. So the larger drill would go in for .67” and the smaller drill would then drill another .83” in for a total of 1 1/2″. I got confused a couple of times so the diagram was very helpful.
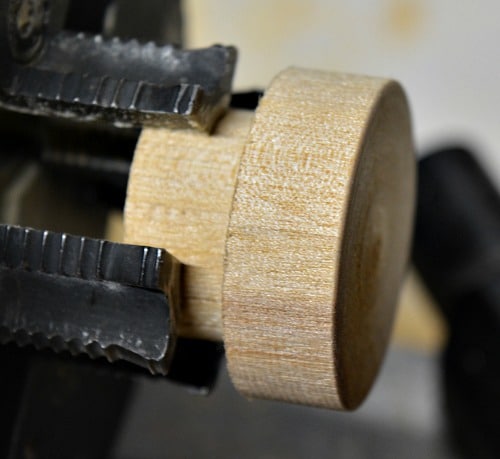
Because there are holes to be drilled I used a 4 jaw chuck to hold the turning blank. You could use an alternative method of holding the wood if you wanted to.
Turning the Wooden Handle
Mount the wood on your lathe and in your multi-jawed chuck. This is a small turning blank but you can bring the tailstock up if you want to.
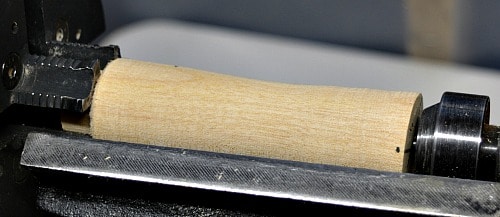
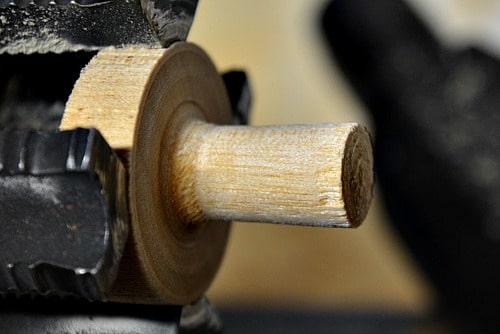
Part some of the wood away from the jaws of the chuck. This will let you shape the handle of the spoon and then part it off of the lathe.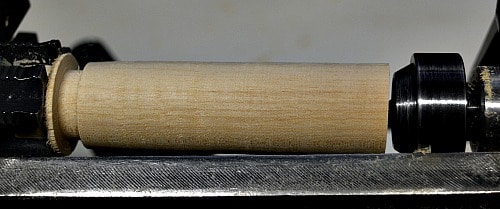
To help me drill the right depth of the holes I marked the drilling distances on the turned blank. The large drill bit is going into .67” then the smaller drill is going into the wood for .83” more for a total of 1 1/2″. Use a parting tool to give you a flat surface at the bottom of the handle.
Drilling the holes for the spoon
To drill the holes into the turning blank first turn off your lathe. Remove the live center from your tail stock and insert a collet chuck that will hold the drill bits. Use the 1/2″ drill bit first. Measure and place a piece of tape so that you know when to stop drilling. Since the drill bit is stationary, it is the wood that will be spinning, you don’t need a fancy attachment. Any piece of sticky tape will work.
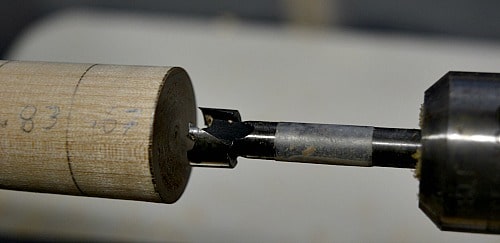
Retract your quill into your tail stock. Bring the drill bit up to the wood. Tighten the tail stock. Turn on your lathe. Slowly advance the drill bit into the wood. Retract the drill bit if the wood chips are not coming out and then clean the drill bit. Keep drilling until you reach the tape mark on your drill bit.
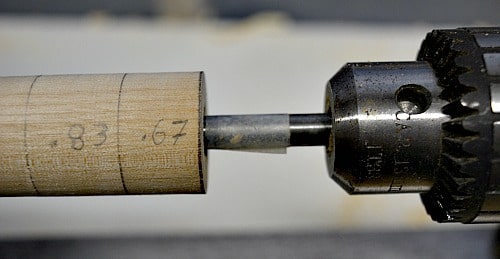
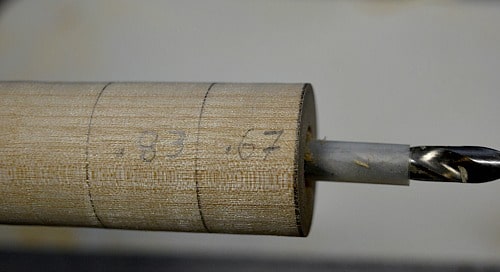
Repeat this process with the smaller drill bit. In this case, the drill bit is going 1 1/2″ into the handle. Part has been removed by the larger drill bit.
It will drill into the wood for .83” and a total of 1 1/2″ from the bottom of the handle.
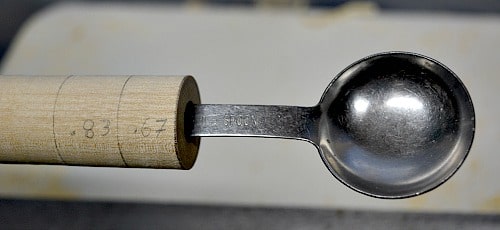
At this point, you can test fit the spoon into the handle and make sure it fits properly. We will need to turn a couple of wedges to support the spoon in the handle. Let’s finish the handle first.
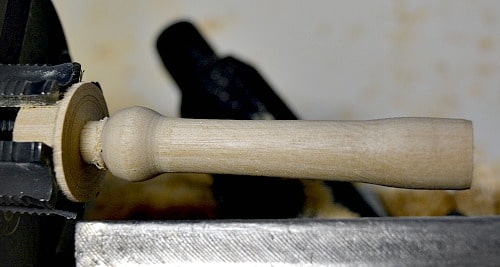
Shaping the Wooden Handle
Shape the handle to fit the hand of the user (smaller or larger). I added a knob on the end to help hold the handle in your hand when you are measuring ingredients.
Once the final shape is achieved, sand and finish the handle on the lathe. Remember to move progressively through the different grits of sandpaper. Here is how I do most of my sanding. On this project, I had a good surface from the tools and I started with 220 grit sandpaper. Wipe the wooden handle down with a soft cloth or paper towel between each size of grit.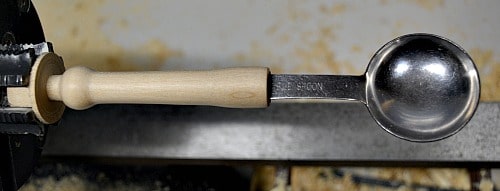
Part the handle off of the lathe. Now you have to sand and finish the end of the handle just like you did the body.
Making the wedges
To make the wedges to help hold the handle in place I mounted a scrap piece of wood onto my lathe. Holding the wood in the multi-jawed chuck allowed me to test the fit of the handle over the dowel that I was turning.
Turn down the wood until it fits into the handle.
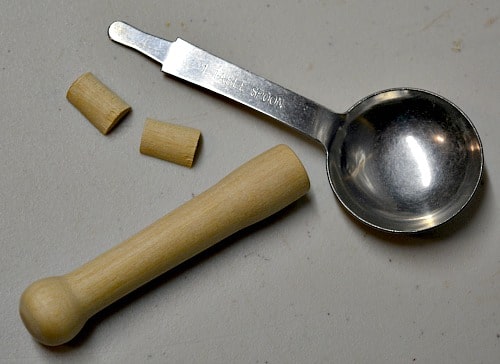
Mark the length needed with a pencil and part slightly undersized with your parting tool. When you have parted the small dowel from the lathe then use a small knife to cut the dowel in half. Take some 150 grit sandpaper and sand the flat part of the dowel. Then assemble all the pieces needed to make the spoon.
If the wedges don’t fit in do some more sanding. It won’t take much to allow the wedges and spoon to fit into the wooden handle. This is a test fit to make sure everything fits together.

Now you glue the wedges into the handle using wood glue. This will give you a slot for the spoon to fit in. Once the glue has dried on the wooden wedges then apply epoxy to the spoon and fit the two together. This will give you a nice tight bond between spoon and handle.
Turning For Profit
If you have any questions about turning or the business of turning, please leave me a comment at the bottom of the page.
These posts are for you, the woodturner. If you like turning projects or articles related to the business of turning then please sign up for the Turning For Profit newsletter. Generally, it comes out once a week and has links to the current articles, a bit on what I am up to, and usually a question for your response. You can sign up on the right sidebar or just a little lower on the page.
I love woodturning and sharing with you. You can follow me on Facebook as well. Thank you for joining me on this woodturning journey. Have fun and remember to turn safely.


nice site and I appreciate the picture and instructions. Am currently not able to do any thing because of time commitments and having to relocate and buy a home but think I will be able to get started by November of this year.
I have seen examples on YouTube, where people cut the wooden stock in half lengthwise and used a router table with a stop block and the router bit protruding half the thickness of the metal object. Then regluing the two wooden halves, with care to avoid glue in the slot. Then mounting it on the lathe and turning the handle, with a flat slot for the metal tool.
Hello,
Would you be able to make a wooden handle for a dearly loved slotted spoon I have from my mother?
Or do you know anyone who might make one for me?
Thanks so much,
Jane K.
Hi Jane,
Turning a custom item would be better in person. Then all of the special details can be discussed and a final project determined.
I would look for a turner where you live. A good place to start would be stores selling wood turning tools. In Canada I can suggest Lee Valley Tools if you are close to one of them. They would offer workshops that would give you opportunities to meet with local wood turners. Just show up during the workshop and chat with the turners when it is appropriate. You might have a woodturning guild or wood working group in your area as well. You could also do an ISO (in search of) for a woodturner in your local Facebook buy and sell group.
Hope some of these ideas will help you.
Robin