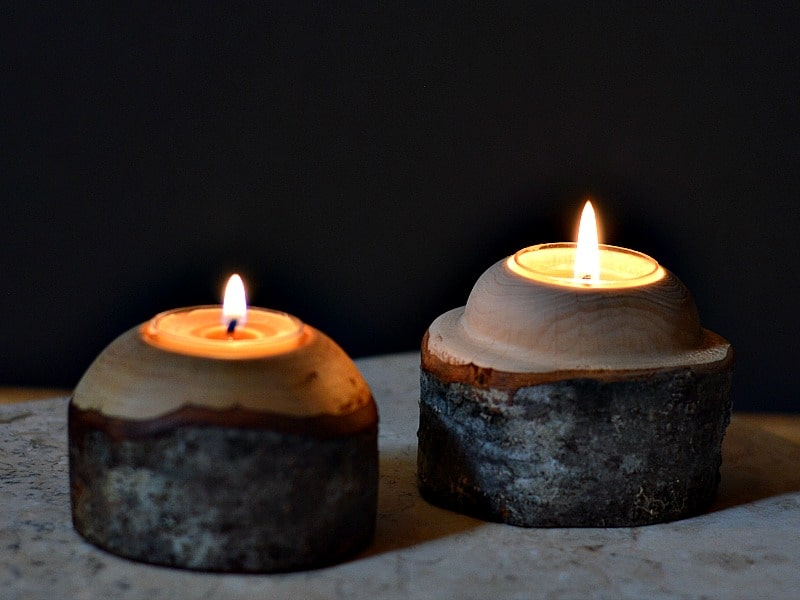
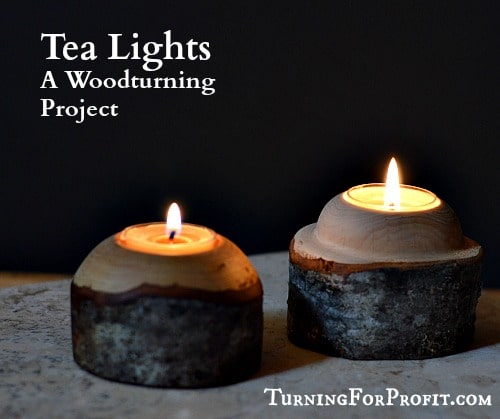
Tea lights are small candles that need small but stable holders. Make several of these to have around the house. These candle holders are great to create ambiance or to use during a power outage. You can use all kinds of wood from scrap to exotics and let your turning creativity show.
Tea Lights – Design Considerations
Practical concerns suggest that you want a good stable base for the candle holder. A tea light doesn’t weigh very much and your candle holder does not need to be weighted down. As long as the base is larger than the diameter of the candle, and not too tall, you should have no trouble with your candles falling over. For a different style check out my second Tea Light Project.
The candle holders in this project are wider than they are tall. This will make them stable. The hole for the candle is a little bit shorter than the candle itself. This reduces the chance of the wood being affected by the candle.
Tea Lights – Wood Selection
As the size of a tea light is fairly small you can turn a candle holder out of lots of different shapes and sizes. I collected a few blanks that I thought would work.
For this project I selected the alder branch in the middle. The goal is to turn a pleasing shape and to leave a good portion of the bark intact on the candle holder.
Tea Lights – Turning the Candle Holder
Mount the blank between centers using your drive spur and a live center in your tail stock. As this is a branch and not a perfectly round blank you can expect some vibration to happen on your lathe. Centering the wood will reduce the vibration. It also depends on the nature and shape of your specific branch. Turn a tenon to fit your multi-jawed chuck on one end of the blank.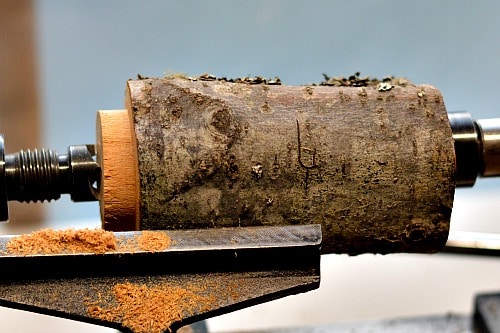
Mount the blank into your multi-jawed chuck. This lets you work on the candle holder without tail stock support. This branch is long enough to give me two candle holders. I used a parting tool to indicate the partition between the two parts.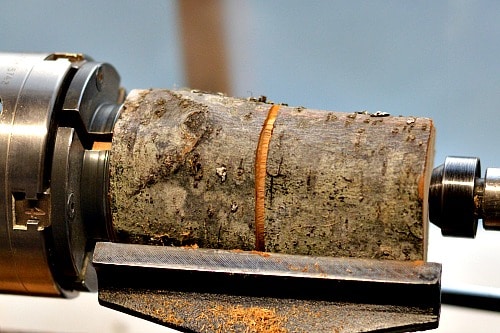
Shape the top portion of the candle holder. I used a skew chisel to get a clean cut on the bark, and a spindle gouge to do the rest of the shaping. You can see the unevenness of the natural bark. This is part of the appeal of these candle holders. 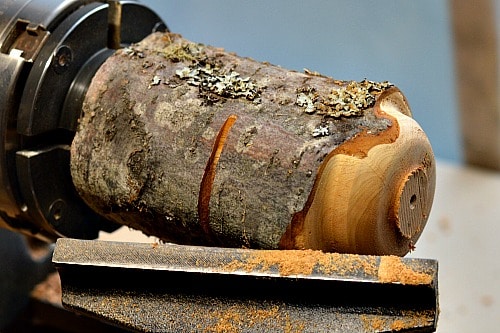
Using my spindle gouge and a 1/2″ square scraper I hollowed out a space for the tea light.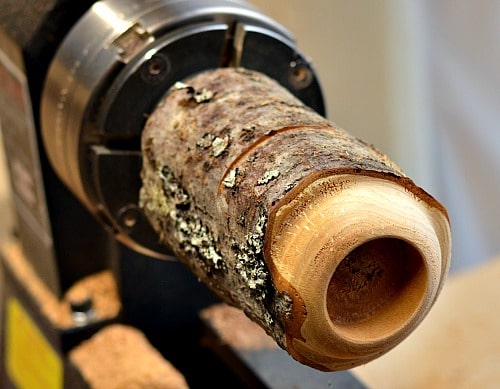
You could hollow out the hole enough for the tea light to be flush with the wood. Given that it is a very small candle that you are burning you probably are safe doing so. I wanted the tea light to be just proud of the hollowing so that you could use pliers if for some reason the tea light got stuck.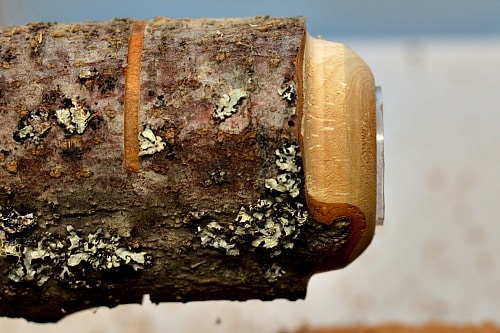
Sand and finish the top of the candle holder. I used my normal sanding technique. Any finish that you are comfortable with could be used here. It is not used for food so food safe is not a requirement.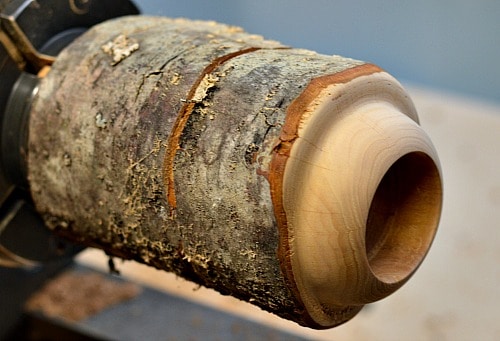
Once the top is sanded and finished then part the candle holder off of the lathe.
The same procedure is followed with the second candle holder.
Smooth off the face of the candle.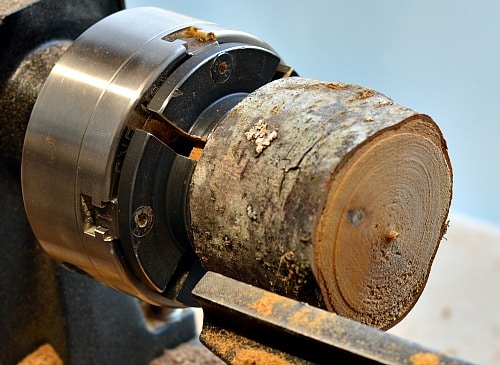
This part of the branch had a bump on the side. I tried to shape only the top but since I wanted more of a dome appearance on this one it wasn’t working out. The bump is on the bottom part of the branch in this image.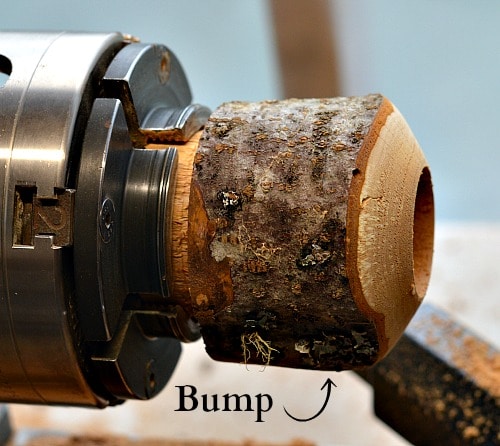
So I turned away the bump revealing the wood along one side of the candle. This allowed me to get the shape I wanted on the top of the candle holder. I also hollowed out the hole for the candle. The wood at the base of the candle holder tore so that was shaped with a small carving chisel and sanded smooth for the final piece.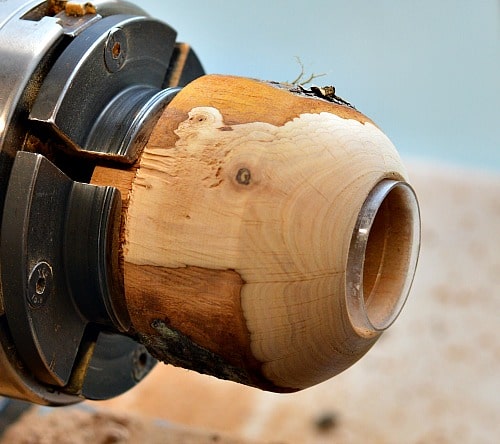
I didn’t want to use my hand to sand the side of the tea light holder. My fingers would bounce in and out, it could hurt my fingers, and cause me to sand more of the bark than I wanted to. So I grabbed a round turning blank (it will be a honey dipper eventually) and wrapped the sandpaper around it. This will give the sandpaper a firm base to support it.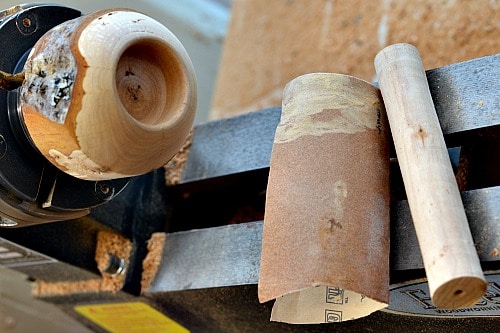
I followed my usual sanding process and moved through the different grit sizes from 150 to 800 grit. On this candle holder I use a citrus wood wax.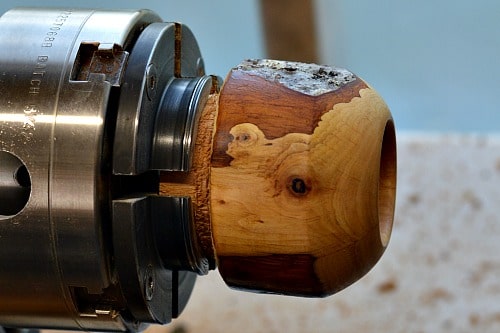
Tea Lights – Production
For this project I was able to get two tea lights out of one branch. If I had made them smaller I could have turned 3. This saves a lot of time chucking the wood once and getting 2 or 3 products out of it. However you don’t want to extend the blank too far out of your chuck because the torque of your tools would be a lot higher. A catch on the end of a 12” blank could cause the blank to fly out of your jaws very easily. Use the tail stock as support when starting with longer blanks.
Each candle holder can be shaped differently depending on the characteristics of the wood you are using. This is a simple project and easy to turn out several in an hour. You could also use a 1 and 1/2” forstner bit to drill out the tea light hole. Just mount the forstner bit in a collet chuck, insert into your tail stock then extend the quill to drill your hole. The force of the drilling would be centered and less likely to knock your wood off center.
Tea Lights – Marketing
These are simple candle holders. I would sell them with a tea light. If you are turning a few different types of candle holders then a selection of tea light holders in a lower price range can fill out your product offerings. If you are selling in a recreational area then these would be great for use in cabins or campers. Make sure you are charging a high enough price especially if you are using found or free wood. It is a challenge to determine the right price for your products but you do want the price to reflect your time and skill as a woodturner.
You can find paraffin tea lights at dollar stores and craft stores. If you don’t like burning paraffin you could make your own tea lights out of beeswax. These will be a bit more expensive to make but might be great sellers at a local farmers market especially if you are using local beeswax in the candles.
I hope you like the tea lights project. Other projects that would be suitable for beginning turners would include a rolling pin, a honey dipper, and a garden dibbler. You can also try the second Tea Light Project which makes a tea light holder from an upside down bowl. You can click on the projects tab above for recent projects, or click on build your inventory for a listing of all the projects on the site.
Please sign up for my newsletter. (Its at the top of the right side bar.) This will allow me to keep you up to date on my latest project or business post. When I can I will also let you know of woodturning sales and events. Remember to turn safely.


I’m a beginner… How do I remove the tenon on anything…tea lights, bottle stoppers, etc.?
Hi Gary,
If you are turning between centers then get the ends down to as small as you can. Then use a sharp knife or carving gouge to remove the wood and hand sand to finish. With a tea light you can turn a spigot out of a scrap piece of wood that will fit the hole that the tea light goes into. Use the tail stock as support to remove most of the wood. Move the tail stock away and either use light cuts to finish or complete by hand off of the lathe. I hope these ideas help you out.
I used to repair antique furniture but became interested in woodturning. At this time I only have a leith with a 12″ bed, so most of my work is small items, and I enjoy it and at 82 it keeps me busy. But over the last few years I have never sold one item, just gave away as gifts, so would like to enhanse my pension, trouble is, I have no idea as to what to charge for any of my items. A little guidance would be a big help.Regards, Slim.
Thanks for your comment. Pricing your work is a real challenge. While I can’t tell you what to charge for your projects my suggestion is that you figure out a price that works for you and then increase it by 25%. Why? Because it is always easier to lower your prices than increase them. Here are some more ideas on pricing. https://www.turningforprofit.com/the-nuts-and-bolts-of-pricing-your-work/
I hope this helps.