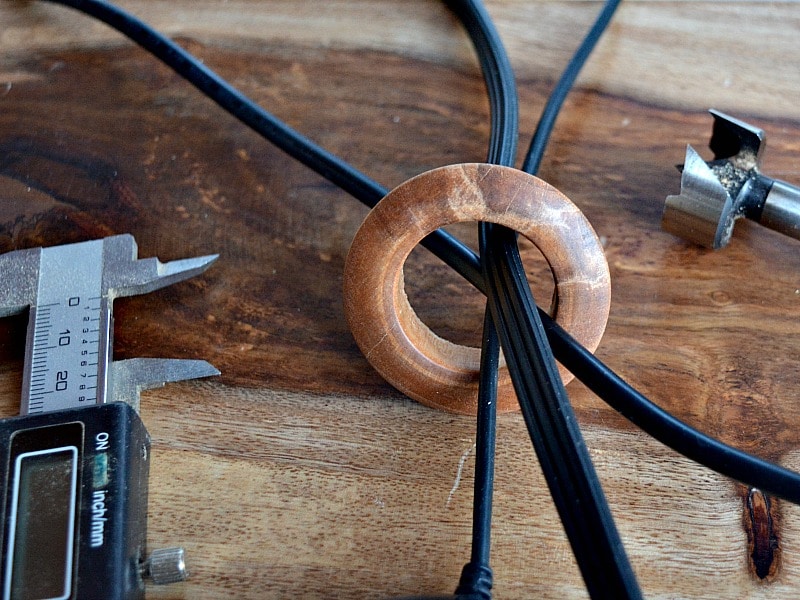
Here’s a way to add a touch of class to your home office. Turn a wooden grommet for those computer cords that are always getting in the way. Some of my computer desks used to look like I was growing tentacles. There are so many cords going everywhere. Drilling a hole in the desk gives you more direct access but the hole doesn’t look good. Well, a wooden grommet is an answer.
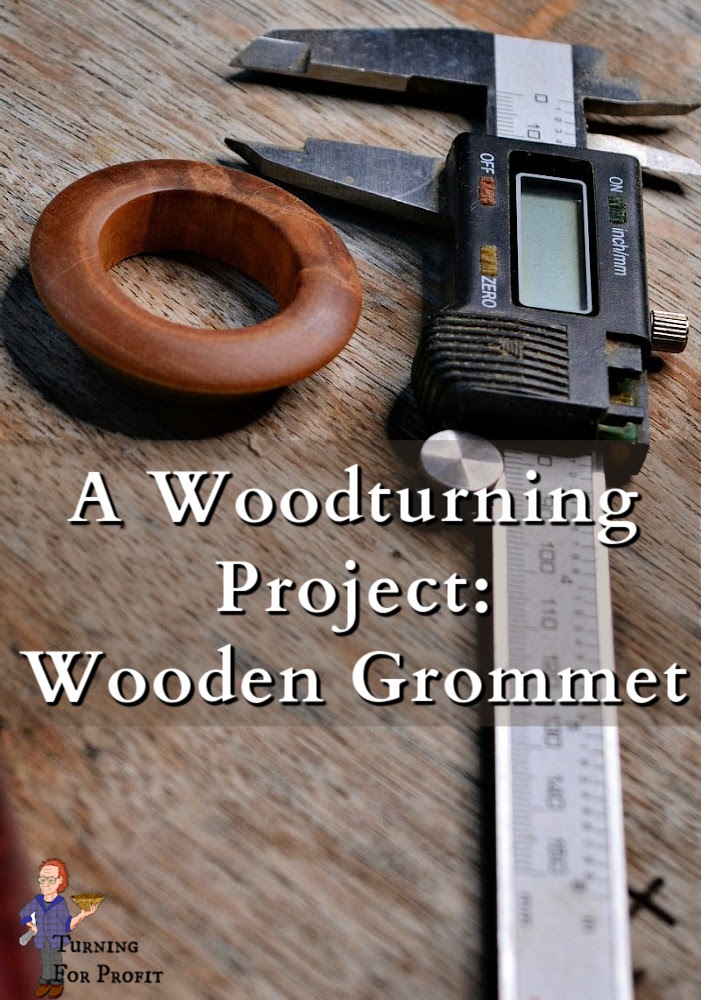
You determine the size of the hole and how much of the grommet will show. There is some measuring involved but really this is an easy face plate project.
What is a grommet?

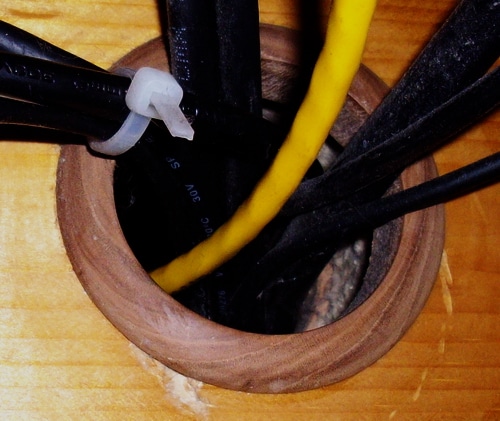
It is a circle with a flange that fits into a hole in the wall so that you can route those cords easily from the back of your computer to the top of your desk. The face of the grommet is what you see in the image and it lies on the surface of your desk. Plastic grommets are available but they are big and black and look cheap.
Wooden grommets can be made from smaller pieces of wood in your shop and designed to fit the number of cords you have and the size of the hole you have made. A grommet has both an inside diameter and an outside diameter. The flange fits into the hole you have put in the wall or desk and this is the outside diameter. The plugs on the cords have to fit through the grommet and this is your inside diameter. If you want a thickness of 1/8” on the flange then the difference between inside and outside diameters will be 1/4″.
This project could be done between centers if needed. A multiple jaw chuck will make the job easier as you can see in the images. A nice hardwood such as birch would give you a very good face surface and take a nice finish as well. Softwoods would not look as good since you are cutting the end grain for the exposed portion of the grommet. End grain is difficult to sand smooth on softwood.
For another project that gives you step by step images on turning rings, check out my project on shawl pins.
Production Steps
First, turn the wood round between centers. How to use a spindle roughing gouge will give you some tips on turning your wood round. If the size of your hole is 2” then turn the blank to 2 ¼” to 2 ½”, the size of your desired face.
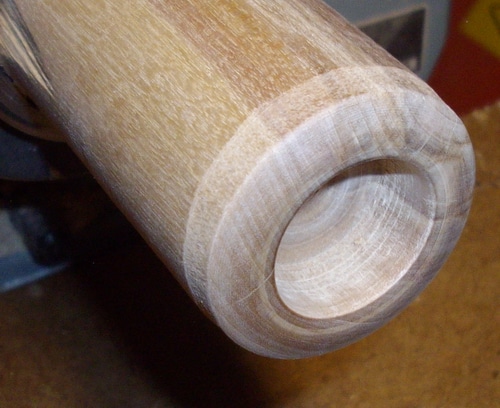
Second, using a spindle gouge, take light cuts to hollow out the center of the grommet. This only needs to be as deep as the flange will go. If you have put a hole in the back of your desk then measure the thickness of the hole and divide it in half. Make the flange on two grommets that length then the flanges will meet in the center.
If you are very gentle you could use a square scraper to ensure that your flange wall is perpendicular to the face of your grommet.
Other Turning Techniques
In order to use your grommet, you do need to drill a hole in your desk (unless one is already there!). I would recommend that you use a Forstner bit in your electric drill. In order to do the inside of the grommet, you could also use a Forstner bit that is 1/4″ smaller in diameter than the one you will use to drill the hole in the desk. Mount the Forstner bit in a collet chuck. Place the collet chuck in your tail stock and advance the quill of the tail stock into the wood with the lathe turned on. To see this in action you can check out how to turn a Mushroom Box and how to turn a needle case.
Use a skew chisel or spindle gouge to shape the outside portion or face of your grommet. At this point sand the inside of the grommet and the outside portion as well. How to sand your turnings explains my usual sanding procedure.

Third, use a parting tool to remove wood down to the outside diameter of your grommet. You should have a thin flange now of about 1/8” thickness. This is where you determine the thickness of the front of your grommet. The back of the grommet and the flange should be left rough for good glue adhesion.
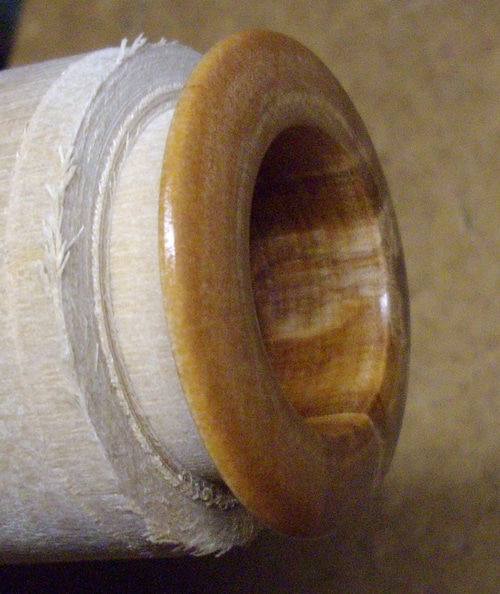
Fourth, apply the finish to the inside of the grommet and the outside portion or face, as well. I used a “fruitwood,” Watco Danish Oil stain.
Finally, use your parting tool to part off your grommet, taking care to catch the grommet as it comes loose from the blank. Take some sandpaper, 220 grit, and sand down the back portion of the grommet where you made the parting cut.
Grommet Installation
Now you are ready to glue the grommet into the hole that you’ve made and thread the cords through. If you need a matching grommet just continue to work your way down the blank using the same steps as before. I found it easier to do one grommet at a time rather than trying to hollow out a long tube all at once.
This adds a touch of class to your office and looks much better than plastic!

Back to you:
What have you made for your office? Anything with turning? Leave a comment.
If you like these woodturning projects please sign up for my weekly email newsletter. I’ll tell you about recent projects, business articles, and any special deals that I come across. You can sign up to the right near the top of the page or through the email, bonus pop-up box. Thanks for reading to the bottom of the post!


I’m looking to purchase large Wooden grommets – not for office use – but for a repair project I am working on. Do you sell them?
I see you left a large hole in the center of the grommet which is good if you have lots of cords. Another idea would be to turn one with a smaller hole in the center but then cut a small notch from the hole to the edge and not glue the grommet in. That way if you have a small number of cords, you could pull the grommet out, feed the cords through the hole, then drop the grommet back into the hole.