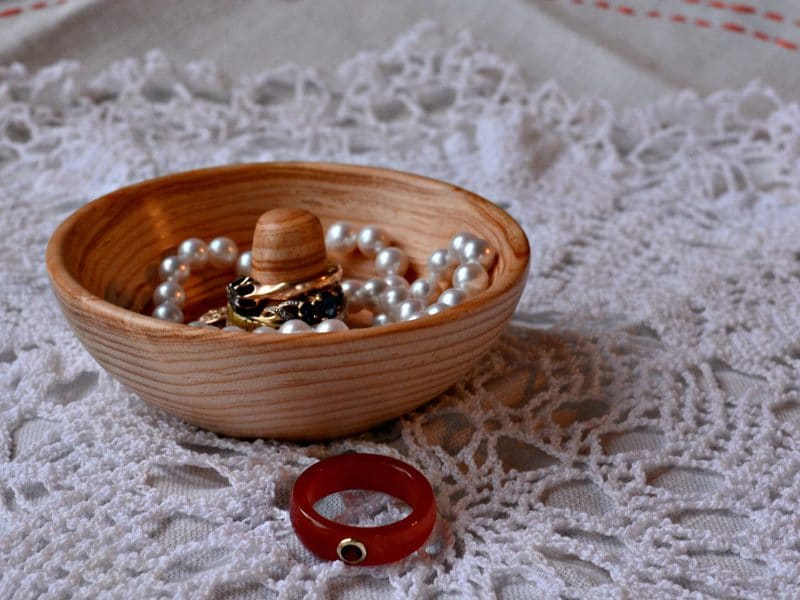
A wooden ring holder is a variation on turning a small bowl. It is designed to be used on a bedside table or the top of a dresser. Everyday jewelry can be dropped into the bowl, with the rings on the holder, and necklaces in the bowl. Everything is kept safe from falling on the floor or snagging clothing.
The style and shape are completely up to you. This one is a bowl with a ring holder in the middle. If you search for ring holder on Google or Pinterest you will see lots of different shapes and sizes. The bowl is 3 5/8” in diameter and 1 3/16” in depth. The ring holder is a little taller.
Design Considerations
Just about any wood will do for this project. I used an old piece of cedar that was in the shop. The orientation of the wood grain will have an impact on your project. With this block of wood I oriented the grain at right angles to the lathe. While I have nice rings on the bowl the ring holder portion was too narrow and the longer point that I wanted kept breaking off. To make a tall and thin ring holder then the grain should run parallel to the lathe.
If you have a block of wood that will make a good bowl but is not tall enough for the ring holder you want, then you can turn a finial out of another wood and join the two together. In this case you can have one grain orientation for the bowl and another for your finial.
Turning a Ring Holder
1. Mount your turning blank between centers on your lathe. Depending on the grain orientation to the lathe, you can use your spindle roughing gouge (grain is parallel) or your bowl turning gouge (grain is at right angles).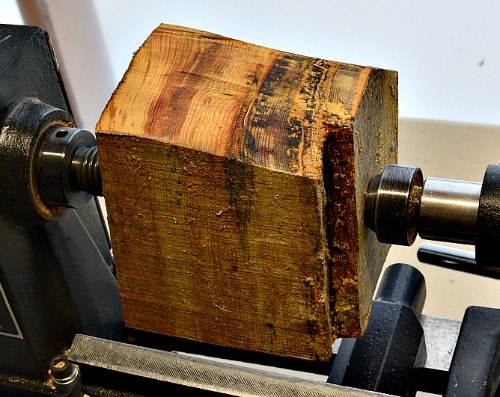
2. Turn your blank round and shape a tenon on the blank that will be the bottom of your bowl. The tenon is so the blank can be mounted in a multi-jawed chuck. This will make it easier to hollow the bowl and to shape the ring holder as well.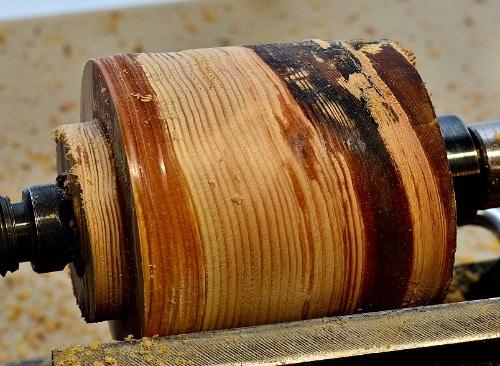
3. On most projects I mark out the different sections so that I get an idea of the shape that I want to turn. In this case we have two waste sections at the top and bottom with the bowl and ring holder in the middle.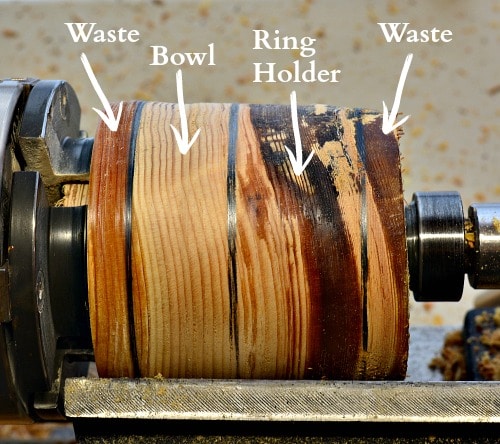
4. Mount the blank by the tenon onto the lathe. Then shape the bowl portion of the ring holder. You don’t want the ring holder to wobble so make sure that the base is a good size.
5. The next step is to turn away the wood from the top of the ring holder so you can have a slender post for the rings to slip onto. In my case the cedar was quite weak with the horizontal grain pattern and broke twice resulting in a much smaller ring post.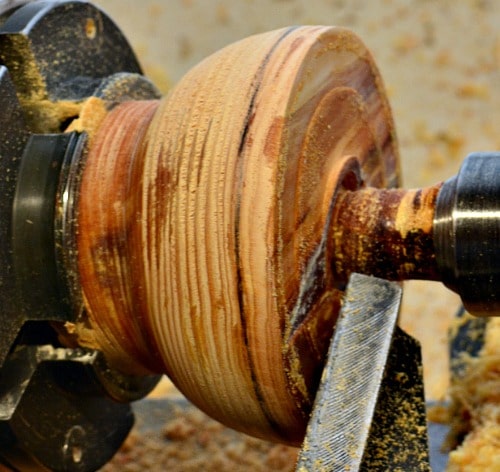
6. Once you have the post roughed out then you can hollow out the basin of the bowl. Take your gouge down the post to the bottom of the bowl and from the outside of the bowl down into the bottom as well. You might have to use a round scraper to finish the joint between the two cuts.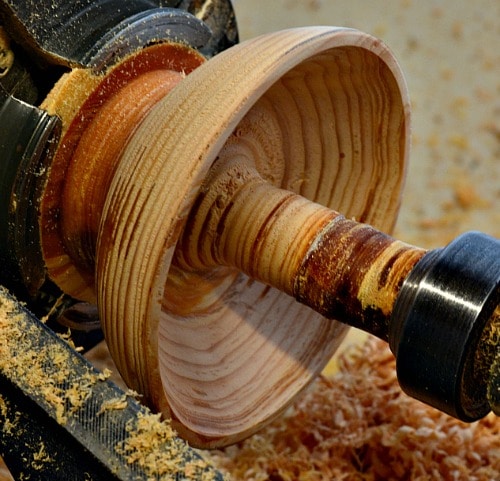
Here you can use a depth gauge to measure how deep you are making the bowl. You need to make sure the bottom is thick enough for your bowl depending on the grain orientation. You can also finalize the shape on the outside of the bowl at this time.
7. Now that you’ve finalized your shaping take a ring and test fit it on the post. That’s my ring in the picture but I wasn’t wearing it while I was turning!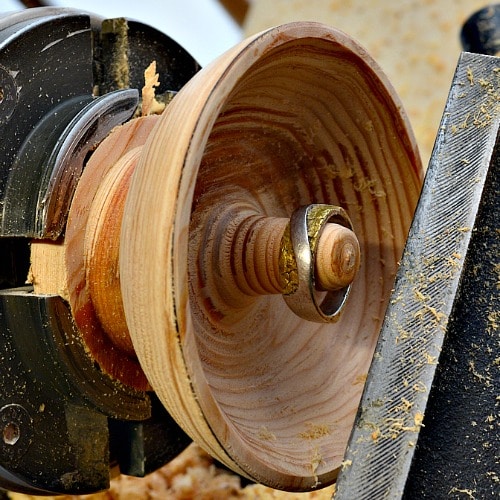
Sand your turning going through from a coarse grit down to finer grits. I wanted the bowl to be smooth so I started with 150 grit. This is coarser that I usually start my sanding but the grain on cedar tends to undulate and this will smooth it out. I continued sanding through 220, 320, 400, 600, and 800 grit sandpapers. Remember to wipe the turning with a soft cloth between each size of grit. I then finished with a wood polish.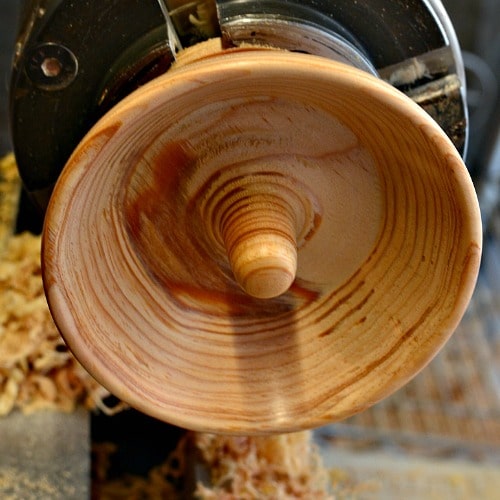
8. With the outside and inside of the ring holder done you can part the holder off of the lathe. Use your parting tool to make a slightly concave bottom to the bowl. To do this place the parting tool at right angles to the lathe then move the tool handle towards the head stock. Now move the tool forward and part the ring holder off of the lathe. Make sure to use your free hand to catch the holder when it falls off.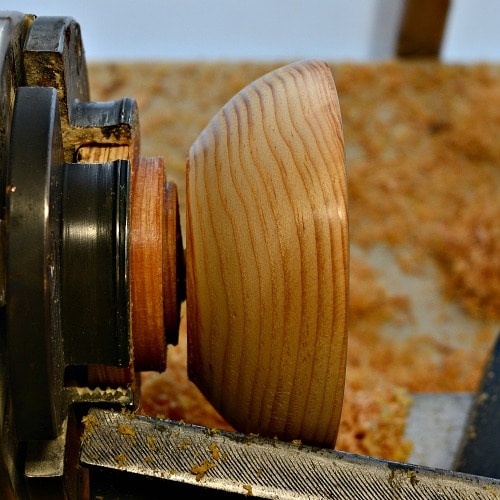
Complete the ring holder by sanding off the bottom and finishing the same way you did before.
I have it on good authority that the ladies like presents that come in small packages. (That was my son’s advice.) A turned wooden ring holder will be the perfect place for some of those other presents!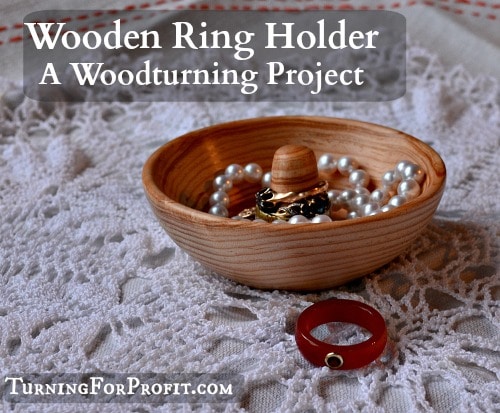
The ladies, of all ages, also like flowers. You can turn a weed pot for dried flowers and there is a heart shaped vase that looks good as well. There are more turning projects here that you can consider as presents.
Turning For Profit
If you have any questions about turning, or the business of turning, please leave me a comment at the bottom of the page.
These posts are for you, the woodturner. If you like turning projects or articles related to the business of turning then please sign up for the Turning For Profit newsletter. Generally it comes out once a week and has links to the current articles, a bit on what I am up to, and usually a question for your response. You can sign up on the right side bar or just a little lower on the page.
I love wood turning and sharing with you. You can follow me on Facebook as well. Thank you for joining me on this woodturning journey. Have fun and remember to turn safely.


Thank You for your insight it is just what I needed
Thank you for sharing your very comprehensive guides, ideas and tips. I have LITERALLY just started wood turning and this website is JUST THE THING I have been looking for!