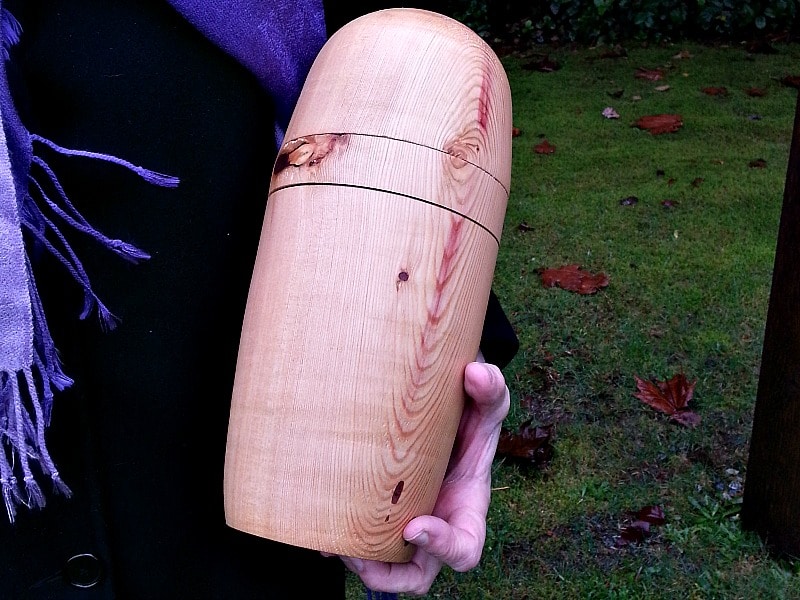
A cremation urn is a special wood turning project. It has a unique purpose and will be treasured by those who have to use it. It gives you the opportunity to create a turned object that reflects your skills as a turner and your values as a person. I will include several considerations for the wood turner at the end of the post.
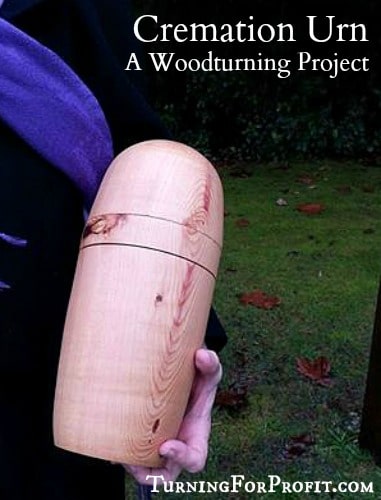
This topic is a challenge for me, which you will understand as you read the post. This is a project that can be turned. For me it was the largest turning that I had ever worked on. Please come with me on a journey that stretches your turning abilities.
I visited my brother and his wife about a month ago. My brother was not doing very well and his wife was making appropriate arrangements. I volunteered to turn a cremation urn to hold my brother’s ashes. I had never turned an urn and wasn’t sure what I was getting into. However my brother rallied and I thought I had a reasonable amount of time.
I got the phone call three weeks later. Sad news but unfortunately expected. There would be about two weeks until the internment and the funeral. I guess I’d better get the urn turned.
Wood Selection
To turn the urn out of a solid piece of wood I would need something about 7” in diameter and 10 or so inches long. I used an excel program to help me estimate the size of the cavity in the urn. So volume will be the area of a circle times the average depth of the cavity. The area of a circle is pi x radius squared. (In excel you can get pi in a cell by using the @pi function.) I needed about 200 cubic inches in volume or the equivalent of two litres. My radius was about 6 1/2″ and depth was about 14”.
I needed dry wood. So out to the woodshed I go. I picked a piece of larch that had been delivered “dry” to me about three years ago. Mr. Ed Pretty, at the workshop I attended basically said if the wood was over 4” in depth you had no guarantee on the dryness. Well let’s see what happens.
Wood Preparation
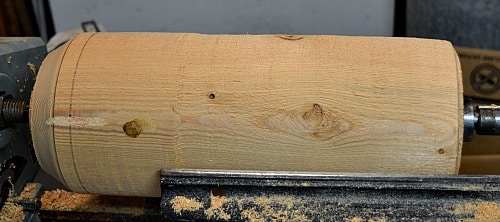
I moved my regular lathe over to my work area. A compass helped me to draw as large a circle as possible on the firewood. I then took an axe and a hammer, to trim off around the circle. I was fortunate that the wood did not have any splits heading towards the center.
This “prepared” blank was placed on the lathe and started at a very low speed. It was actually quite balanced and it did not take long to turn it to round. I used my roughing gouge and stood mainly to the side for the initial roughing.
Outside dimensions
I turned a reasonable shape to my eye. If I do another cremation urn (with more time), I might add a bit more decoration in the shaping. The outside will be shaped again once the lid has been turned. Even though I had room for the parting tool I used a saw to finish the cut when there was just over an inch remaining. Then I was not trying to catch a heavy block of wood.
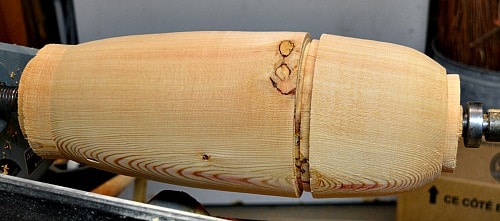
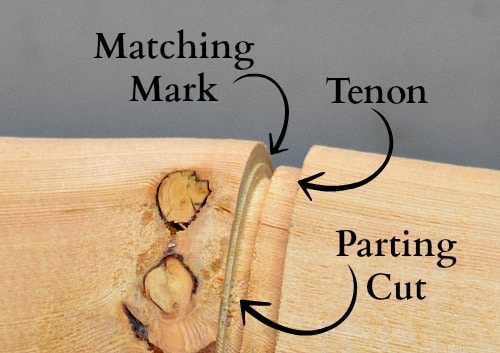
I used a woodturning tip to part off the two halves. Rather than parting straight along the bottom side move your parting tool out a smidge to make a matching mark. That little snippet of wood tells you where to start your hollowing because it matches the tenon, and makes it much faster to fit the lid to the base.
If I was to do another urn this large I would part the wood in half, rather than 2/3 base and 1/3 lid. This would make hollowing out both parts about the same difficulty. I would add a burn line or two to draw the eye away from the actual joint.
Hollowing the Lid
The base was removed and I hollowed out the inside of the lid. This part of the process went very smoothly. I’m trying to maximize the holding capacity of the urn yet not turn too thin of a wall. I aimed for about 3/8ths of an inch thick.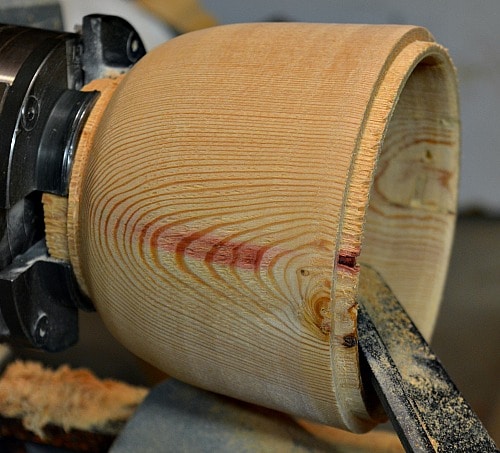
Hollowing the Base
The first job was to turn a recess to accept the lid of the urn. Because of the little bit of wood which matched the tenon on the lid it was quick and easy to get the two pieces to fit.
I knew that hollowing the base could move the urn out of round so I finished up the outside shape of the urn before I did the base.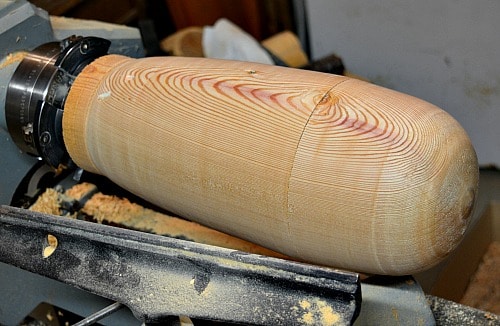
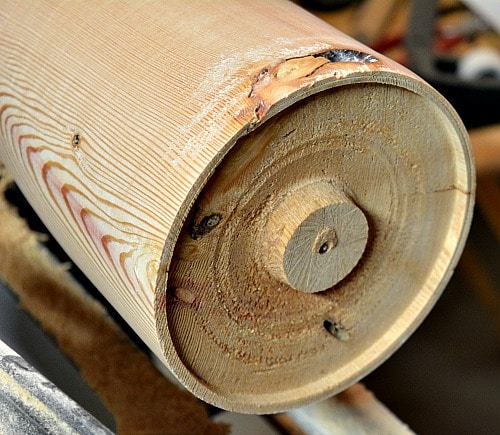
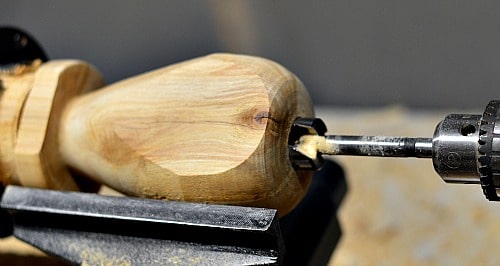
Well this turned out to be my biggest challenge. I do not have any specialized hollowing tools. Bowl gouge and scraper were my options. To make this work easier I fitted a 1” forstner bit into my tail stock. Since this was my big lathe I had a greater reach into the base. I was able to make a hole to the depth that I wanted. This will give me something to aim for. This is the same method that I used to drill out the heart vase garden project.
I managed about half of the hollowing with my bowl gouge. But beyond that I had to rely on scrapers. With the hole in the center I was able to process the rest of the hollowing with my big 1 1/2″ scraper. However, the base did move out of round if I was too aggressive in my cutting.
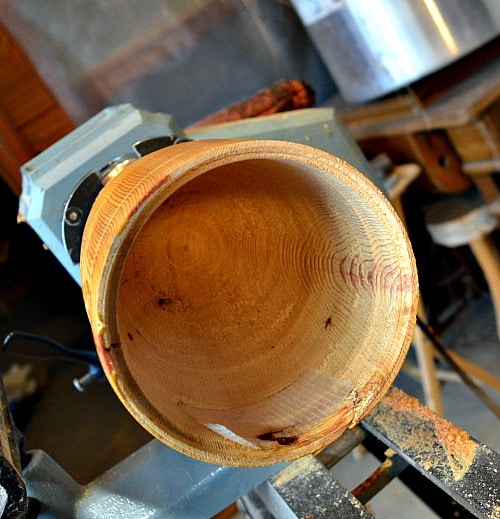
At one point the base moved out of round and hit the lever on my tool rest. This put a dent in the urn. My wife suggested that I use a burn line to cover the mistake. Great idea!
Before I went back to the lathe I filled a measuring bowl with two liters or about 8 cups of wheat. This is close to 200 cubic inches. I filled up the lid then the base. I had room left over so my urn would be large enough.
Once I returned it to the lathe and carefully adjusted it to round. It wasn’t perfect but it was close. Using my skew chisel I cut a fine groove. I then use a wire to friction burn a line around the urn.
Finishing
I then sanded the outside of the urn and finished with a wood polish. I did sand the inside with 120 and 180 grit papers. The outside was sanded up to 800 grit like I usually do. While the lid kept a good friction fit even after a couple of days it really wasn’t important in this case as the funeral home glued the urn after the ashes were placed inside.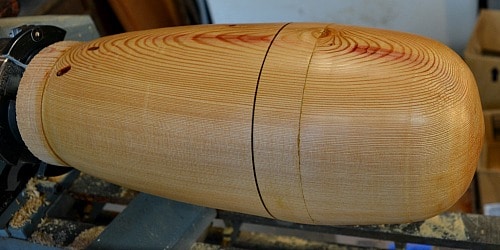
Additional Considerations for a Cremation Urn
Each cremation urn is unique and can be a challenge depending on the size required and the wishes of the purchasers.
Urns can be turned for people and for pets and will be obviously different sizes. The ratio is about 1lb = 1 cubic inch therefore a 200lb person will need 200 cubic inches within the urn. However a 10lb pet will take up much less space. If you make urns for purchase you will have to indicate the volume.
While my brother’s urn was interned at the cemetery, other people do keep the urns on display. Urns on display will need to be turned from very stable wood. I would recommend a segmented construction as the wood will be dry in that case. You can also have a removable lid. One cremation urn maker that I researched glues the entire urn together after the ashes are inserted but includes a brass plate as an access point on the bottom of the urn.
The funeral home that I worked with inserted an identification paper in the cremation urn and had a label on the bottom as well. While I don’t expect my brother to go anywhere this can help relatives if the urn goes missing. The paper is just the name of the funeral home and a number so the identity of the remains is confidential.
Turning For Profit
This was a challenging project for me. It was turned over three days. The key to a successful outcome was not rushing the project and being steady in the hollowing out of the lid and base of the urn. I hope you enjoyed my story.
For more projects you can see a list here or under the tab Build Your Inventory. These are in general order of difficulty. To stay up to date with my projects you can sign up for my weekly newsletter. (Scroll down a bit or on the right side bar.) This newsletter comes out once a week generally unless I have information that I think will benefit this woodturning community.
Thanks for joining me on my woodturning journey and remember to turn safely


Robindl……….
Sorry for your loss………..
thank you for this, my youngest daughter just passed. I’m going to make her urn.
Thanks Robin for posting this information. You have a created a fine tribute to your brother–time and effort invested in a handcrafted vessel. Can you tell me where you find the component parts for an urn such as the brass plate used as an access point that you mentioned after the urn is glued together. Thank you.
So very sorry for your loss. I lost my brother in 2013, and I’ll never stop missing him. Making your brother’s urn was really a beautiful tribute and, as I can well imagine, very difficult. Thanks for sharing your story.
Sorry for your loss
You did a good job thanks for the write up.
Thank you very much.
thank you for lid cutting marking trick, we are turned dolomite urns for 28 years now.
Your marking tips is genius!
best regards,
mihkel
T hanks for giving the size. L have make ours which is large but I`ll not care. hi hi