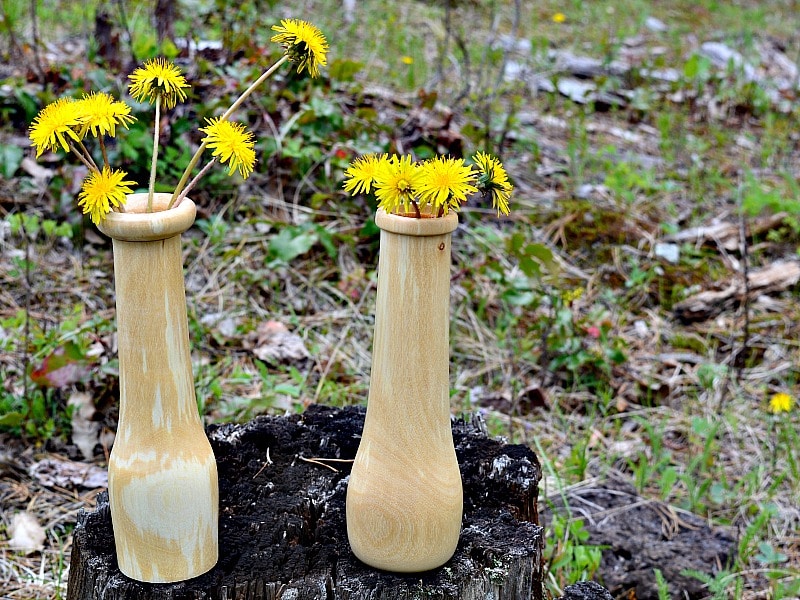
Spring is when all the flowers are in bloom. Your little ones bring Mom bouquets of wild flowers. True they are weeds and the best place for them is in a weed pot. A small turned weed pot is perfect for that bunch of flowers picked by tiny hands. You can always use an extra vase or two so turn on the lathe and see what you can do.
Generally a turned weed pot is for dried flowers. The idea is that they are picked and put on display without the need to provide or maintain a water supply. However, if you can provide water, then the flowers will stay fresher longer. This project also shows you how to recycle a pill bottle as a water reservoir for your weed pot.
A weed pot or flower vase is a simple woodturning project. This video gives you a short overview of the project.
Design Considerations
The main requirement for a weed pot is that there is a hole for the flowers and that the vase is stable enough not to tip over. You may need to do some judicious trimming of the flowers if they are too long and high for the weed pot. You can turn this project out of any wood. Lighter woods like pine would be more likely to tip. Turn the base fairly large in diameter to help put more weight at the bottom.
The shape of the vase itself is completely up to you. You can leave the bark on for a rustic look. You can turn a wooden vase that is more classical in its lines. I have also seen some weed pots that have a bottom and a top that is turned and the body is left in a very natural state. The choice is yours.

If you do an image search, include the word turned in your phrase. If you just search “weed pot” then you get a completely different set of search results. In the southern part of BC if you say “weed pot” most people will think you are being redundant.
Turned weed pot process
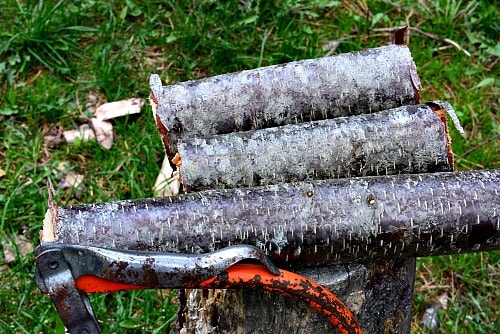
1. Select your turning blanks
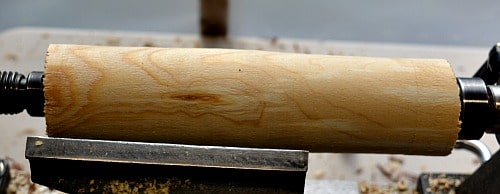
Find branches or firewood that will give you a three to four inch diameter turning blank. I found a water birch that had been knocked over in a heavy snowfall last year. I cut two turning blanks from the larger branch.
2. Mount the blanks and turn round
Mount the blank on your lathe between the drive spur in the head stock and the live center in the tail stock. Your branch or firewood is likely not going to be perfectly round so try to center the blank as best as you can. My first blank was very symmetrical. The second one had a bend in it and the lathe vibrated a bit until I turned the blank round. Always wear a face shield especially when removing bark from a branch. Even birch bark can fly off at a good speed.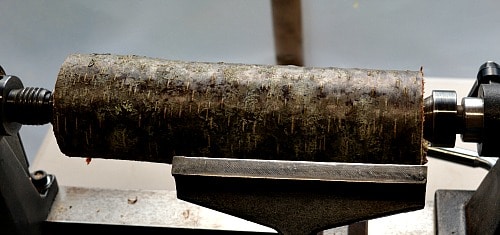
Turn the blank round with your roughing gouge. The size of branches that I had fit nicely into my 4 jaw chuck.
If you are going to turn the weed pot without a 4 jaw chuck then you will have to do the drilling of the hole after the weed pot was finished on the lathe. Make sure the bottom is concave to give you good support. The top of the vase should be finished nice and flat. A 1” hole puts a lot of torque on the weed pot and the drill. Hold the vase securely in a vise and use Styrofoam to protect the body.
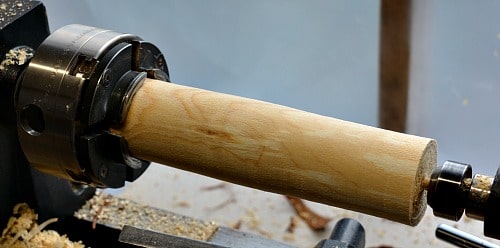
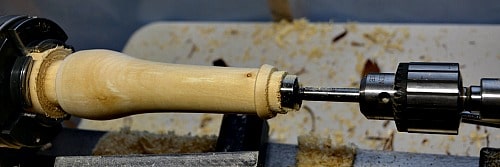
3. Transfer the turning blank to your multi-jawed chuck
Mount the turning blank into your multi-jawed chuck. Bring the tail stock with the live center up to provide additional support and to get the blank centered on the lathe.
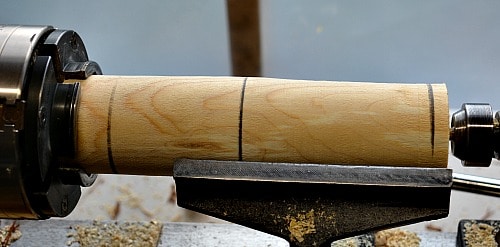
Roughly plan out the sections of the vase. You have the top where the flowers will be put, the neck of the vase, and the base. Try to make the weed pot bottom heavy for more stability. Now, these lines will disappear really quick when you start turning. However, you now have a visual idea of the different sections of your turned weed pot.
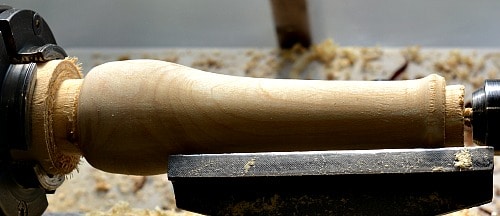
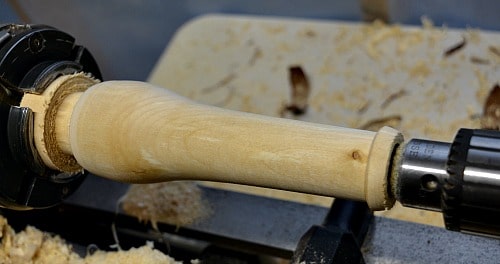
4. Shape the weed pot
Use the turning tools you like to make the body of the vase. I did most of the shaping with my roughing gouge. The final smoothing was done with the skew chisel. One professional turner saves time by turning as much of his projects with each tool that he picks up. If he can pick up each tool only once it is a good use of time.
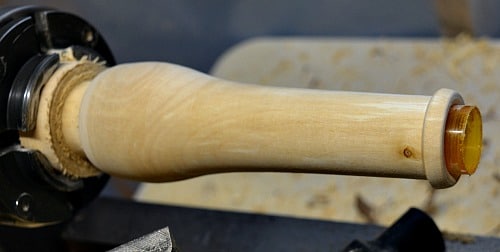
5. Drill the hole in the vase
Remove the live center from your tail stock and insert your collet chuck with a 1” forstner bit ready to go. Move the tail stock so the drill bit is just touching the turning blank. Turn on the lathe, and slowly advance the quill, of the tail stock, so that the drill bit enters the wood. In this situation, the drill bit is held motionless and the wood spins to create the drilling action.
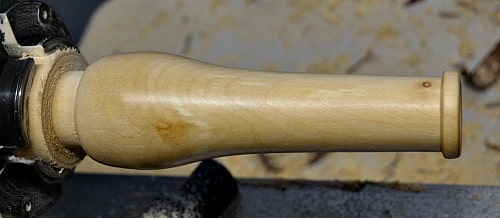
Once you have completely extended the quill you may still have room left on your drill bit. If this is the case then retract the quill, loosen the tail stock, and manually move the drill into the hole. Once the drill is touching the bottom tighten the tail stock and again advance the quill, with the lathe turned on. This is how it will look when you have the drill completely inserted into the wood.
6. Adjust for an Insert
The pill bottle that I’m using as a water reservoir is just a tad larger than 1” in diameter. I used a 1/2″ scraper to slightly widen the hole. Set your tool rest so that the corner of the scraper touches the upper left quadrant of the hole. Because the hole is fairly small your tool rest may need to be below center to do this. Take your time and adjust carefully. The end of the weed pot is a good distance from the head stock and sideways pressure can knock your turning blank out of alignment.
Once you have enlarged the hole (only if needed) then you can insert your pill bottle or other water reservoir.
7. Sand and Finish your turned weed pot
Remove the insert and sand your weed pot. I generally sand from 220 grit up to 800 grit. Be sure to wipe your turning with a soft cloth or paper towel every time you change grit sizes. Your final sanding should also be done parallel to the lathe bed. This will remove the circular sanding marks that happen because you are sanding on the lathe. Simply sand the turning parallel to the lathe bed. Turn the wood slowly with your free hand while the other hand does the sanding.
If you want you can add a wood polish, beeswax, or carnauba wax to your finished weed pot. I used an orange based wood polish.
8. Part the weed pot off the lathe and finish the bottom
Take your parting tool and part the weed pot from the lathe. Angle the cut away from the head stock so that you will have a concave surface to the bottom of your weed pot. Remember to sand and finish the bottom the same way you did the body of the vase.
Now you have a turned weed pot. You can quickly make a few more so that there are lots available when those flowers start coming into the house. It is an easy project to turn with no fixed dimensions. You can be creative and come up will all sorts of different shapes and sizes. So have fun.
Another simple vase is the heart shaped vase. It is made by turning a rectangular turning blank. No matter which turned weed pot you turn, I would love to see what you made.
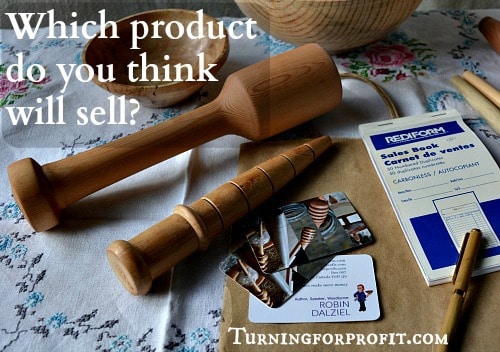
Turning For Profit
If you have any questions about turning or the business of turning, please leave me a comment at the bottom of the page.
These posts are for you, the woodturner. If you like turning projects or articles related to the business of turning then please sign up for the Turning For Profit newsletter. Generally, it comes out once a week and has links to the current articles, a bit on what I am up to, and usually a question for your response. You can sign up on the right sidebar or just a little lower on the page.
I love woodturning and sharing with you. You can follow me on Facebook as well. Thank you for joining me on this woodturning journey. Have fun and remember to turn safely.


Very informative.
I make some of these and am trying to improve my production run efficiency.
Why not shape completely while between centres and then cut a tenon, and put several aside. Then you are mounting in chuck just to drill and sand each one. The roughing gouge is used only once with this method. Are there any drawbacks to this method?
Give it a try and see how it goes. The challenge is re-chucking the piece so the drill will be centered. Have fun.