I love wood and wood grain. A wooden Icicle is a great way to showcase wood on a smaller scale. Small and delicate it shows off the wood and your skills as a turner.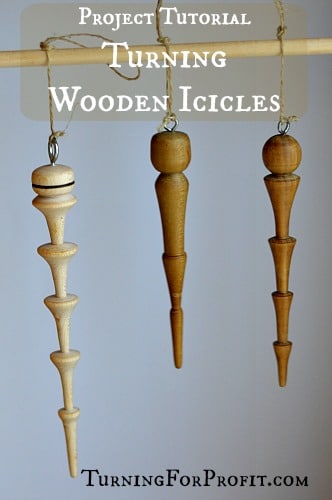
Wooden Icicles are easy to turn. I used only three tools, a roughing gouge, parting tool and a skew chisel. Utilizing pen blanks, small pieces of wood from the shop, or even small branches, makes a wooden icicle inexpensive to produce. I used three pen blanks for my Icicles.
Wooden Icicles Design Considerations
Doing a search for wooden icicles on Google or Pinterest will give you a wide range of sizes and styles for the icicles. I looked out of our kitchen window and realized it would be very boring to turn a “real” icicle. They are long tapered shapes with a few bumps along the way depending on how the wind was blowing when the icicle was forming. Your confidence at the lathe will determine how thin and what extra features you want to show off on your wooden icicle.
I planned mine, sort of, with tapered sections. Each section comes down quite narrow and tapered. To top the icicle off I made a rounded top. My first wooden icicle was thicker and looks bulky (in my opinion). The next brown icicle looks more delicate and has a rounder top. The segments get larger as you move up the icicle. The third icicle, turned out of Canary Wood, has an extra segment and the segments get shorter as you move up the icicle. Not sure which of these two looks better. I made the last top a bit fancier by adding a burn line with wire. However all three, placed on a tree, with other decorations and lights will look lovely.
Wooden Icicles Turning Process
-
Turn the blank round between centers.
Put a drive spur in your head stock, and a live center in your tail stock, then mount your blank between them. If you are turning more than one icicle this is the point to turn all of your blanks round. I used a 1/8th inch parting tool to create a tenon at the top of the icicle. The parting tool allows me to get very close to the drive spur as I am forming the tenon. I then used a roughing out gouge to turn the rest of the blank round.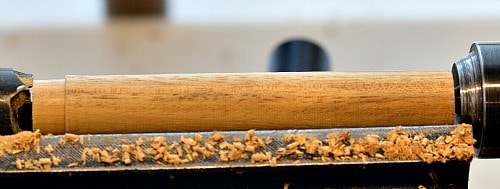
-
Set up the Wooden Icicle in a multi jawed chuck
Remove the drive spur and mount your multi jawed chuck (I use a one way chuck with the small jaws) on the lathe. Use the tail stock to center and hold the blank in place as you tighten your chuck. If you don’t have a multi jawed chuck then you can turn your icicle between centers. You will have to finish the top and bottom of the icicle by hand.
As I use a skew chisel to part the icicle off of the lathe, I turn away a portion of the top of the icicle near the head stock, with a parting tool, so that I have enough room to angle the skew chisel in later.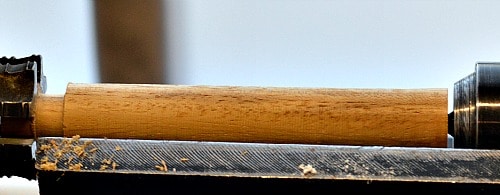
-
Taper the Icicle
Leave a portion for the decoration at the top of the icicle and taper the icicle portion from the head stock towards the tail stock. I tried to work from the tail stock towards the head stock and turn only one section of the icicle at a time. This didn’t work as I couldn’t angle the skew chisel in to create the taper I needed on each section of the Icicle. So tapering the entire blank at once solved that challenge.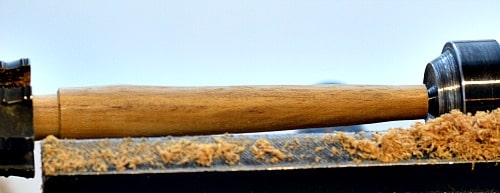
-
Shape each portion of the Icicle
Now we will work from the tail stock to the head stock to shape each section. This process gives you more support for your turning. If you need to touch up a thinner portion later, support the Icicle with your free hand and take very light cuts.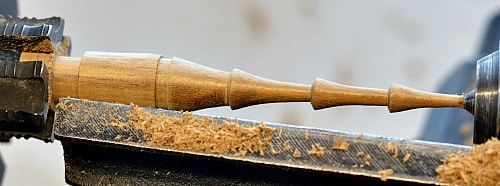
-
Shape the top of the Icicle
At this point the entire icicle is turned and you need a decoration on top. Make this as simple or complex as you feel comfortable turning. Try different designs as you make more Icicles. You can see that my three finished Icicles are all different. If you want to burn a line on yours, take your skew chisel and make a small groove to hold the wire in place. Take a good length of wire, as it will heat up quickly, and hold it in the groove as the wood spins on the lathe. You may need to pull up a bit so that the friction heats the wire and creates the burn mark.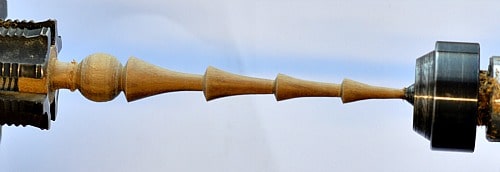
-
Part off the tip of the Icicle
When the decoration is shaped to your desire then it is time to separate the tip of the icicle. You can either use your skew chisel to make a rounded tip or you can pull the tail stock back and sand the tip round. The multi-jawed chuck is now holding the Icicle.
If you are not using a chuck to hold the wood then you want to do step 7 next. Then come back and part the wooden Icicle off of the lathe. First, almost, part the wood away from the head stock and then fully part the wood off the lathe at the tail stock end.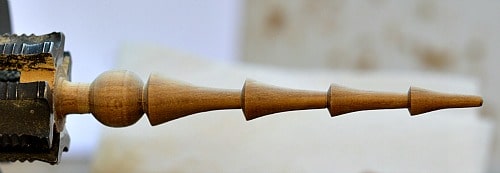
-
Sand the Icicle on the lathe
Depending on how well it went with your skew chisel and your shaping you can start with a finer grit of sand paper. However, if you don’t like the feel of your tapers or the shape of your decoration a coarse grit like 80 or 120 will quickly smooth out those challenges. Move on to 220, 320, 400, 600, and 800 grit sanding. Remember to wipe the icicle down with a paper towel or soft cloth between each grit.
-
Part the Icicle off of the lathe
I use my skew chisel to do the final shaping of the decoration as I part the Icicle off of the lathe. This gives me a smooth finish. Use your free hand to “catch” the Icicle as it drops off of the lathe.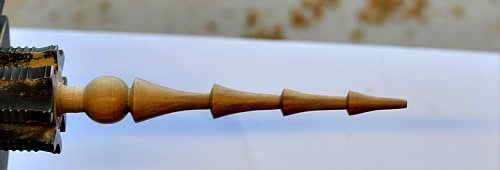
-
Sand off the top of the Icicle
You are almost done. Sand the top portion of the decoration going through the grits in progression you did in Step 7. Use a hand awl or other sharp point to start the eyelet hole. Screw in an eyelet hook so you can attach some string or ribbon to your icicle. It also helps with finishing.
-
Finish the wooden Icicle with a high gloss finish
I used three coats of a water based acrylic finish on my Icicles. I took a dowel and inserted it into two holes in a cardboard box. Then I attached string to the icicles and threaded the string on the dowel so that the Icicles could hang as they were finished. I used a small brush to apply the acrylic coating letting it dry between coats. Looks pretty good.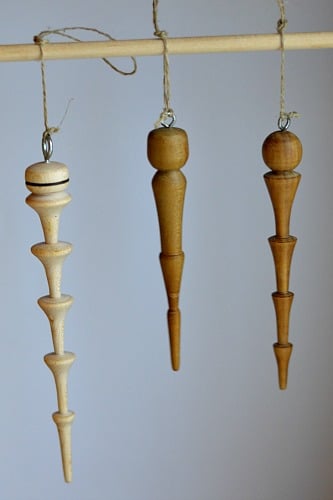
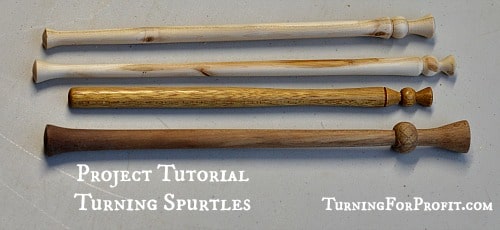
So that is how I turned three wooden Icicles. A great little project that gets easier each time you turn a new one. If you are looking for other ornaments to make for Christmas check turning ornaments. Two other similar projects would make great Christmas presents. These are kitchen utensils, a honey dipper, and a Scottish Spurtle. Both are turned between centers. The spurtle is the Scottish name for a stick used to stir oatmeal.
Let me know how you make out. I would love to see what you have turned.
Thanks, Robin.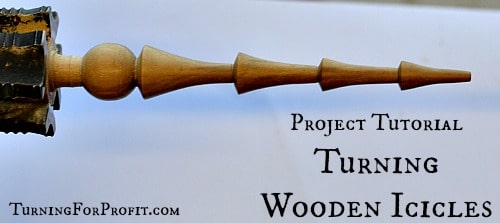


Do you have a source for the components needed to make a turned wood oil vial keychain?
I did a search on key chain kits and no oil vials showed up. However there were key chains for holding pills and having a secret compartment. How were you going to use the oil? If the vial was small enough (10mm) it might fit in the pill kit. If you wanted an infuser the secret compartment kit could hold oil infused cotton. Hope this helps. Thanks for your comment.
Are you talking about something like this? https://www.woodcraft.com/products/pendant-perfume-holder-kit-gold
Robin, I like these icicles (and your book!), but only suggestion I have is to turn small ball on the top and drill thru it to run the string. If people like the flat look of the eyelet, they could sand the ball flat on the drilled sides.
Keep up the great ideas and thanks for being admin on the Facebook site. Love to see all the turning work people do!