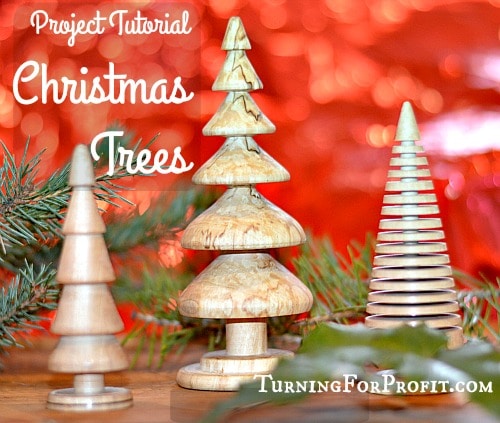
Christmas Trees – A Turned Christmas Ornament & Decoration
It feels ironic to select a piece of wood, from a tree, and turn a tree out of it. We can’t exactly move the firs and cedars into our house, so these decorations are a great alternative. Christmas trees are good woodturning projects especially for new turners. They are small enough to complete in an afternoon, suitable for learning good turning technique, and large enough for most catches to be incorporated into the design of the tree. Once you have made a few Christmas trees you can try making Wooden Icicles.

Christmas trees are easy to turn. I used three primary tools, a roughing gouge, a parting tool, and a skew chisel. Small rectangular pieces of wood from the shop, or small branches, make a wooden Christmas tree an inexpensive product. I used a spalted paper birch branch for the larger tree and smaller pieces from a paper birch round for the smaller trees.
Christmas Tree Design Considerations
Looking at wooden Christmas trees as woodturning projects on Pinterest, gave me three styles of tree to make. I asked my Facebook fans which tree they liked and the first two I turned followed their suggestion. If you are looking for real tree inspiration the firs are probably closest to the cone shape that is easiest to turn. Alpine fir is very long and narrow and the other firs will have a wider base. If you have Pondarosa or Red pine in your area you might want to make a long trunk on your tree with just the top tapered and shaped.
Your confidence at the lathe will determine how thin and what extra features you want to show off on your wooden trees.
The tree base and trunk are places you can put extra features. I added burn lines, a groove, and a shaped trunk on these trees. Add you own touches and make the tree uniquely yours.
Depending on the size of the tree you turn it can be a table top decoration or a tree ornament. You can drill a small hole in the top of the tree. Screw in an eyelet screw. Attach some ribbon and now you have a tree as a tree ornament!
Wooden Christmas Tree Turning Process
This first tree is turned out of spalted Birch. It would have been easier if I had caught the spalting a bit sooner. The texture of the spalting really adds to the turned tree. It is just under 6” tall and 2” in diameter. I tried to undercut the branches somewhat with my skew chisel.
1. Turn the blank round between centers.
Put a drive spur in your head stock, and a live center in your tail stock, and then mount your blank between them. If you are turning more than one tree this is the point to turn all of your blanks round. I rounded 6 blanks for trees and other projects.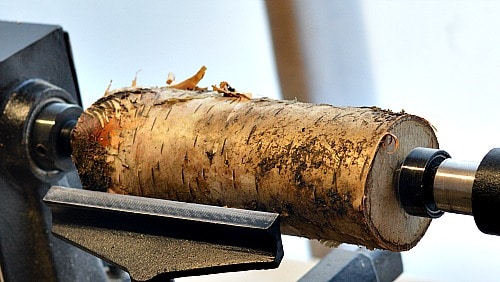
I used a 1/8th inch parting tool to create a tenon at the bottom of the tree. The parting tool allows me to get very close to the drive spur as I am forming the tenon. I then used a roughing out gouge to turn the rest of the blank round.
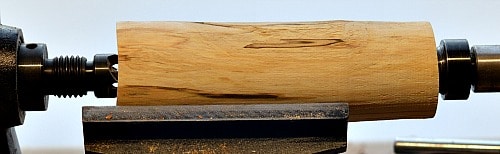
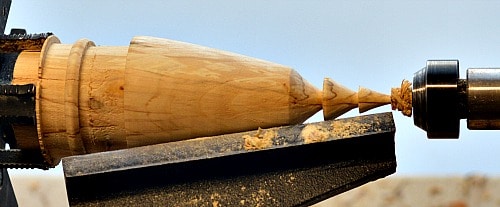
2. Plan and rough out the shape of the Tree
As the base of the tree was quite wide I used the narrow parting tool (1/16”) to part the tree from the lathe later in Step 7. I still need room to work with the narrow parting tool so I turn away a portion of the bottom of the tree near the head stock, with a regular (1/8”) parting tool. This is the area between the Tenon and the Base.
Mark out the important sections on your blank. Working from the head stock turn a tenon then leave a section for parting off of the lathe, the stand for the tree, the trunk of the tree, and the remaining wood, up to the tail stock, will be the branches of the tree. Lightly touch a pencil to mark the place for each item. This process is the same for all the tree woodturning projects.
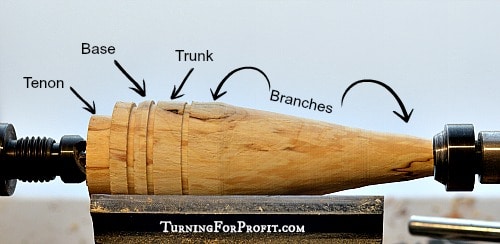
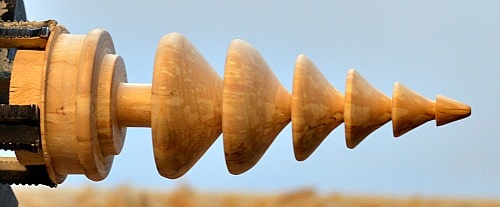
3. Shape each portion on the Tree.
Remove the drive spur and mount your multi jawed chuck on the lathe. Use the tail stock to center and hold the blank in place as you tighten your chuck. If you don’t have a multi jawed chuck then you can turn your tree between centers. You will just have to finish the top and bottom of the tree by hand.
I would start by tapering the tree from the base towards the tail stock. Don’t turn the trunk thin to early. You need good support on the wood as you shape the branches. Space your branches out as seems good to you. Real trees are not symmetrical so you can estimate where you place the branches.
Once you have the branches complete move on to the trunk and the tree stand. Turn the trunk so that it looks right for your tree. The base can be simple or embellished as you desire.
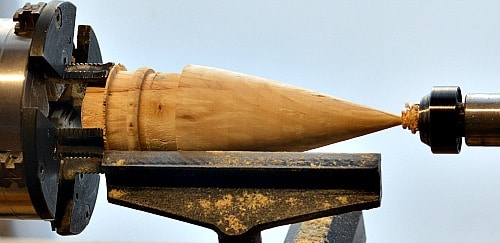
4. Part off the tip of the Tree
When the decoration is shaped to your desire then it is time to separate the tip of the tree. You can either use your skew chisel to make a rounded tip or you can pull the tail stock back and sand the tip round. The multi-jawed chuck is now holding the tree.
If you are not using a chuck to hold the wood, then you want to do step 5 next. Then come back and part the wooden tree off of the lathe. First, almost, part the wood away from the head stock and then fully part the wood off the lathe at the tail stock end.
5. Sand the Christmas Tree on the lathe
Depending on how well it went with your skew chisel and your shaping you can start with a finer grit of sand paper. However, if you don’t like the feel of your branches or the shape of your trunk or base a coarse grit like 80 or 120 will quickly smooth out those challenges. Move on to 220, 320, 400, 600, and 800 grit sanding. Remember to wipe the tree down with a paper towel or soft cloth between each grit.
When the sanding is complete I finished the tree with carnauba wax.
6. Part the Tree off of the lathe
I use my narrow parting tool to separate the tree off of the lathe. This gives me a smooth finish and a slightly concave base. That is, point your parting tool slightly towards the tail stock. Then your tree will sit properly. Use your free hand to “catch” the Tree as it drops off of the lathe.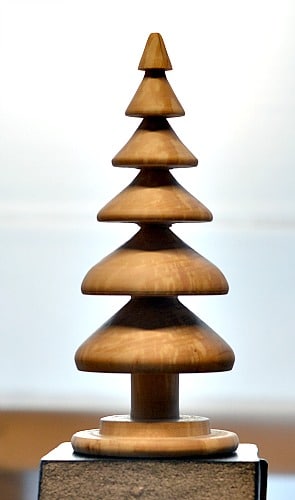
7. Sand off the bottom of the Tree
You are almost done. Sand the bottom portion of the decoration going through the grits in progression you did in Step 6. Remember the wax as well.
The spalting on the birch produced a very mottled tree. Turning the wood was tricky as the spalted wood was quite soft.
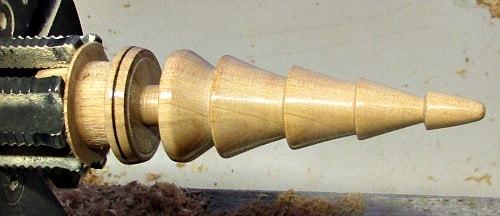
A second Christmas Tree
This tree was turned out of a piece of birch firewood. It is quite small, 3 ¾” tall and 1 ¼” in diameter. I added a burn line on the base and a groove on the top of the tree stand.
A third Christmas Tree
With this tree I wanted to try the honey dipper look. The turning process is the same up to the tapering of the branches.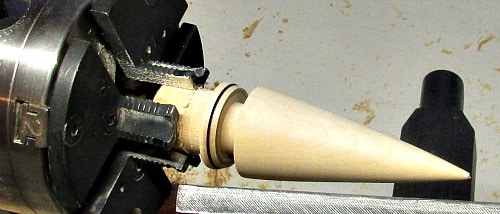
I turned two grooves at the top of the tree that seemed to be the right spacing. The distance turned out to be 3/8”. I then used a ruler and a pencil to mark out a line every 3/8th of an inch.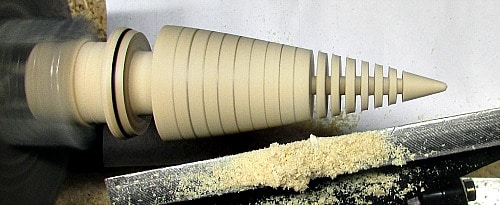
I just took my time and cut each groove with the narrow parting tool. Looking down on the tree as I was cutting the groove helped me to get a consistent thickness for the trunk of the tree. After the fact my branches are different thicknesses. The lines help get fairly consistent placement of the branches.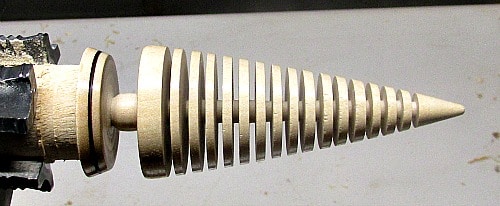
This tree is 4 ¼” tall and 1 ½” in diameter.
So that is how I turned three wooden Christmas Trees. A great series of woodturning projects that get easier each time you turn a new one. If you are looking for other ornaments to make for Christmas check out my posts on turning ornaments and wooden icicles.
Let me know how you make out. I would love to see what you have turned.
Thanks, Robin.


These are so lovely! I need to get my husband the proper tools? Where do I start? Seems like a lathe would be quite pricey and I have no idea even where to look. Ideas? Oh, the things he could make! I sound like Dr. Seuss…
Hi Tessa, The number of tools is really not that many, a roughing gouge, a spindle gouge, a skew chisel, a parting tool, and a bowl gouge. For a lathe the mini-lathes are a lot lower in price. I am really enjoying my excelsior mini-lathe and it goes on sale for around $ 300.00. If you have buy and sell groups in your area there may be a chance to acquire a lathe from an estate sale. You could also check with any woodturning groups in your area as well. Hope it works out for you.
Great idea – going to turn a few for my wife who loves to decorate for Christmas.
Do you sell these trees? I’m a 5th grade teacher and would love to have one for my classroom décor this Christmas season.
Thanks,
Joyce