
A little preparation will give you great benefits in your wood turning. These four steps will help you out. In a production run you need a source of wood and a breakdown of the specific processes of the product being turned. Each step of the project gives you a chance to increase your effectiveness and efficiency in your turning.
Moving from a hobby to a business requires a change in perspective. Turning as a hobby usually entails going to the shop and finding a likely piece of wood that looks good to turn. Or you have the idea that this week you are going to make a turned box, bowl, spindle, or whatever, and now you are looking for a good piece of wood to use.
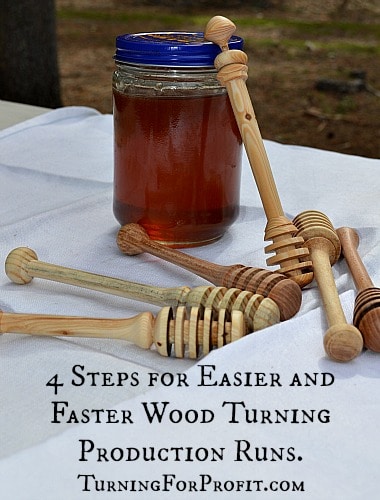
Getting organized shouldn’t remove the spontaneity of your wood turning but enable you to make more effective use of your time and resources. I’m going to use Honey Dippers as my example. The steps to turning a honey dipper are:
- Pick out the wood
- Turn the wood round
- Shape and finish the project on the lathe
- Label and store the dippers
A bigger issue is what products you should make for your business which I’ll save for another post!
Let’s assume you want to make a production run of honey dippers. The size of the product is under an inch in diameter and about 6 to 7 inches long. The dipper section is under 2 inches long and the widest in diameter. The handle can be quite narrow.
-
Pick out the wood.
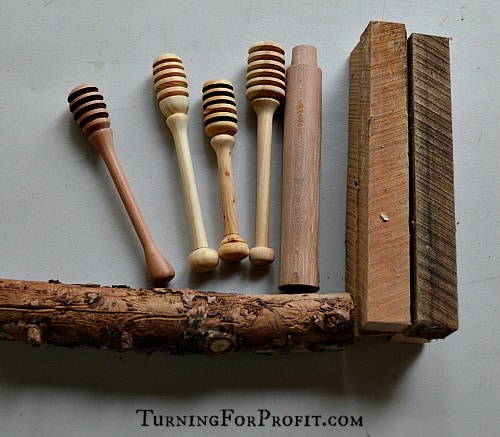
What types of wood blanks could I use?
A square blank of wood 1 inch by 1 inch and 8 inches long would work. I had prepared dogwood spindle blanks in the shop about 16 inches in length so each blank provided for two honey dippers.
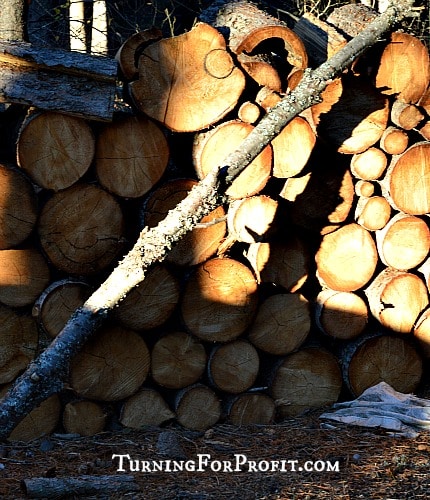
Branches that were 1 inch to 2 inches in diameter work. Go through your wood supply and see what you can find. I found a Hazel branch, a larch branch, and an alder branch that I cut into 8 inch long sections.
A piece of Jack pine firewood was available about 15 inches in length. I set my rip fence on my table saw to just over 1 inch from the blade and carefully cut out blanks on the table saw. Make sure you use your guards and push sticks to stay safe.
At this point you have several prepared blanks ready to start turning. You determine the size of your production run.
-
Turn the wood round.
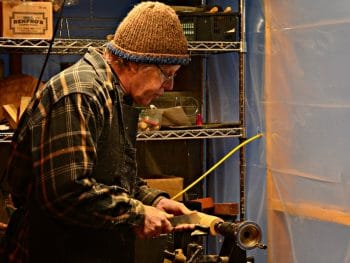
Place the blank between centers on the lathe. A drive spur in the head stock and a live center on the tail stock. For the square blanks draw a line from corner to corner and center on the intersection of the lines. For round stock you can guesstimate it fairly close.
Before you start wood turning check to see if there are any defects in the blank that require adjustment. Use a prototype dipper to compare to your wood to see which end would be best for the dipper or handle.
A branch with a bow or curve in it can be placed so that the section at the head stock is centered, giving you enough wood for the dipper, but the branch may be off center on the tail stock in order to get enough wood for the handle in the middle of the bow. Turning the lathe on will allow you to see the solid sections and the not so solid sections of the blank.
One of my blanks was an old larch branch which had started to split. One cut end showed no splits to that would be the dipper end. The other end had a split on one side so I moved the blank so that the live center was placed on the solid wood. As I only needed about half an inch for the handle this adjustment allowed me to turn the split wood away and still make a honey dipper.
Turn all of your blanks round between centers at one time. For the honey dippers I used a roughing gouge to turn the blank round and then a parting tool to shape a tenon to go in my multi-jaw chuck. This is the spot for efficiency. Turning ten blanks round, one after the other, means that you are only using two tools and you get very efficient with them. I found I was making heavier cuts with smoother results after two or three blanks. You also only have to release the tail stock to change to the next blank.
-
Shape and finish the project.
Take out the drive center and put your chuck on the lathe. Now each time you put in a new blank you are just moving the jaws of the chuck rather than taking the chuck on and off of the lathe each time.
The specific steps for turning honey dippers are in an earlier blog post. The tools you need are a parting tool, skew chisel, and / or a spindle gouge. (I also used my roughing gouge to speed up the rough shaping of the handles.) Having a spot right beside your lathe for the tools specific to your wood turning will increase your efficiency. Use a finished honey dipper to help you set the dimensions until you can freehand the operation. Again repetition increases your efficiency.
I would shape the dipper first then cut the fins on the dipper then shape the handle. Why? This is the point where the fins could break if the parting tool is off center or there was a weakness in the wood. One honey dipper I turned broke at this point. I was able to turn a tenon at the other end of the blank, flip the wood around and salvage a dipper because I had not already turned the handle.
Additional efficiency is in the finishing process. Set up a stack of your sandpaper in grit order. You go from smallest number (highest size of grit) to largest number (smaller sized grit). So my paper order is 220, 320, 400, 600, and 800. I work the paper in order and place the paper just used in a new pile so that when I’m finished I pick the stack up and turn it over so it is ready for the next sanding run.
I actually sand the honey dipper three times in the production run. First, main handle and dipper are sanded and finished when the blank is between centers. Second, finishing off the handle. And third, finishing off the dipper end when it is turned off of the lathe.

-
Label and store the dippers.
As each dipper is finished label it with the species it was turned from. You can do this with little tags or by placing each type in its own container. I know from experience that in a couple of weeks I might remember what species I turned in general but that dipper specifically?

The efficiencies that you achieve depend on the turning methods you are using and the item you are turning as well. Turning the blanks round all in one go is much easier than taking each dipper from rough blank to finished dipper. So think about the processes you are using and see where you can increase your efficiency. A production run of ten items allows you to be efficient in what you produce but you can also change what you are turning on a regular basis so you won’t get bored. Ed Pretty, a wood turner from the Vancouver area of BC, does production runs in the hundreds. He says that he gets two benefits from production turning. “First, it’s very meditative since your focus and concentration excludes everything else and second, it’s like a musician practicing scales, developing muscle memory and improving the very same skills that I use when turning gallery pieces.” Two very good points to remember.
Happy turning and stay safe.


[…] stock, and a live center in your tail stock, then mount your blank between them. If you are turning more than one icicle this is the point to turn all of your blanks round. I used a 1/8th inch parting tool to create a […]