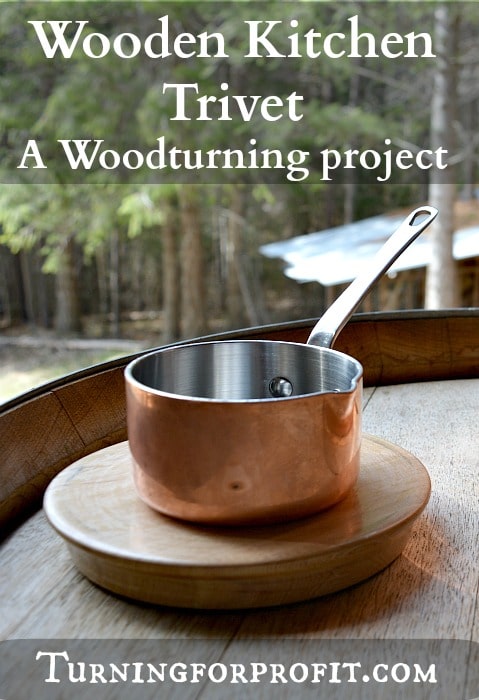
Turning a wood kitchen trivet is a great project to practice your bowl turning skills. You make the face of the trivet flat and shape the profile of the edge to suit your project. The end result is a wooden trivet you can be proud of.
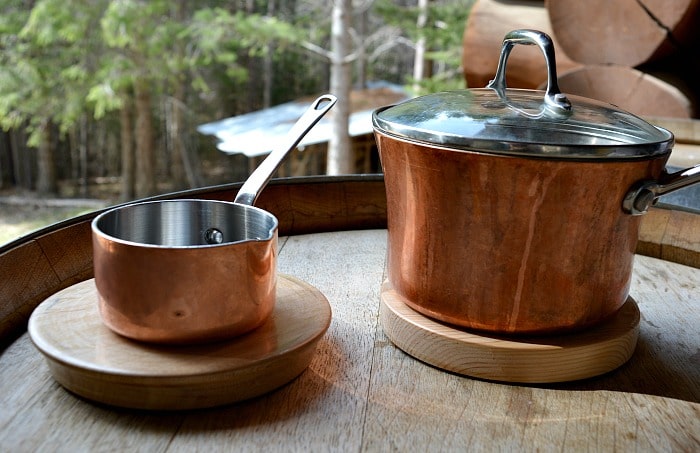
Kitchen trivets are used to protect surfaces from pots and dishes. This could be heat, water, dirt, or something else. While a folded dish cloth would work, it lacks a certain elegance and charm. Trivets are made from cloth, wood, ceramics, and metal. A turned wood trivet gives you a chance to practice your face plate skills and produces a round trivet that matches your round pots and dishes.
Design Considerations for a Wood Trivet
You want your trivet to be large enough for the pots or dishes that you will be using. However a range of sizes gives you flexibility in matching the trivet to the base as needed. The trivet also needs to be stable. In this project I’m turning a flat disk of wood as the trivet without any legs. We currently have a turned trivet that has four legs with felt pads. With one of the pads gone there is a definite wobble to the trivet. It still works but not quite as well.
If you are adding legs take the time to make sure they are the same size and that they are securely attached to the base. Then add small felt discs to the bottom of the legs. That will protect the surface from being scratched by the extra weight on the legs when using the trivet for dinner.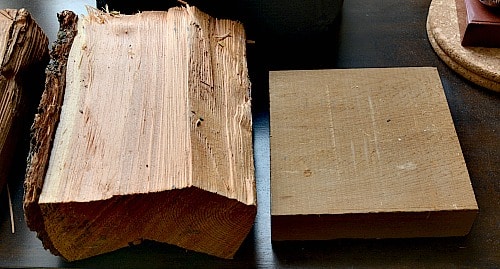
I’m turning two trivets. One from a cedar plank and the other is larch from my firewood pile.
Mounting the Base
Use a face plate and make sure the screws are big enough to be secure but not so large at to create problems for your turning. Note how long your screws are after they are placed in the face plate. That is the danger point that you don’t want to reach with your chisels and other turning tools.
Mounting the face plate on the cedar board is easy. With the larch I made the blank fairly flat. I used longer screws to hold it in place. My plan with the larch is to turn a tenon and to finish the trivet with the wood held in my woodturning jaws.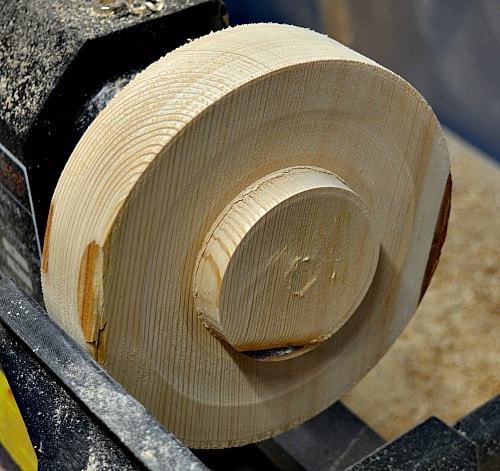
Use your bowl gouge, the wood is presenting end grain twice in every revolution, as this is not spindle turning. Your spindle roughing gouge is not designed to handle the differences in pressure as you change grain orientation while you are turning. Remember to go very slowly if your gouge is cutting “air” as you true up your blank!
First turn the blank round. You can turn a blank round entirely on the lathe or you can trim the corners before it is mounted. Cutting the corners will save you a bit of time at the lathe. The larch piece took longer because it was a rougher piece of wood. At this point I also rough flatten the face to help balance the blank.
On a trivet you turn the edge and face just like turning the outside of a bowl. In this case you are turning the face flat and the outer edge into the profile you want on your trivet. So use your bowl gouge for both of these tasks. As you can see in the image your tool rest is at right angles to the lathe. This will give you a reference to flatten the face. When you move on to bowl turning your cut will transition from the face side to the edge. So practicing here will help you when you turn bowls.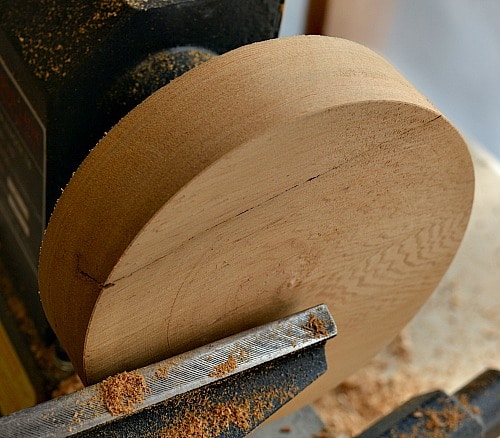
Turning the Face
Next flatten the face surface of your blank. You can actually do this from the inside out or the outside in. (When you are turning a bowl remember to go from smaller to larger diameter.) I prefer going from the inside because I have a tendency to catch when going up to the outside of the blank. Depending on your grain you may find one method is better than the other, on occasion, depending on the wood you are turning.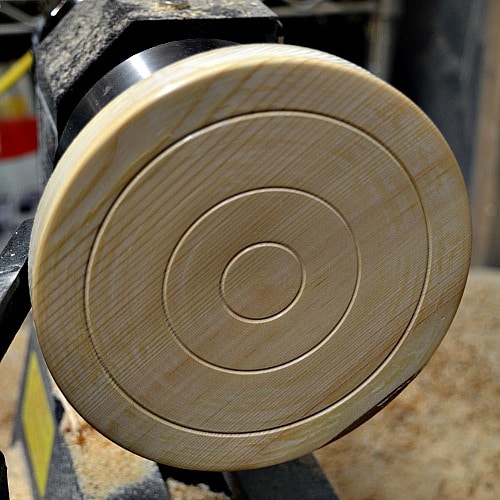
This is the point to add decoration or texturing to your trivet. On the larch trivet I added three circles using the tip of my bowl gouge to make them. Your creative flair shows up at this point. Fancy or plain is entirely up to you. I tend to go fairly simple letting the grain of the wood be the main feature. Your customers will have a variety of tastes so feel free to experiment and see what feels right for you and your customers.
Adding a Profile on the Trivet
At this point you can determine the shape of the side of your trivet. On the larch trivet I turned a straight edge. You can see this when I show parting the larch off of the lathe below. On the cedar trivet I wanted a curved profile. I think this will make it easier to pick up the trivet when there is a hot serving dish on it.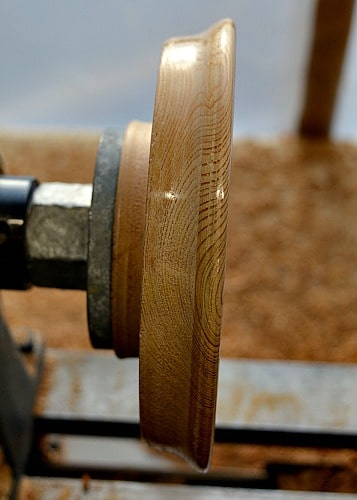
At this point you should sand and finish your wood trivet. My standard process for sanding is to move from a coarser grit, depending on how good the turning is, to 800 grit as the finest. I’m finishing these wood trivets off with carnauba wax. You will have to sand and finish the back of your trivets off of the lathe.
Part the blank off the lathe
Use a thin parting tool to remove the blank from the lathe. Remember how deep your screws on the face plate went into the wood. When turning the cedar board I hit the screws when I was parting off. In this case I had a large amount of wood on the underside of the blank.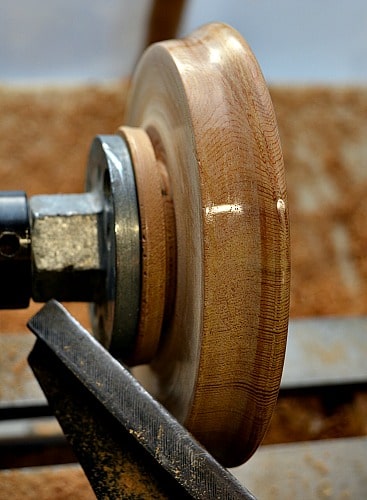
I wanted to turn off the back of the trivet on the lathe. To do this I created a jig that would hold the trivet in place (by using the tail stock) and then most of the rough wood on the back could be removed.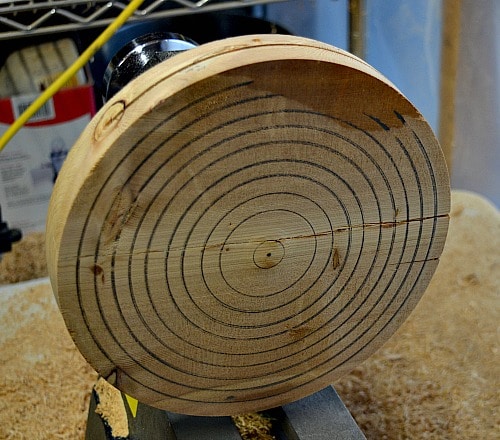
I mounted another board on a face plate. Then I smoothed the face fairly flat. Using a pencil I marked a series of circles about half an inch apart. This will make it easy to center the cedar wood trivet.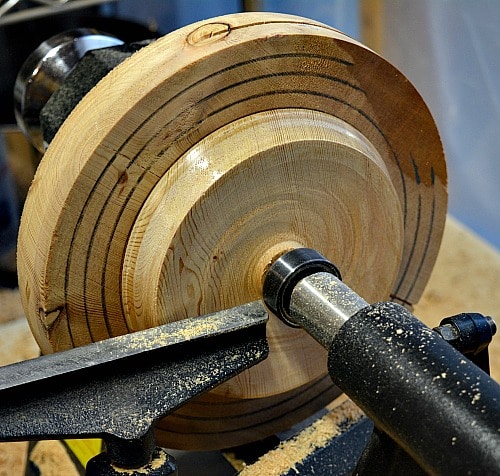
I used the tail stock to hold it in place and centered the trivet based on the circles. With everything firmed up I removed a lot of the excess wood and was left with only a little clean up. The final result looks good.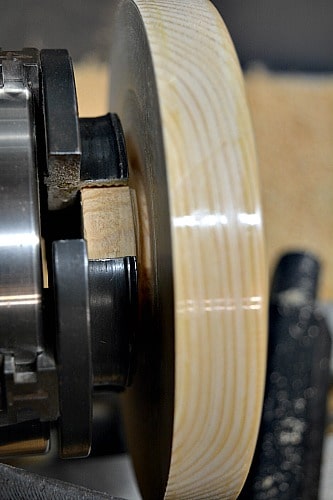
With the larch trivet I was able to part off of the lathe because I had more wood depth to work with. The trivet came off of the lathe easily with just a nib to be cleaned up.
Final Touches on the Trivet
Sand and wax or finish the trivet as you see fit. I did my usual sanding procedure to 800 grit sandpaper. On the trivets I used carnauba wax as the finish. I realize that these will get a fair amount of use with hot and sometimes dirty pots so a glossy finish just didn’t seem appropriate to me.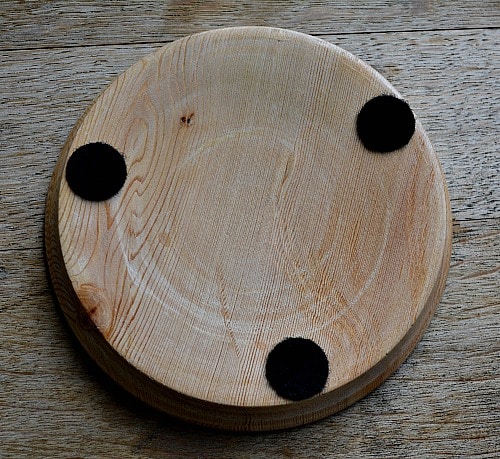
The last touch is to add three felt pads to the underside of the trivet. You could turn small feet and attach them if you wanted to. The current wood trivets that I use have 4 legs. While it looks pretty, if they lose a felt pad, or are placed on an uneven surface they wobble. I put three felts on my trivets and they will be very stable. I remember from High School Geometry that three points describe a plane. So three points will be more stable than four. Make sure you place the feet fairly close to the outside edge of the wooden trivet.
Turning For Profit
Turning a kitchen wooden trivet is a great way to help out in the kitchen. For more kitchen turnings you can check out the projects listed here. If you would like similar turning projects here are three to choose from.
Turn a lid for a Mason canning jar. This uses the same skills as for a trivet but it is not as large. These lids are a great way to add charm to your Mason jars as they are used for storage in the kitchen.
Make a shawl pin. This project uses both face plate skills to make the ring and spindle turning to make the pin. Combined they create a great way to hold a shawl together. It think the two are a great combination.
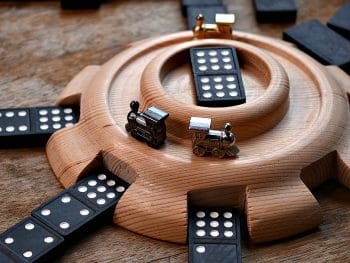
Just for fun, turn a station for the game Mexican Train Dominoes. It does require a little bit more than just turning but it creates a great center piece that makes the game more enjoyable.
I hope you have enjoyed this little turning project. Please let me know in the comments below how your trivets have turned out!


Thanks for sharing your experience and expertise, Robin. As a novice turner, I appreciate the assistance, time and effort you have taken to develop your site and your sharing of your life experience.
I look forward to your next offering!
Cheers
Eric Judd
Thank you! I’m glad you are enjoying the projects.