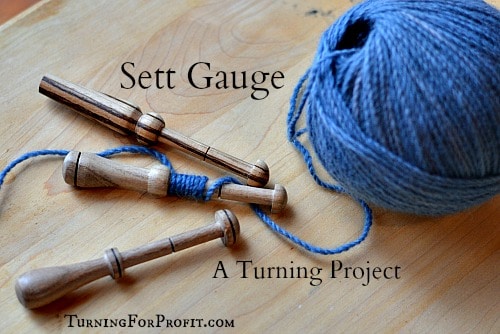
Sett Gauges – A Turned Fiber Tool
This is a little turned tool that fibre artists love. A wooden sett gauge is a great way to showcase wood on a smaller scale. Small and delicate it shows off the wood and your skills as a turner.
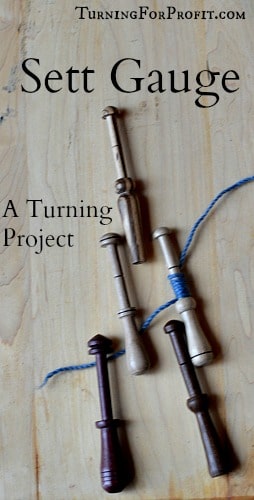
What is a Sett Gauge
A sett gauge helps you work with yarn. The tool is 2” long with a 1” burn mark in the center. If the wool is bulky use 2”, if the wool is thin then measure 1”. Wrap the yarn on the tool side by side. You only want one layer of yarn. When you reach your mark unwind the wool counting the number of wraps. For example if you counted 20 wraps per inch then to “Sett” a tabby warp on a loom you would use 10 threads per inch (20 / 2).
Sett gauges are easy to turn. I used only three tools, a roughing gouge, parting tool and a skew chisel. Using pen blanks, small pieces of wood from the shop, or even small branches, makes sett gauges inexpensive to produce. I used pen blanks for my gauges.
Sett Gauge Design Considerations
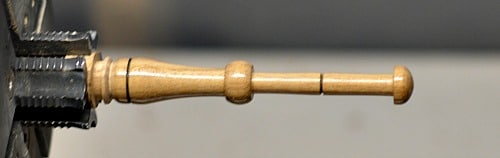
The Sett Gauge needs to be accurate where you are measuring the yarn. The dowel in the middle should be smooth so as to not catch the yarn. It does not need to be a precise diameter all the way along. The top decoration holds the yarn on and the bottom portion is the handle. These sections can be turned any way you like. Your confidence at the lathe will determine how thin and what extra features you want to show off on your sett gauges.
One key item to remember is that a sett gauge works with yarn. You want your final product to be very smooth with no rough spots to catch the yarn on.
Sett Gauge Turning Process
-
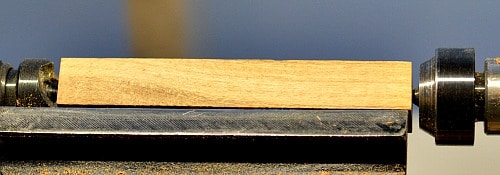
Turn the blank round between centers.
Put a drive spur in your head stock, and a live center in your tail stock, then mount your blank between them. If you are turning more than one gauge this is the point to turn all of your blanks round.
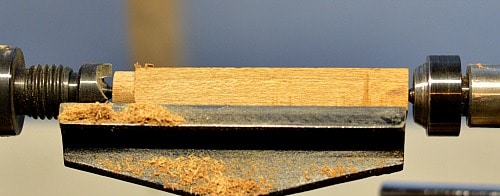
I used a 1/8th inch parting tool to create a tenon on the blank. The parting tool allows me to get very close to the drive spur as I am forming the tenon. I then used a roughing out gouge to turn the rest of the blank round.
-
Set up the blank in a multi jawed chuck
Remove the drive spur and mount your multi jawed chuck on the lathe. Use the tail stock to center and hold the blank in place as you tighten your chuck. If you don’t have a multi jawed chuck then you can turn your gauge between centers. You will just have to finish the top and bottom of the gauge by hand.
-
Mark the sections of the Sett Gauge
Here is where you plan out your sett gauge. You need basically a handle and 2” to roll the yarn onto. Since even pen blanks come in different lengths you are welcome to try different features and handles.
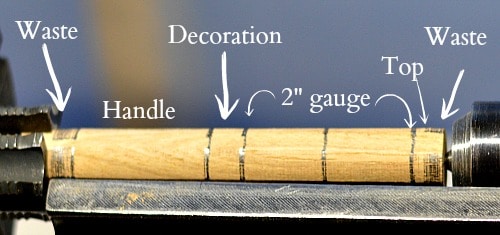
As I use a skew chisel to part the gauge off of the lathe, I turn away a portion of the top of the blank near the head stock, with a parting tool, so that I have enough room to angle the skew chisel in later.
-
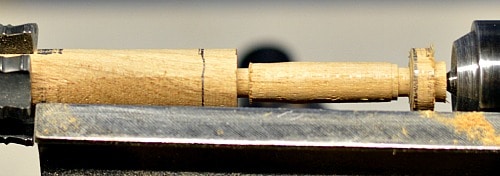
Turn the 2” section for the yarn.
Determine where on the gauge you want the 2” section. I would use a ruler to measure off the section. Take your parting tool and mark the inside of the section near the top of the gauge. Take some calipers and determine where 2” is farther down the blank. You may want to sneak up on this with your turning as you can always take wood away but it is not so easy to add back in.
If you were doing a production run of gauges I would put two nails in a piece of wood. Use your grinder to sharpen them into points. Measure the distance and bend the nails to be exactly two inches apart. Then very gently with the nails resting on your tool rest lightly touch each nail to the blank. This will give you exactly 2”.
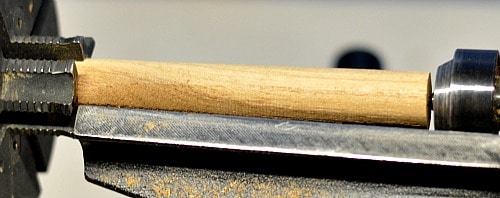
Use the parting tool and take the blank down to between 1/4” and 3/8” in diameter. Then use a roughing gouge or your skew chisel to remove the middle section of wood. When you are close to the right diameter use your skew chisel to smooth everything out.
Measure the 1” midpoint on the gauge. Use your skew chisel to make a small V-groove at this point. Then take some wire and friction burn a black line at this point.
-
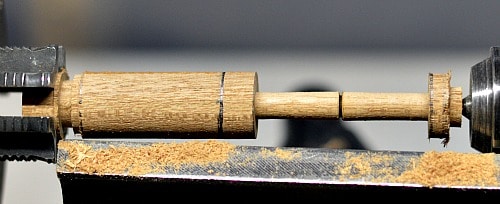
Shape the rest of the gauge
Turn the remaining portions of the Sett Gauge remembering that it is a hand tool and must not catch the yarn. Your handles can be any shape you like. Fiber artists have different preferences and each will select what feels good in their hands.
Add decoration as you wish. I added a burn line as a decoration on mine.
-
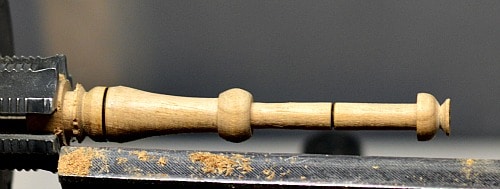
Shape the top of the sett gauge
Even though the blank is supported with the jaws of the chuck I leave the tail stock in place until the last possible moment. It just gives your turning extra support. When working 5 or 6 inches from the chuck jaws you can break your work or get chatter marks on your turning, without support.
Remove the tail stock from supporting the blank. Take very fine cuts with a skew chisel. You may need to support the blank with your other hand for the final shaping.
-
Sand the sett gauge on the lathe
Depending on how well it went with your skew chisel and your shaping you can start with a finer grit of sand paper. However, if you don’t like the feel of any aspect of your gauge use 80 or 120 grit sand paper to smooth it all out. Trust your fingers to spot the imperfections. Your eyes usually won’t see them. Move on to 220, 320, 400, 600, and 800 grit sanding. Remember to wipe the gauge down with a paper towel or soft cloth between each grit.
This is where I apply the wax to the gauge. I used carnauba wax.
-
Part the gauge off of the lathe
I use my skew chisel to do the final shaping of the decoration as I part the gauge off of the lathe. This gives me a smooth finish. Use your free hand to “catch” the gauge as it drops off of the lathe.
-
Sand off the bottom of the set gauge
You are almost done. Sand the top portion of the decoration going through the grits in progression you did in Step 7. Don’t forget the wax.
So that is how I turned a Sett Gauge. A great little project that gets easier each time you turn a new one.
A Sett Gauge goes well with a wooden ball winder and could make a nice set if you matched the wood and the decorations.
Let me know how you make out. I would love to see what you have turned.
Thanks, Robin.


Great little project. You always give very good instructions and explanations for each step in your projects.
I have one question: How did you evaluate if there was a market for the Fiber project in your area?
Thank you for your compliment. I am always looking for turning projects. I have also spun fibers and needed the sett gauge. In any craft there will be people who appreciate artisan work. Turning a Sett Gauge, or Ball Winder, or Needle Case, lets you create a product that will be appreciated by someone in a different craft. I would not base my turning business on one product but would look for niches where I could promote my turnings. Fiber arts is one area, while kitchen utensils would be another. Thank you again for commenting.