• Menu
  • Skip to right header navigation
  • Skip to main content
  • Skip to secondary navigation
  • Skip to primary sidebar
  • Skip to footer

Before Header

  • Facebook
  • Instagram
  • Pinterest
  • RSS
  • Twitter

Turning for Profit | Woodturning | Lathe |

Helping woodturners make more money

  • Blog
  • Projects
    • Library
      • Turned Bowls
      • Christmas Projects
  • Inspiration
  • Make Money
  • Woodturning Techniques
  • Workshop Expertise
    • Splinters
  • Shop
  • Blog
  • Projects
    • Library
      • Turned Bowls
      • Christmas Projects
  • Inspiration
  • Make Money
  • Woodturning Techniques
  • Workshop Expertise
    • Splinters
  • Shop
You are here: Home / Inspiration / How to Turn a Canning Lid Lifter
A canning pot, jars and lids sitting on a counter

How to Turn a Canning Lid Lifter

By //  by Robin 1 Comment

divider
This post contains affiliate links. If you use these links to buy something we may earn a commission. Thanks.

A shelf full of canned fruits and vegetables
Canned vegetables in front of a canning pot
a wood turned canning lid lifter

A shelf full of canned fruits and vegetables

Turn a Canning Lid Lifter

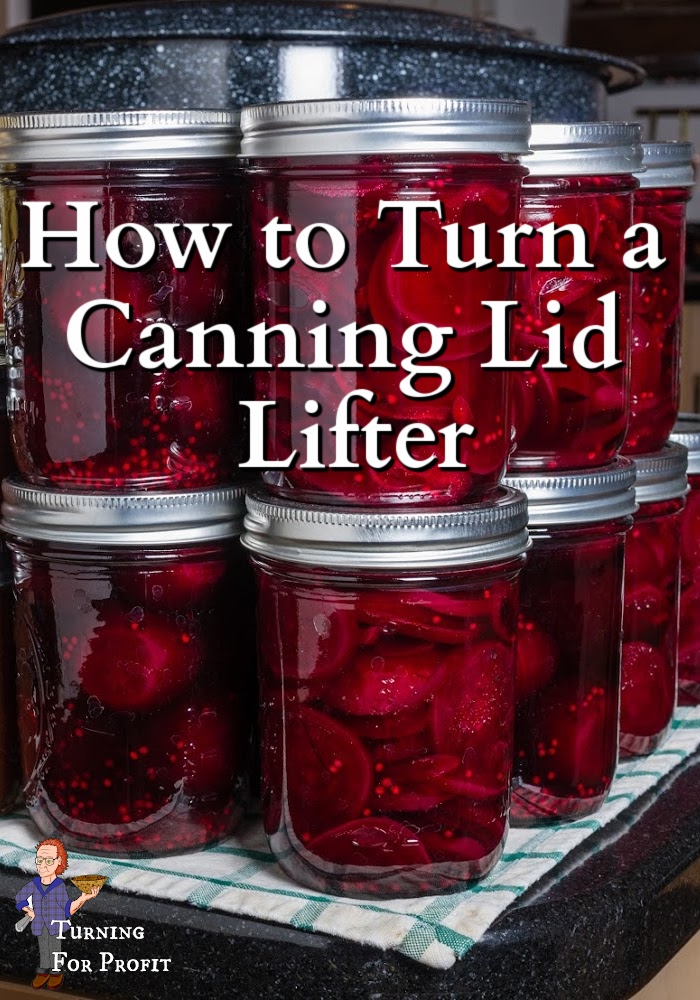
Canning season is upon us.  Here’s a quick wood turned solution to safely get those canning lids out of hot water.  Turn a few extras and save them for the ladies at the farmer’s market who make jams, jellies, and pickled garlic during canning season.  They make really good barter items.  Trust me.


Are you looking for other kitchen utensils?  Here are two projects: Turning an Oatmeal Spurtle, and Turning a Honey Dipper.

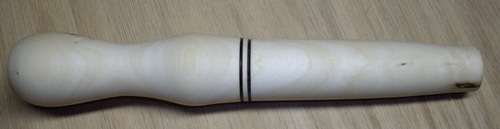
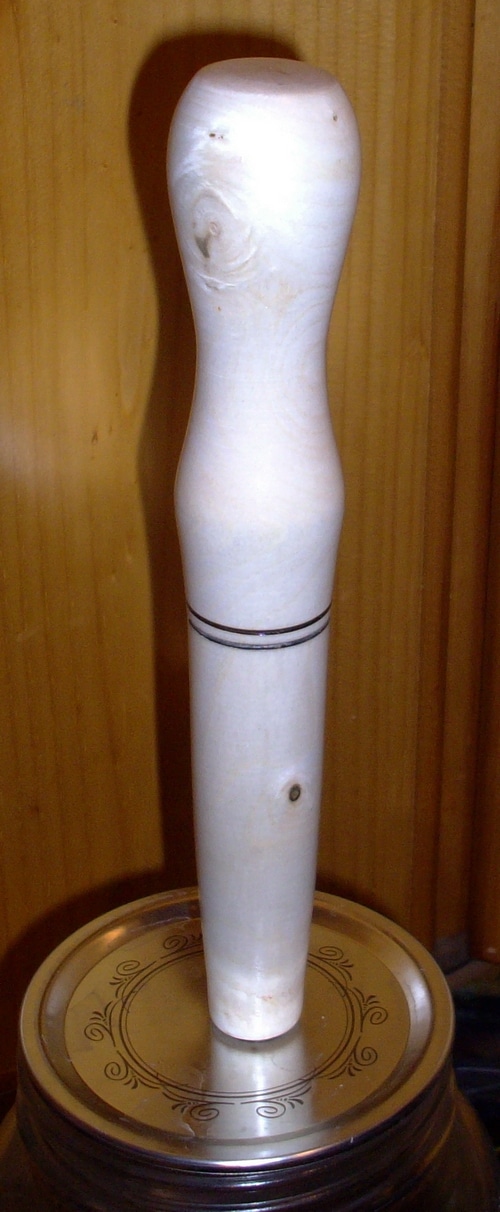
This Canning Lid lifter is a straight forward project that is easy to turn.  Pick a nice straight piece of wood at least an inch in diameter.  Turn a spindle 6 to 8 inches in length.  Make a knob on one end to make it easy to hold and drill a small recess on the other to hold a rare earth magnet.  I used the same tools on this project as I did on the Wine Stopper project.


Step 1 – turn the wood round

A straight piece of Vine Maple.

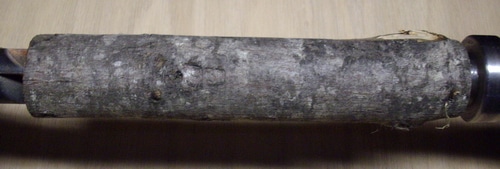
Put your wood between centres and turn it around.  For this project, I picked a piece of Vine Maple that was harvested last fall.  The total length is about 8″ and about 1 1/2″ in diameter.  Turn the whole piece around so that you can see what your design options are.  I used the spindle gouge to do this.  Most branches have some bend so the initial turning shows where you might have thinner spots.

The branch is turned around.

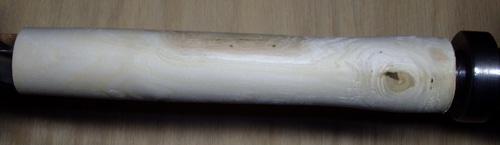
The dark spot on the wood is the cambium layer so I will have to turn that thinner for the final spindle.

Step 2 – shape the spindle

The spindle has been shaped ready for sanding

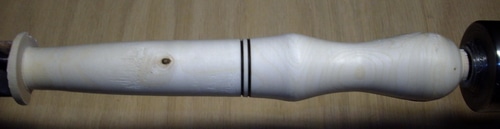
First I defined the ends with the parting tool.  Next, turn a nice top so that the lifter is easy to hold.  The bottom needs to be large enough to hold a 1/2″ diameter rare earth magnet.  So the wood should be about 5/8″ to 3/4″ in diameter.  In between the top and bottom is a free design zone.  I have turned a couple of bands for decoration and created a smooth flowing form for the spindle using the skew chisel.  I sanded from 200 grit through to 800 grit sandpaper.

Step 3 – insert the rare earth magnet

Spindle sanded ready for the magnet and finishing.

I sanded both ends of the spindle then used a drill press to drill the recess for the magnet.  The magnet is 1/2″ in diameter so a 1/2″ Forster bit made a great recess.  I also drilled a pilot hole for a 3/4″ screw that the magnet will stick to.  If you need to take the magnet out just touch the end to a fridge or stove and it will pop out easily.

Step 4 – finish the spindle

Lid Lifter finished and in use.

I used a water-based polyurethane.  Since it will be used in hot water during canning season select an appropriate, waterproof, finish.

This is a special use project that sure speeds up the canning process and keeps fingers from being burned when you take the jar lids out of the hot water.  Use the lifter to position the lid over the jar before putting them on.  The rare earth magnets are available from Lee Valley Tools, or Amazon.  Enjoy your canning season without hurt fingers.

Let me know what you’re turning and thanks for stopping by.

Canned vegetables in front of a canning pot

Each day I share a woodturning project on my Facebook page.  Join me there and get the turning project of the day, delivered to your Facebook homepage.


Filed Under: Inspiration, Projects Tagged With: beginner turners, blank preparation, local wood for turning, turning tips, wood turning

Related Posts:

You may also be interested in these posts:
Handmade with Care Stamp

7 Gifts for Men Made on the Lathe

Christmas Projects Title

Christmas Ornaments: Build Your Inventory Fast

Finished Niddy Noddy with yarn.

Niddy Noddy – A Woodturning Project

Wooden Kitchen Trivets are easy to turn and love to use.

Wood Trivet – A kitchen turning project

This cup holder extension will help you hold larger coffee cups in your car

Cup Holder Extension

Domino Train Station ready to go

Turn a Mexican Train Dominoes Hub Even If You Are a Beginner

Previous Post: « A Wood Turning Lathe Wood Turning Safety Tips
Next Post: Wholesale or Not Wholesale That is the Question. a pallet of boxes »

Reader Interactions

Trackbacks

  1. Jar Lid: A Woodturning Project - Turning for Profit says:
    September 13, 2016 at 4:50 pm

    […] project would be a good complementary product with the Kraut Pounder, and the Lid Lifter.  These three focus on canning season and could also be combined with turnings for the kitchen, […]

    Reply

Leave a Reply Cancel reply

Your email address will not be published. Required fields are marked *

CAPTCHA
Refresh

*

Primary Sidebar

Welcome

About me:

Welcome to the Turning For Profit Community! I'm Robin. Turning for Profit is about helping you find hope and joy in your woodturning hobby. It's about projects that fill your inventory and inspire your creativity. It's business help to get you set up and making a profit quickly. If you've always wanted to work from home playing with wood, let me help you realize your dream of Turning for Profit. Read More…

Help for Beginner Woodturners

Learn to use 5 different wood turning tools, with confidence, while you turn 7 projects, building your wood turning skills sequentially.  Includes tips and ideas for marketing your wood turning, when you are ready to move forward.


Footer

Inspiration:

You don’t have to be good to start.  You just have to START to be good. — Joe Sabah

Handmade with Care Stamp

7 Gifts for Men Made on the Lathe

7 Gifts for Men Made on the Lathe
Christmas Projects Title

Christmas Ornaments: Build Your Inventory Fast

Christmas Ornaments: Build Your Inventory Fast
Finished Niddy Noddy with yarn.

Niddy Noddy – A Woodturning Project

Niddy Noddy – A Woodturning Project
  • Start Here
  • About me
  • Contact
  • Privacy Policy
  • Terms and Conditions
  • Disclosure

Site Footer

  • Email
  • Facebook
  • Instagram
  • Pinterest
  • RSS
  • Twitter

Copyright © 2023 · Mai Lifestyle Pro On Genesis Framework · WordPress · Log in