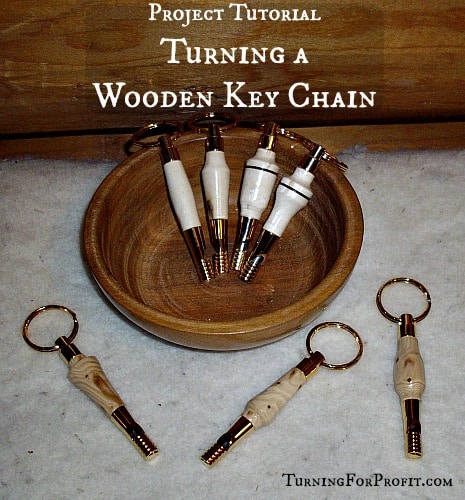
A turned wooden key chain, easy and quick, just follow these steps.
I found seven whistle wooden key chain kits in my workshop. So I decided that it was time to turn some key chains. This is not a large project and small pieces of wood from other projects would be suitable. The challenge with a kit project is that you need to recover both your turning time and the cost of the kit. That can make it a challenge is you are going to sell a product at a wholesale price.
Initial Materials

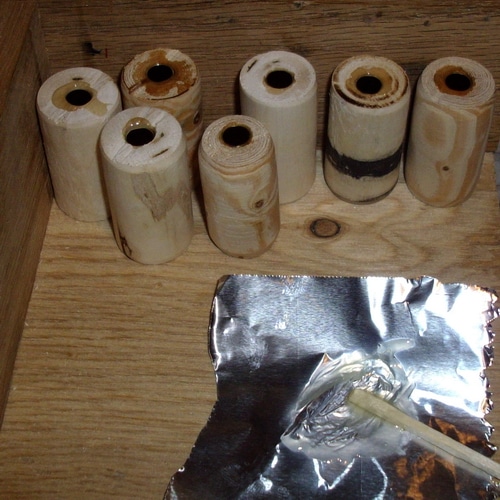
There are a lot of wood turning kits available that require a turned piece of wood and the hardware in order to create a great looking product. So this is what I’ll be working with. A stick of larch and of vine maple. Since I will be drilling through the center of the wood there will be no risk of cracking. These branches have been in my shop for awhile. The hardware consists of a brass tube, a swivel end and split key ring, and the whistle end.
Step 1 – Turn the wood round
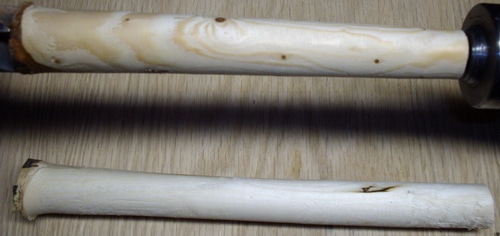
Turn the wood you are using round between centers. This will show you if there are any thin portions because of curves in the branches. These two look nice and thick, ready to go.
Step 2 – Mark the wood
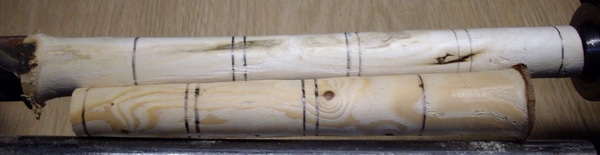
Measure the brass rod and mark out a length on your wood that is a bit larger. You will sand the body down to size later on. Remember to leave enough room to cut the wood between the lengths of the key chain body. Consider the figure and grain of the wood and place the bodies over the knots and grain that will add character to your key chains.
Step 3 – Part the sections
Using a parting tool cut between the sections. Don’t turn it too small or it will break. You want to have a square end on the body that is just a bit larger than your brass tube. A square end will also sit better on the drill press. True up the sections so that they are equal diameters for each body. This will make it easier to trim in the next step.
Step 4 – Cut the sections
Place the wood on a bench hook and use a back saw to cut each end of the body to size. You might want to rough sand the end to make it smooth and flat for drilling.
Step 5 – Drill the bodies
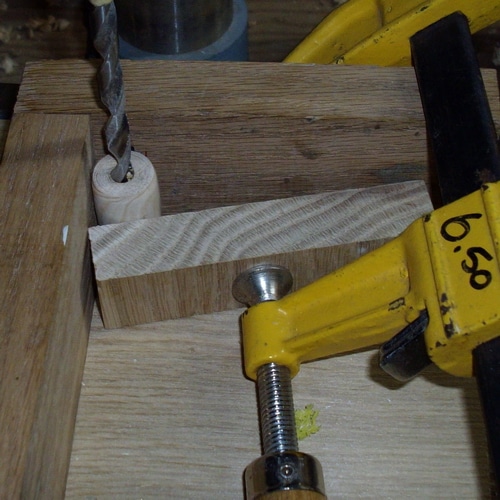
Clamp the body to a square (right angles) jig. Mark the center of the body. Drill through the center of the body with the appropriate drill. The brass tube should slide easily into the wood but not rattle around either.
Step 6 – Buff the brass tubes
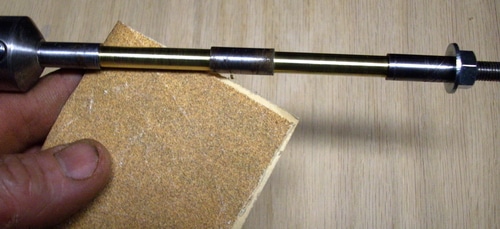
Insert the brass tubes on your pen mandrel. Turn the lathe on and sand the brass tubes a bit with a medium grit sand paper. You just want to rough up the outside of the tube to enable the epoxy to get a grip on the brass.
Step 7 – Epoxy the tubes and insert the tubes
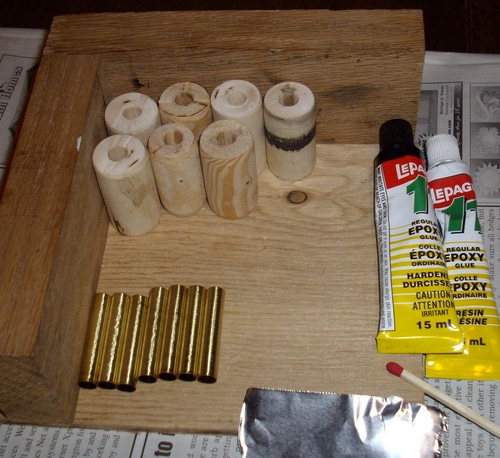
You need a two part epoxy to bind the metal and the wood together. Mix the two epoxies together on the aluminum foil using a small stick like a match, then place some mixed epoxy on each tube. Slowly insert the brass tube into the wood and twist it as it is inserted. Some of the epoxy will slide out of the hole. Make sure that the end of the brass tube is clean so that the ends(whistle and ring) will be able to be inserted.
You need to let the epoxy sit before you turn the wood. Follow the manufacturer’s instructions on drying times for the epoxy that you are using.
Step 8 – Turning the body
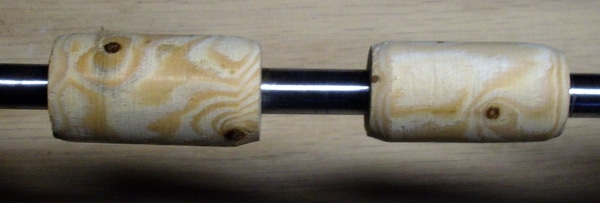
Once dry, insert the wooden body onto your pen mandrel. I have a standard mandrel and was able to turn two bodies at one time.
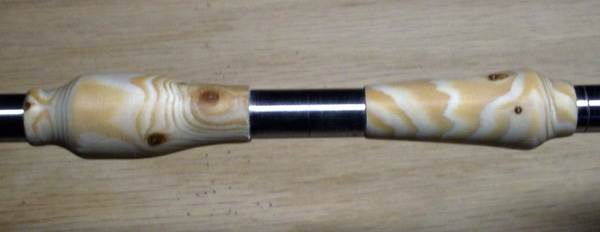
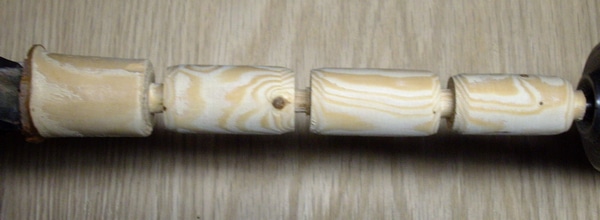
The shapes you turn are completely up to you. Have fun and experiment with different cuts and shapes. Remember that a key chain will be carried in a pocket so you might not want to be too crazy with a large body. But who knows, let inspiration strike.
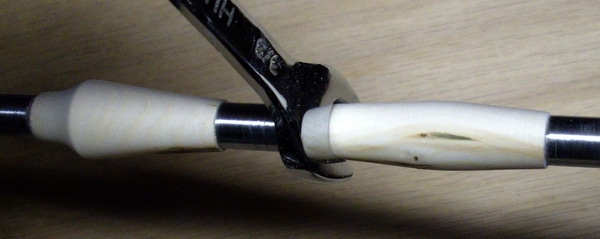
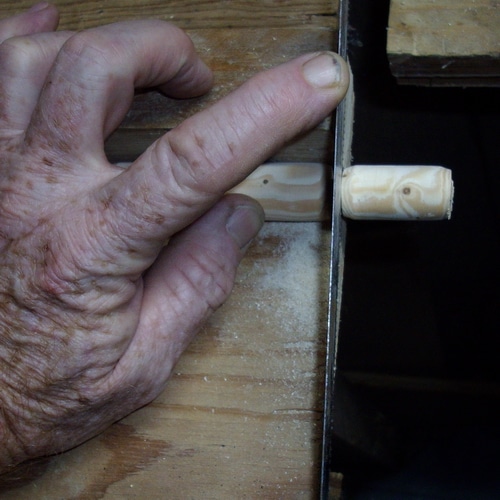
The only trick on the wooden key chain is making the end of the body match up with the brass that will be inserted into the tube. I used my calipers to measure the brass whistle then I selected a wrench that was just a bit larger. By making it larger I can sneak up on the right diameter so that there is a smooth transition between the wood and the brass components. Turn the end of the wood close to the right diameter then hold the wrench in one hand and continue turning with the other. When the wrench slides over the wood you have reached the right size. Trim the remainder carefully or sand down to the right size.
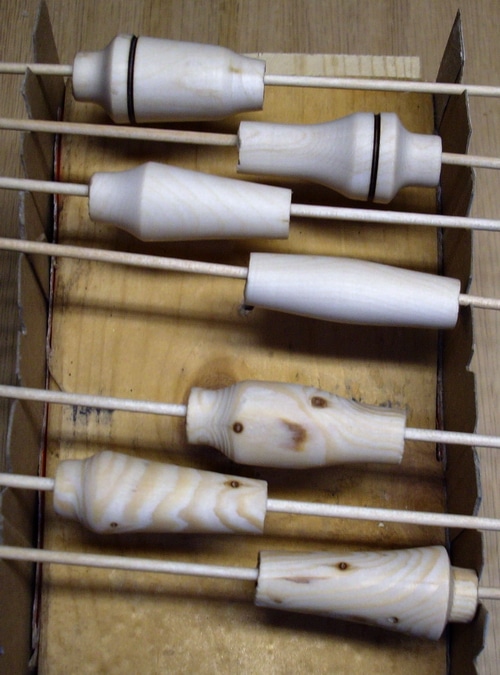
Once you have the right shape take the bodies off of your mandrel and sand the ends flush with the brass tube. I used 80 grit paper on an orbital sander. Keep the body at a right angle to the sander. You can see the different shapes that I turned. The dark line is formed by cutting a small groove with a skew chisel and then holding a wire in the groove until the friction burns the wood.
Step 9 – Finishing the body
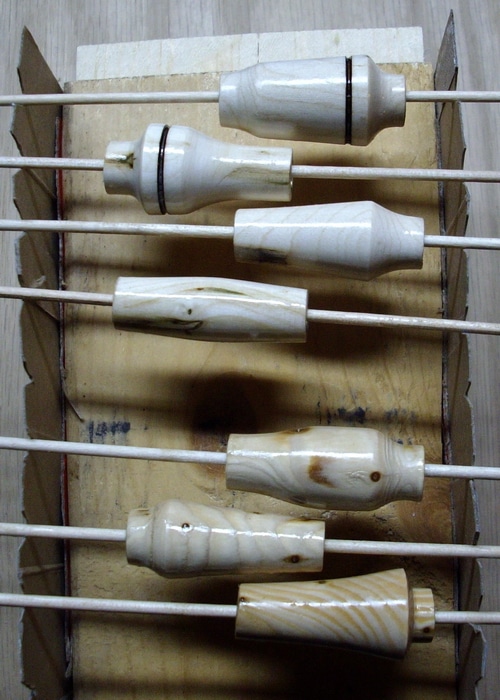
Apply the finish you have chosen to the body. I used a water-based poly-urethane, hence the set up shown here is needed to allow the bodies to dry. If you used carnauba wax I would apply it while the bodies are still on the mandrel. Once the bodies are finished, then you need to attach the swivel and whistle to the key chain. I used my woodworking vise to tighten the pieces together. Take your time to ensure that the pieces come together nice and straight. Do be careful attaching the split ring to the wooden key chain because you can scratch the brass fittings if you are not.
Well here are the finished Wooden Key Chains. I think they turned out nicely. A straight forward project with a few more steps than usual.
Each day I share a wood turning project, tip, or inspiration, on my facebook page. Join me there and get the turning project of the day, delivered to your Facebook homepage.


wonderful post.Never knew this, regards for letting me know.
I love the valuable info you supply in your posts. I like your writing style.