As I write this we are on the cusp of 2017. A New Year and a new season for turning. To help you get things together for the New Year, and anytime you need inspiration, here are 5 steps or tips you can take to prepare your shop for action.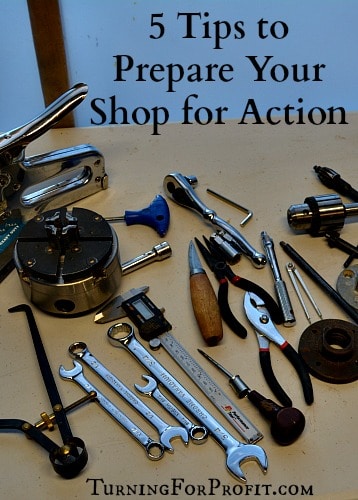
Preparation
Get yourself lots of boxes (amazon boxes come in lots of different sizes) and containers. I like mixed nuts and the plastic jars they come in can hold a lot of different items from my shop. They are also clear making it easy to see the contents. Make sure you have a pen and paper to make notes with and a marker to label different containers.
Take a moment to look at the organization of your shop. Can you find a spot to build or place some shelves? Why? Because shelves that are accessible and with containers that are labeled facilitate activities in your workshop. One woodturner added shelves behind his lathe then covered the shelves with a drop down sheet. This helps with storage and will prepare your shop for pictures.
-
Sweep up around your lathe.
Take the time to sweep off your lathe and your other woodworking tools. Don’t forget behind the lathe and the floor as well. Shake off and clean up your fatigue mats as well. Put any offcuts that you find in a box. Dust off any tools or supplies found on the floor and put on a bench. (You might have to clean the bench first!)
Okay there may be some of you out there who do not need to sweep the shavings away from your lathe. You are also the ones who probably don’t need this reminder, and yes you can gloat over the rest of us turners who don’t keep our shop as spotless as yours. All kidding aside every turner will be different so take what you can use to prepare your shop, and ignore the rest.
Put the shavings into garbage cans or plastic bags and save them for your garden. Remember to wear a dust mask as you’re sweeping up. There is a woodworking law that states that any tool or supply dropped will immediately roll to the most awkward spot in your shop. Therefore you are likely to find some of these in your sawdust. If you have small screws or nails in your sawdust use a magnet to fish these out. This is easier than trying to pick them out by hand. Rare earth magnets work well as do cow magnets from a farm supply store.
-
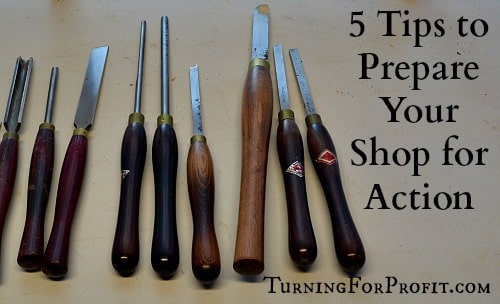
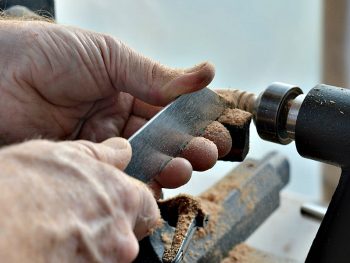
Clean and organize your turning and other tools
Put all of your turning tools in one place. Examine them to see if they need sharpening. (Trust me, they do!) Sharpen your tools. Wax or oil your tool handles to preserve their longevity. Make sure the bars are all secure in the handles and secure the ferrules if needed. (What is a ferrule? A ferrule is the brass or copper sleeve that is between the wooden handle and the metal part of the tool.)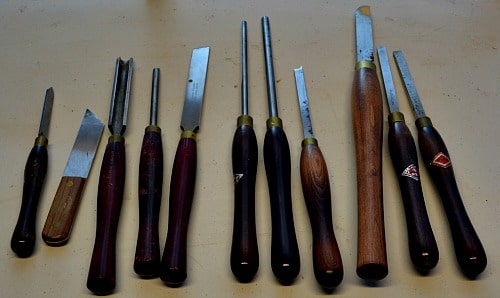
Are there any tools that are missing? If you really don’t know where the tool is then add it to a purchase list. (Remember the pen and paper?) Do you need to replace any tools? Think of safety and utility here not just expanding the tool selection of your shop.
Organize your tools so that you know where the tool is along with the keys and extra bits to make it work. This is a key way to prepare your shop so that you are not interrupted in a project trying to find the key to the drill press. As an alternative you can buy extra chuck keys at your local hardware store and keep a second key in a specific location.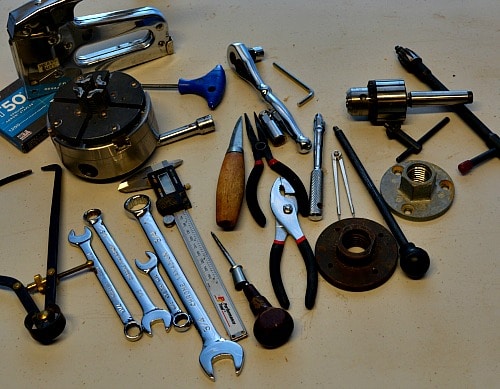
Any electronic tools should be checked for batteries and that they are working. An air compressor helps to blow out any tools that are covered in dust. Put the battery numbers on your purchase list so that you always have a spare battery on hand.
Use the plastic containers to organize your hardware supplies like screws and nails. I generally sort into type of hardware; wood screws, metal screws, nails, etc.
-
Organize your wood and offcuts
There is always a use for a small piece of wood, even as the nose on a turned snowman! So gather up all of your small blocks of wood. This is where you can use the amazon mailing boxes and your marker. If you know the wood species then attach a label or mark it with your marker. Do a rough sort into shapes and sizes. If you don’t know what woods you have then you limit the projects you can turn.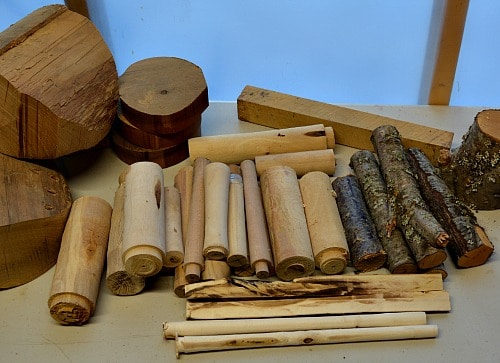
I just organized a small section of my wood and I have lots of blanks that would be perfect for lidded boxes. There were a few blanks for honey dippers and a couple that would make spurtles as well.
Note down on your paper projects that you think of as you sort your wood. You pick a piece of wood up and think this would be perfect for a garden dibbler and you know who would like it too. So mark down the project, the person, and the wood so you can find it later.
-
Examine your power tools
If you haven’t used your lathe in a while do a complete maintenance check to ensure it is working well and properly. You can also tune up your table saw, band saw, and drill press. Use an air compressor to blow out all of the sawdust. (Wear a dust mask.) Check all adjustments and handles to make sure they are working correctly.
This is the time to check all electrical power cords. Make sure that rodents or other things haven’t damaged your cords. Setting an anvil or the foot of your table saw on a power cord can crimp the cord and that is the spot it is likely to break. You don’t want to receive a shock or have a tool that isn’t working. You want to prepare your shop so that it is a safe electrical environment. It is so easy to ignore all of the power cords and the condition that they are in.
Add lubrication where appropriate and wax down all working metal surfaces. This will cut down on the buildup of rust and make everything move and slide well. Having your work stick as you slide it into a power tool is not a good idea.
-
Prepare your shop for safety
While this is an obvious thing to do it is so easy to put it off when you have little projects to work on. Accidents will happen and you want to be prepared. It is a good idea to review your shop on an annual basis from a safety perspective. You are the most important part of your shop. Make sure you are taken care of.
- Purchase a first aid kit or update the one you do have. Check the fire extinguisher for pressure. Once you find them then put both the first aid kit and the fire extinguisher in a conspicuous place.
- Specifically for turning do you have dust masks or filters for your respirator? Is your face shield cracked or dirty? Don’t take chances; add a replacement face shield to your purchase list. Do you have fatigue mats on the floor anywhere you will be standing for more than a few minutes?
- Is it safe to walk around your shop? Remove all tripping hazards including extension cords running all over the place. Seriously it would not be very expensive to have an electrician put a few more outlets in your shop and it would make it much safer. Tripping in your shop with sharp tools and power tools is just a bad idea.
- Consider the lighting in your shop. LED lights are very affordable and can be hung almost anywhere in your shop for ambient lighting. The adjustable and magnetic LED flashlights can help you with spot lighting when you are turning a hollow form, finishing a project, or trying to see a spot that is in the shadows.
- Finally make sure your wood storage is secure and won’t fall over on you if you are storing larger turning blanks or sheet goods.

5 Tips to prepare your shop
- Sweep up around your lathe.
- Clean and organize your turning and other tools
- Organize your wood and offcuts
- Examine your power tools
- Prepare your shop for safety
These five tips will help you prepare your shop for a year of activity and production whether you are turning as a business or as a hobby. What do you do to prepare your shop? I know that my main shop is way too cold for much of anything right now but I’ve got a plan for March and April when the weather finally warms up! I am always looking for tips and tricks to share so if you have something that really helped you get organized leave a comment and share your idea.
Turning For Profit
If you have any questions about turning, or the business of turning, please leave me a comment at the bottom of the page.
These posts are for you, the woodturner. If you like production or articles related to the business of turning then please sign up for the Turning For Profit newsletter. Generally it comes out once a week and has links to the current articles, a bit on what I am up to, and usually a question for your response. You can sign up on the right side bar or just a little lower on the page.
I love wood turning and sharing with you. You can follow me on Facebook as well. Thank you for joining me on this woodturning journey. Have fun and remember to turn safely.


I had to look up what a cow magnet was being a city boy. Thanks for taking the time to share your woodturning thoughts and Happy New Year. Check out my woodturning videos if you have not visited my YouTube channel.
Mike Peace Woodturning.
A cow magnet is a smooth magnet that is feed to a cow so that any metal object the cow eats is kept with the magnet rather than going through the cow’s digestive system and causing problems. Thanks Mike. I’ll take a look at your videos.