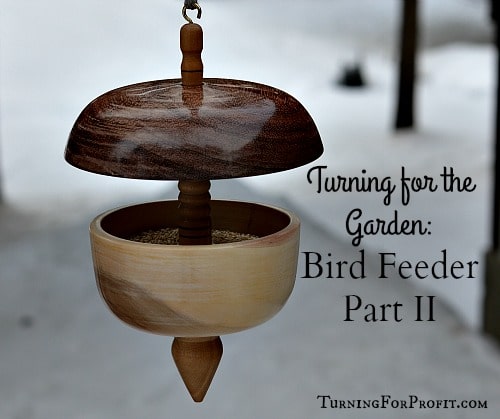
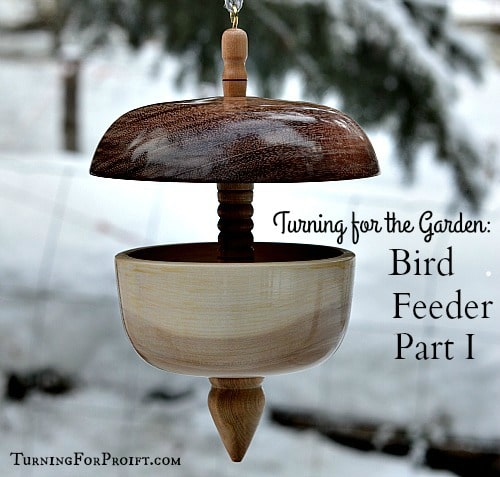
Bird Feeders – Turning Project Part II
This is the second part on how to turn bird feeders. Part I showed you how to turn the central dowel that will support the two bowls. Part II is about turning the feed bowl and cover bowl to complete the bird feeder. Put the two together and you get an awesome bird feeder.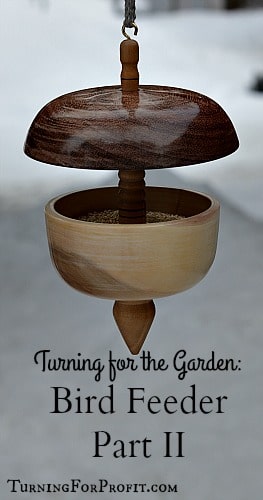
Design consideration on the bowls for the bird feeders
If you turn two small bowls and put a hole in the bottom you will not have much wood to support the bowl. The center dowel will hold the bowl on the feeder but it probably would wobble and lean from one side to the other. If the bottom of the bowl was the same thickness as the wall of the bowl you only have 1/4″ to 3/8″ thickness of wood to support the bowl. To prevent this I turned a central cone for each bowl.
The feed bowl will be heavier because of the feed, and need more strength in the center for its support. I only pared down the cone about 1/2″ from the total depth of the bowl. This should give the feed bowl lots of support and prevent the bowl from breaking. The feed bowl is 4 3/4” in diameter and 2 1/4″ deep. I chose a light colored wood for the feed bowl but I don’t know what species.
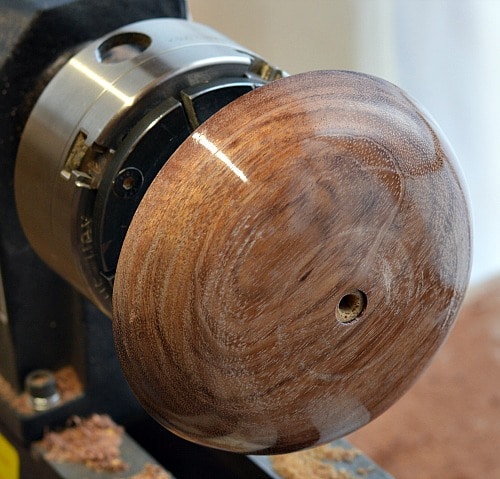
The cover bowl protects the seed and shouldn’t receive as much tangential pressure as the feed bowl. Its’ cone is about 3/4″ in length which is half the depth of the cover bowl. The diameter is 5 3/4″ which is an inch larger than the feed bowl. That should give it enough protection. The cover bowl was turned out of purple heart wood.
I left the thickness of both bowls between 1/4″ and 3/8”. This will be an outdoor project and I wanted thicker walls as a result.
Turning process for bowls
Here I was caught up in turning and completing the bird feeders project as soon as I could. I missed a very easy way of starting the bowls and therefore had to work harder to achieve the desired result. So while my method did produce the desired result I took the long road.
This is the simplified process.
-
Attach bowl blank to a face plate.
Draw two lines diagonally on the bowl blank. Use these lines to center your face plate to the top of the bowl and attach with some wood screws.
-
Turn a tenon on the bottom of the bowl
Attach the face plate to the lathe. This is much more secure than what I did. Now you can turn a tenon on the bottom of the bowl.
-
Drill the hole in the bowl
Put your drill bit into a collet chuck and insert this into your tail stock. Bring the tail stock up to blank then advance the quill while the lathe is spinning. Remember to retract and remove the shavings frequently.
-
Turn the outside of the bowl
Use a bowl gouge to turn the outside of the bowl. Don’t turn the tenon off at this point.
-
Insert tenon into your multi-jawed chuck
Put the tenon into your multi-jawed chuck and attach it to the lathe. You can bring your tail stock up for support if you think that is necessary.
-
Turn the inside of the bowl
Use a bowl gouge to turn the inside of your bowl. Remember to turn the center cone and not make your bowl flat.
-
Turn a jig
Use a piece of scrap wood to turn a dowel that you can put the bowl on. Turn the feeder bowl first, which has the largest hole (3/4”) then you can turn the jig down to (1/2”) for the cover bowl.
-
Put the jig in the multi-jawed chuck and turn the bottom of the bowl
Take your time to get a snug fit. This will allow you to turn off the tenon.
-
Sand and finish the inside and outside of the bowl on the jig
Using the jig to support your bowl you can sand and finish both the inside and outside of your bowls. Completely finish the feeder bowl first before moving on to the cover bowl. I sanded all parts of this project from 220 through to 800 grit.
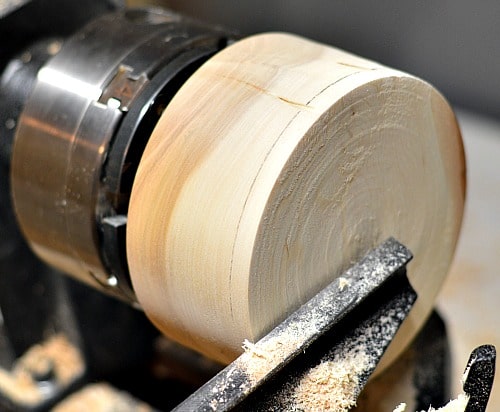
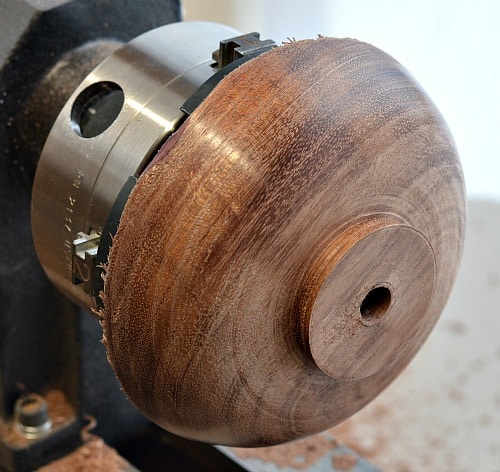
Turning the feeder bowl
Okay now you get to see what I did. I used a bowl gouge and scrapers for most of my turning.
I first turned the blank round between centers. (Again this is not the best way to hold the wood on the lathe, use a face plate. Next time I will too.)
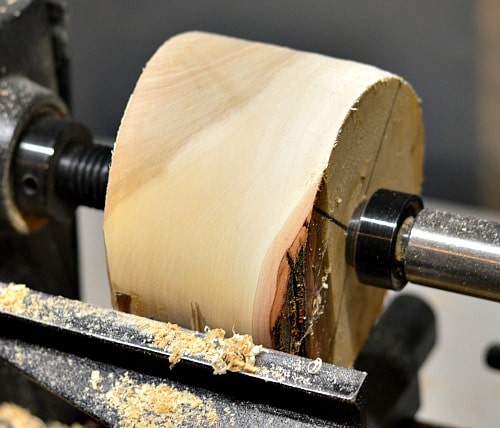
I worked hard to get a tenon formed on the blank between centers.
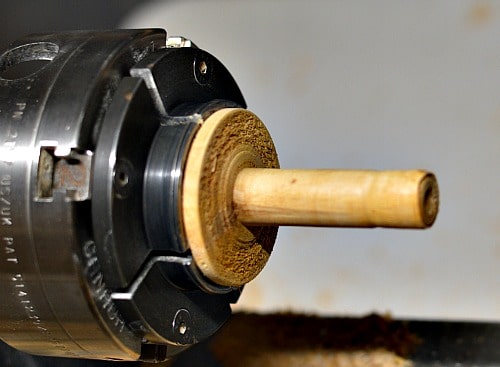
The blank gets turned around and chucked into my multi-jawed chuck.
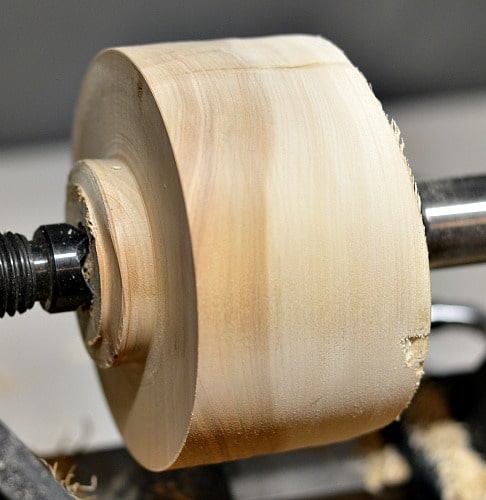
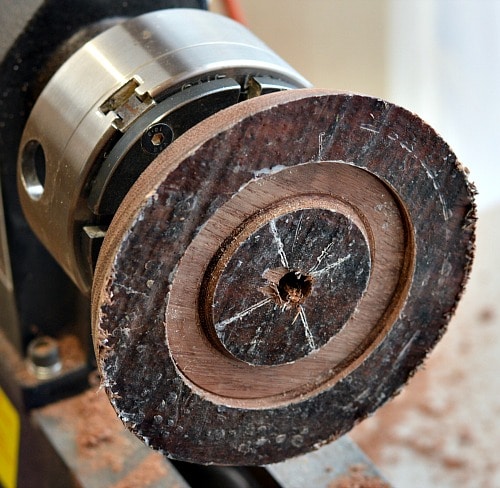
I smoothed the face of the bowl blank at this point. Then I realized how hard it would be to turn the outside of the bowl.
I turned a recess on this side to expand the jaws of the chuck into.
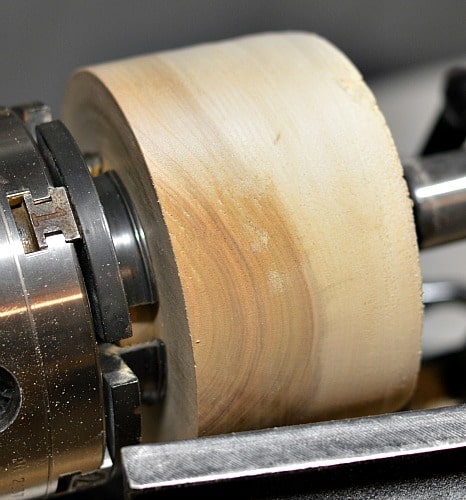
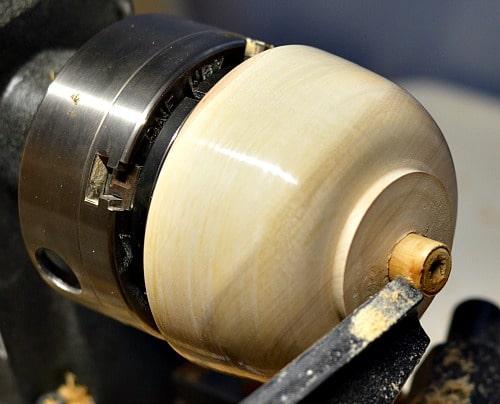
Reverse the wood again so that I could turn the outside of the bowl. (This could have all been done in one step if I had used a face plate.)
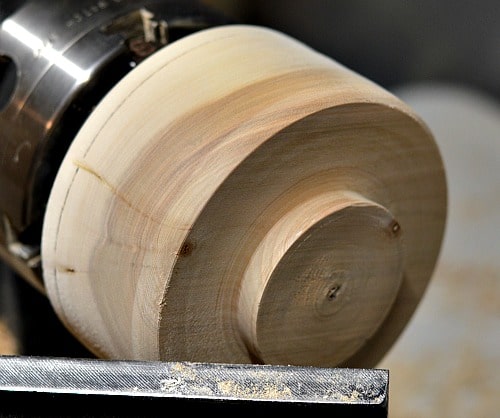
Outside of the bowl is now shaped with a bowl gouge. This is a fairly steep sided bowl to maximize the amount of bird feed that you can fit in.
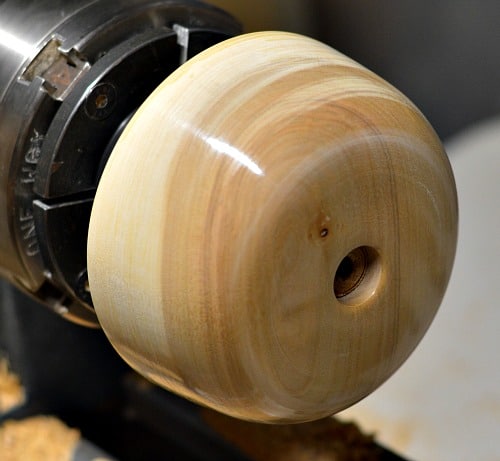
Put a 3/4″ forstner bit into a collet chuck and insert into your tail stock. Bring the tail stock up to the blank and turn the lathe on. Slowly extend the quill of the tail stock into the blank. Retract the drill bit frequently to remove shavings.
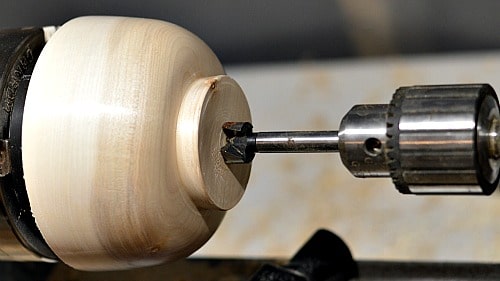
The hole is drilled and the outside is sanded.
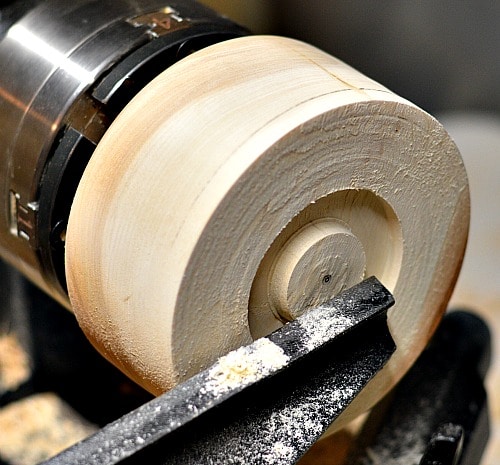
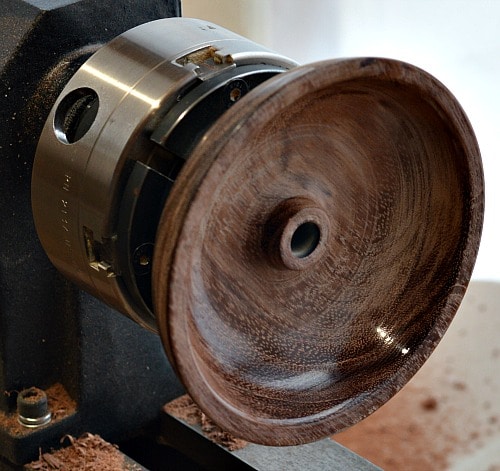
Reverse the wood in the chuck one more time.
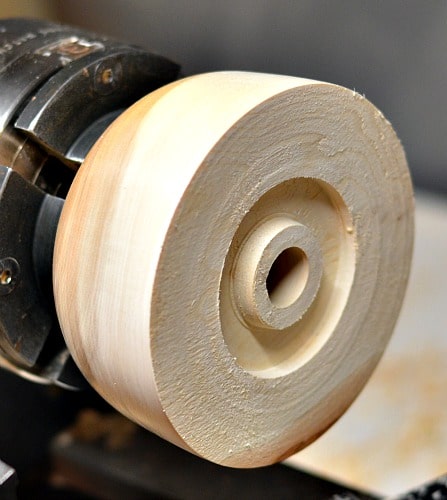
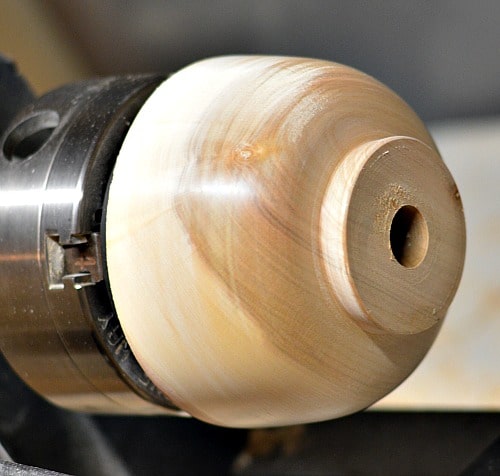
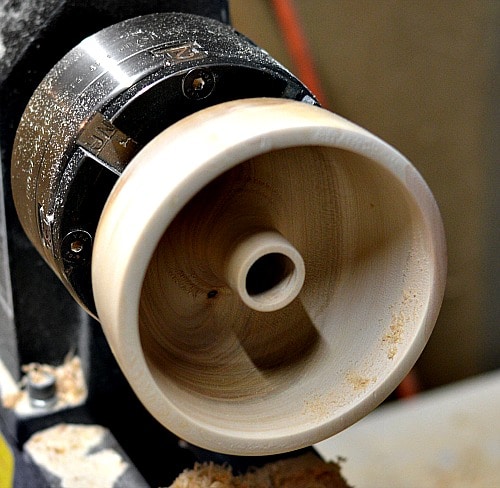
Now I can hollow out the bowl. Be careful not to remove the center cone. You need that to support the bowl on the dowel that was turned in part I. The cone is 1/2” below the rim of the bowl. This gives it about 1 1/2″ of wood for support.
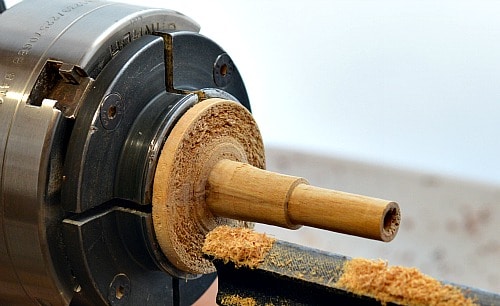
Use a piece of scrap wood to turn a dowel that is slightly longer than the depth of the bowl. Remember to use the wrench from Part I to help you get a dowel of the correct size. It was tight when I used the wrench as a guide, which is good. A quick sanding with 220 grit sand paper removed enough material for the bowl to fit snugly on the jig.
With the bowl completely on the jig use your bowl gouge to turn away the tenon.
Slide the bowl out along the jig to sand the bottom of the bowl. At this point you can add your finish as well.
So the feeding bowl is completed. Pick up your dowel from part I and make sure you can slide the bowl all the way down to the bottom. If the hole is tight you can put the bowl back on your jig and sand one part then reverse the bowl and sand the other part to make the hole larger.
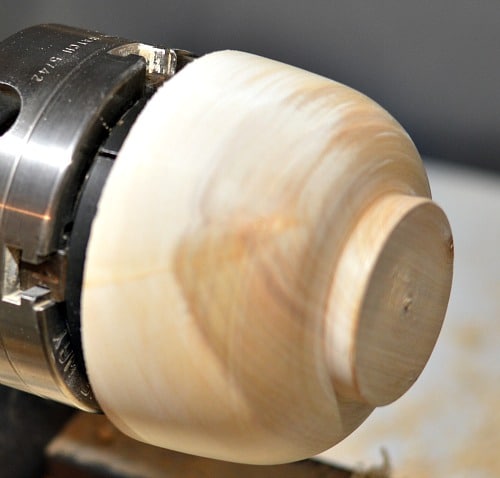
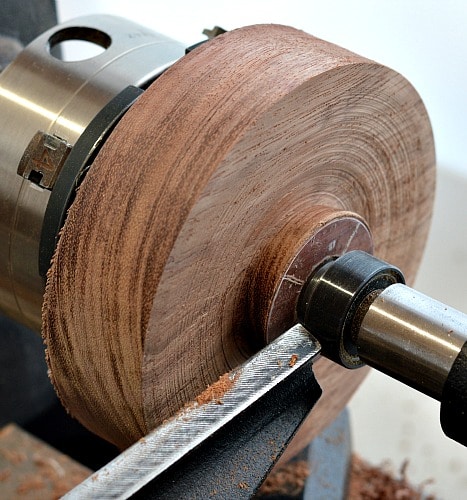
Turning the cover bowl
I started by turning the recess in the top of the bowl and expanding the multi-jaw chuck to hold it on the lathe. This made it much easier to turn the tenon.
Put the 1/2″ forstner bit in and drill out the hole for the cover bowl.

Use your bowl gouge to shape the outside of the cover bowl. You can have a more graceful shape here as you are not trying to hold bird seed, just provide a cover.
Turn the bowl around and hold by the tenon.
Hollow the inside of the bowl with your bowl gouge. Remember to leave the central cone to provide physical support for the cover. In this case the cone is half the depth of the bowl.
Turn your jig down to 1/2″ in diameter. The cover bowl is not as deep so I didn’t have to turn as much away on the jig.
Place the bowl on the jig and remove the tenon. If you make the jig too small you could add masking tape to the jig or just turn a new one. You do need a snug fit to finish the bottom of the bowl.

Slide the bowl out past the end of the jig so you can sand and finish the bottom of the bowl. You can flip the bowl at this point and finish the inside as well if you didn’t do it earlier.
Now you have completed the cover. Slide it on the center dowel and you have your bird feeder. I used a 3/8” screw eye on the top of the dowel. When I opened up the screw eye, I could still slide the cover bowl over it.
There are lots of ways to attach wood to the lathe and different methods of turning the wood. Take your time and enjoy the process. Use tools and procedures that you are comfortable with and keep safety upper most while you are turning.
Now you need to find some bird seed and a location to set it up in. I hope you had fun with this project.
Selling the Bird Feeders
These bird feeders are very attractive especially with different wood for each part. I purchased a box of random bowl blanks and I now have a use for them. Pricing your products can be a challenge but I would encourage you to price your bird feeders as works of turned art rather than a utilitarian object. Here is an article on the Nuts and Bolts of pricing your work. Consider the time, effort, and craftsmanship of your work when you determine your price. You might be surprised by how much it is actually worth.
So for me these would be higher end products available in my booth or at my table. I would also want other product that would be both lower and higher in value. You might want to have a whole lot of dibblers or honey dippers and a few bird feeders as well. If you sell all your bird feeders then you’ve got more turning to do!
I would love to see what you have made and how you are making out selling your wares.


This is really beautiful. I’m thinking about giving it a shot. What did you use for your final finish to keep it weatherproof?
Thanks Gavin for your comment. I used carnuba wax. It looked great during the summer but not into the fall. I would like to try again with a more durable finish. I’ll be honest here that I’m not sure what I would use. While a glossy finish makes the feeder look good probably a good oil preservative would be better and less toxic for the birds. Hope this helps.
Robindle…love this feeder. In the process of making one now. I live in Canada….pretty harsh winters. The best finish for my other wood projects for outside use is as follows: While still on the lathe, I use a thin oil. Orange oil is my favorite. I like the colour it gives to most wood. It soaks in and dries quickly. Next, I put a liberal amount of tung oil. Let it sit for about 15 to 30 minutes, start the lathe at low rpm and work it in with a cloth. Increase rpm and burnish the the bowl with the oil rag. I set a light bulb close to the bowl and set the lathe to about 1000 rpms to complete the drying process. I then remove the project and apply one last thin coat of tung oil and let it dry naturally for at least 24 hours. I reapply tung oil each spring to revitalize and add protection.
Thank you for your comment Doug. I like your finishing idea and I’ll have to try it out.
Hi
Thanks for the instruction. I made one following it. It turned out very good. Thanks again!
https://www.instagram.com/p/B8PN1LAnH3M/?igshid=1j0f6tlapohcn