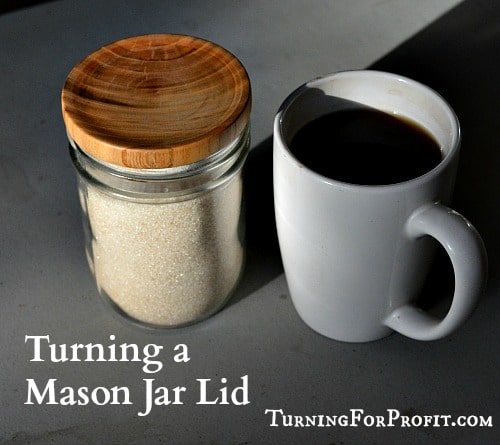
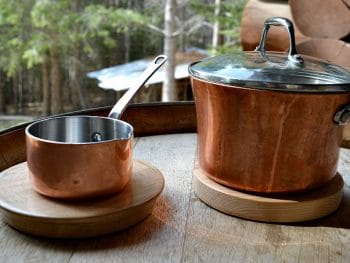
Mason jars and mason jar memorabilia are all over the place. I know of one restaurant that serves its water in mason jars. (It used to be only rednecks that did that.) You can get mason jar shaped measuring cups, mason jar shaped cookie cutters, mason jar measuring spoons, and mason jar salt and pepper shakers. With the popularity of the mason jar it just needs the perfect accent. A turned mason jar lid.
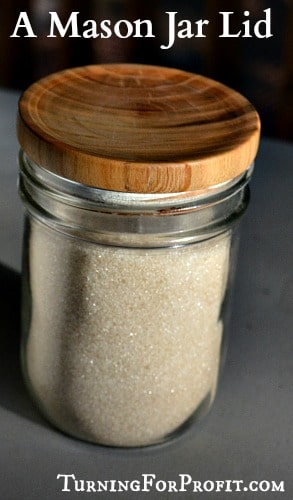
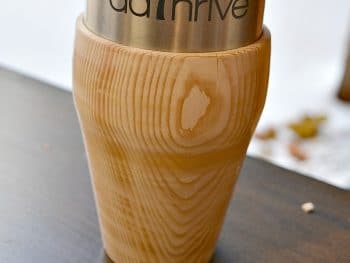
This is a quick and easy project. Turn a jar lid for a wide mouth mason jar. The idea is to turn the wood flat on two faces and include a tenon to fit inside the mouth of the jar. It will help you practice turning the faces of platters nice and flat. You only have to turn the face flat if that is what you want.
This project suits this time of year. The leaves are turning color and there is a bit of a nip in the air. It is Fall and it is canning season. The fruit is ripe and coming in off of the trees. Turning a lid for a mason jar adds a touch of class that goes beyond the metal ring. A lot of people like to accessorize their mason jars.
This project would be a good complementary product with the Kraut Pounder, and the Lid Lifter. These three focus on canning season and could also be combined with turnings for the kitchen, such as rolling pins, honey dippers, and oatmeal spurtles.
Wood Selection
A wide Mouth canning jar is just about 3 1/4” in diameter. So you will need a turning blank that is a bit larger. I would recommend dried stock rather than green wood. If you turn a lid out of green wood and it adjusts its shape as it dries, it could break the mason jar or make it very difficult to take it off once inserted.
A 2 x 4 piece of wood, that you get in the lumber yard is nominally 1 1/2″ thick by 3 1/2″ wide. The width is large enough to turn a jar lid out of. So if you have some 2 x 4 cutoffs in your shop then you can experiment with turning jar lids. Cut them 3 1/2″ in length and you are ready to turn.
I am using a block of seasoned cherry wood for this project.
Turning process for a Jar Lid
Remember to turn safely. If you are not sure about a cut or what you want to do, turn your lathe off, and walk through the process first. Wear your safety equipment and dust protection. Turning is fun and I want you to enjoy it for as long as possible.
Put your turning blank between centers and use your roughing gouge to turn the blank round.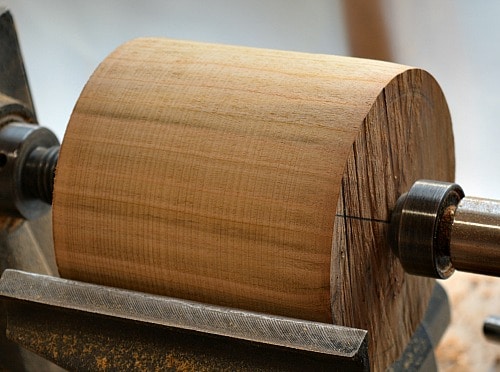
Turn a 1/2″ tenon on the end of the blank to fit into your multi-jawed chuck.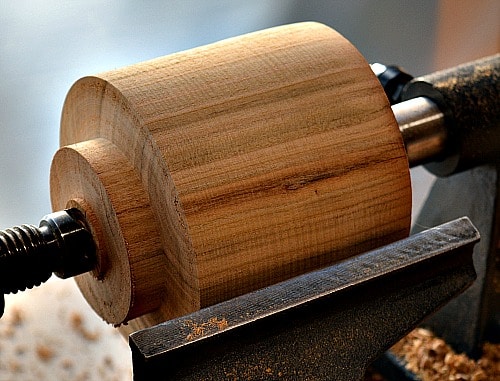
Turning the bottom of the Lid
Remove the blank from the lathe. Mount your chuck and insert the blank. Bring the tail stock up to center the blank and hold it centered in place as you tighten your chuck. Make sure your key is removed before turning on your lathe.
Smooth the end of your blank with a bowl gouge or spindle gouge. Depending on how far your blank extends from your chuck you may have to take very light cuts to not move the blank off center as you are turning. This is a great time to practice your face plate turning. It is small enough that imperfections will not be as noticeable and it is not as picky as turning a platter.
Once the face is acceptable, mine has a slight concave surface to it, and then make the tenon that will fit into the jar. I test fitted mine with only an 1/8” depth to get the fit right.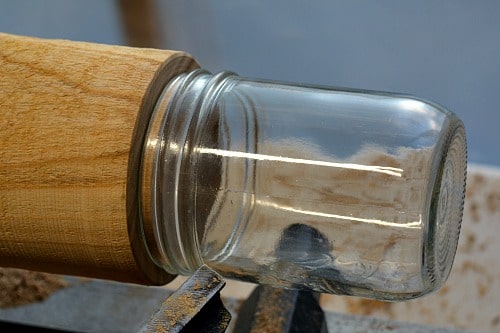
Once the jar fits then turn about 1/2″ for the tenon, or in this case the wood that will fit inside the canning jar. At this point you also decide on the size of the lid. By placing the jar on the tenon you can get the overlap that you want for the lid. I wanted the lid to be proud of the edge of the Mason jar so I turned it about 3 1/2″ in diameter.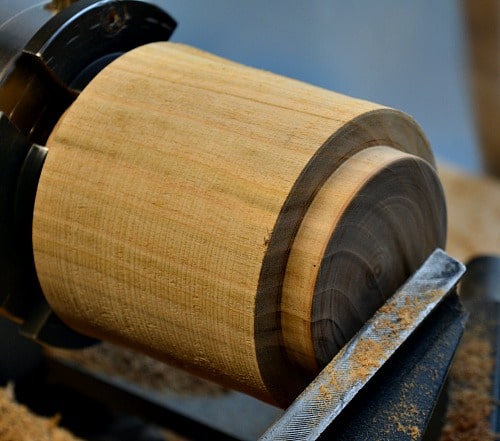
Sand and finish the bottom or underside of the lid at this point. I used my normal sanding technique going to 800 grit sandpaper for the final finish. Finish the lid with a food grade finish if it is going to be used with food. Given that you are putting a lid on a jar that would be a really good idea.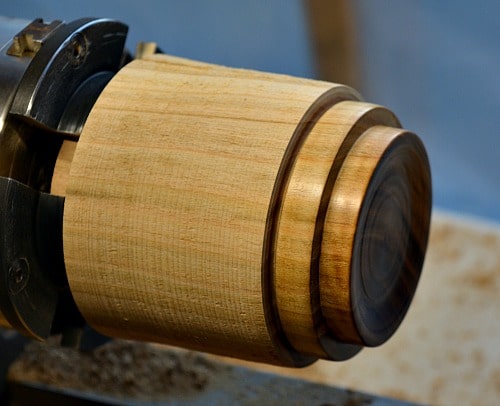
Now you are ready to part the jar lid away from the blank. I’m using a narrow parting tool that is 1/8” thick. You could also use a dovetail saw or a Japanese saw to cut at this point. As the blank was over 3” in diameter my narrow parting tool really heated up and burned the top of the lid. You can see this when I finish the top portion a little farther down.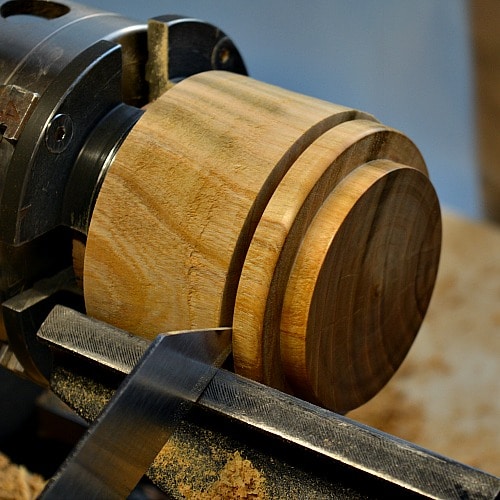
Turn the top of the Jar Lid
To complete the project I released the blank from my multi-jawed chuck in order to hold the lid in place. If I was doing a production run I would have turned all the lids first then processed them in a batch for finishing the top.
To protect the jar lid I folded a paper towel, tore it to length, taped it in place around the tenon of the jar lid, and then inserted it into the chuck. I brought the tail stock up again and advanced the quill to push the lid into the chuck so that it would hold tight and be running true in the lathe.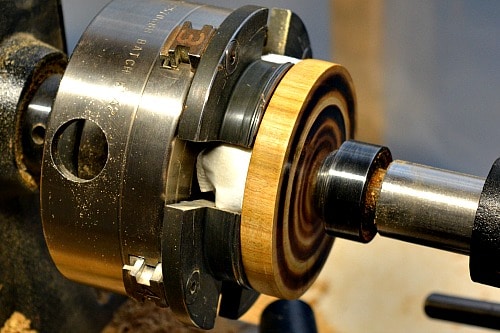
You can see the burning that happened with my narrow parting tool. To avoid this make the slot for the parting tool a bit wider than the tool. That will greatly reduce the friction build up.
I took this shot after the lid was finished. It shows the paper towel still in the chuck and the jar lid positioned underneath. The paper towel protects the jar lid so there are no marks from holding it in the chuck.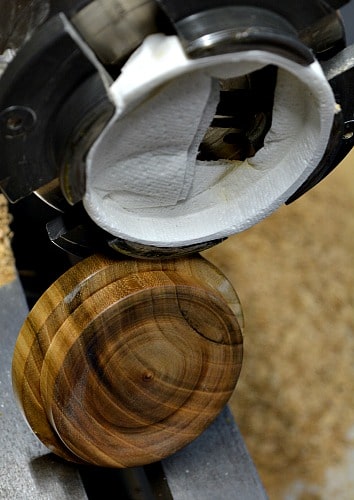
Back to the project in process. Once the lid is secure then you can turn the top of the lid flat or shape as you see fit. In this project I put a little bit of a dip in the lid.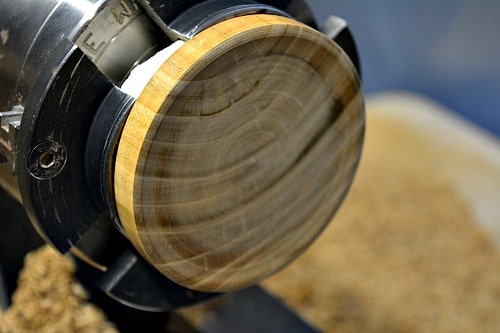
Now you sand and finish the lid just like you did earlier for the bottom. Now you have a lid for your mason jar.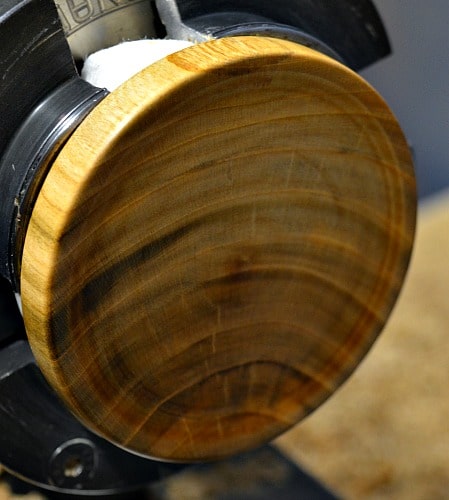
If your lid is not quite as tight as you would like you could wrap an elastic band around your jar lid like this. It works quite well and keeps the lid secure. Even with a good friction fit I would not pick the jar up by the lid just to be on the safe side.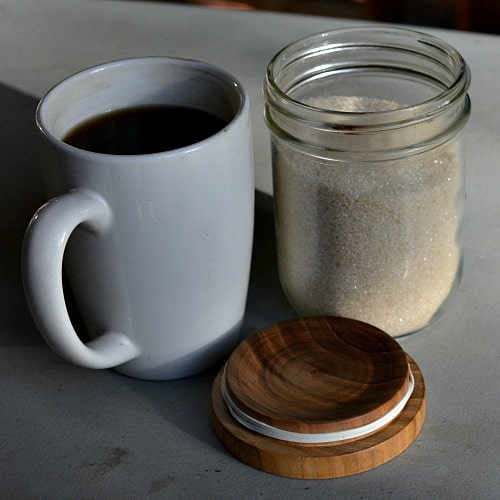
Other design considerations
As an accessory to Mason jars you could make your lid suitable for different uses.
- Drill a hole in the jar for the insertion of a straw for those who like to drink from a Mason jar but still keep the bugs out.
- Make a triangle cut on the edge of the lid. This would allow a spoon or other utensil to remain in the jar and still put the lid on it.
- You could make the top thicker so that it was more bowl shaped. Then you could store wrapped candies inside the jar and place a few in the bowl as samples.
- What ideas have you come up with?
Marketing Ideas
As mentioned above the Mason jar lid, kraut pounder, and lid lifter are all suited to canning season. With the craze for mason jar items a unique lid just for a mason jar could sell quite well. It works in the kitchen as a container for sugar and salt. It is also shaped differently from the long and narrow spurtles and rolling pins which provides diversity on your table. These are some ideas you can use to sell your jar lids.
You can also vary the prices on your lids depending on the wood and complexity of the turning work involved. This gives you different price points to offer your customers.
As a final idea you could sell the mason jar with the lid for a premium as well. In that case you want to buy the mason jars when on sale and recover a bit more than your cost when you sell it to a customer. Remember that you will be hauling these glass jars to and from the market or event, and storing them as well. There is likely to be some damage and breakage so you need to charge more than just your direct cost.
I hope you enjoyed turning a Mason jar lid. Let me know how your projects turned out. Join this awesome tribe of woodturners. I send out a weekly email alerting you of the new posts on the site and some additional information just for those who have signed up. The sign up box is at the top of the right side bar. Remember to turn safely.


This is a project I will have to try. At first I thought a domed to would look good but then realized you could not stack them in the cupboard. I also thought about doing some wood carving or pyrography. You could burn the name of the contents into the rim. Salt, Sugar, Coconut Flour, Almond Flour, ect? It would make for quick identification of the contents while on the shelf. Selling the jars in sets of four would make a nice canister set.
Those are some really good ideas. Thanks for sharing.
I’ve been scowering Dollar Stores, flea markets and friends for all types and sizes of mason jars and I’ve found it works great when people can select from an assortment of sizes based upon what they want to use them for.
I’ve also found the same kind of wood kid popular for coffee mugs. My 85 year old mother likes to sit on her front porch in the evenings and mornings and the lid both keeps her coffee hot but it also keeps flies/bees away.
Would turning the lid from end grain rather than side grain minimize wood movement, or is using dried wood sufficient? Also, I have some cut off wine bottles that I have been meaning to make lids for.
Yes, turning the end grain would reduce wood movement but it might make the jar lid more likely to break as the lid might snap when fitting in a tight jar. Dried wood help but wood will still move over time. I’d love to see lids for your wine bottles. Please share when your done.
I was interested in this one and if you were going to turn threads. The tight fit is a great alternative. One thought though – rather than a rubber band, mask the area off and use a rubberized leak seal which might compensate for the wood movement? Also worth mentioning, along with the other food turnings is to make sure you use an appropriate finish, like mineral or walnut oil.
Hello
I am so happy to have stumbled upon your website! It’s amazingly informative.
I purchased a lathe and tool set for my husband for Christmas. He is a beginner and I will definitely steer him to your site.
I was wondering if by chance I could purchase a mason jar lid from you? Or if you could perhaps point me in the direction of another artisan who might be selling them? I know this will be something he will want to make so I thought it might be nice to give him a finished one to emulate.
Please advise! Thank you and happy holidays!
Hi Amy,
Awesome that your husband is getting a lathe. Let him practice with it for awhile. A mason jar lid is a very easy faceplate turning project and this post gives good step by step advice. You could connect with a local woodturning supply store for names of local turners but I don’t think he’ll need a prototype for this project. Let me know how it goes.
Thanks for the instructions! This looks like a relatively simple beginner project. I wonder, though, how using this lid to cover jars with liquid, especially hot liquid, would affect the wood. Thoughts? Would sealing the wood with food-safe finishes be enough to protect it from the effects of liquids?