I’m not sure which is more amusing. Watching a baby with a rattle or an adult trying to figure out how the rings were put on the rattle in the first place. Captive rings are a woodturning trick and I use captive rings on this baby rattle.
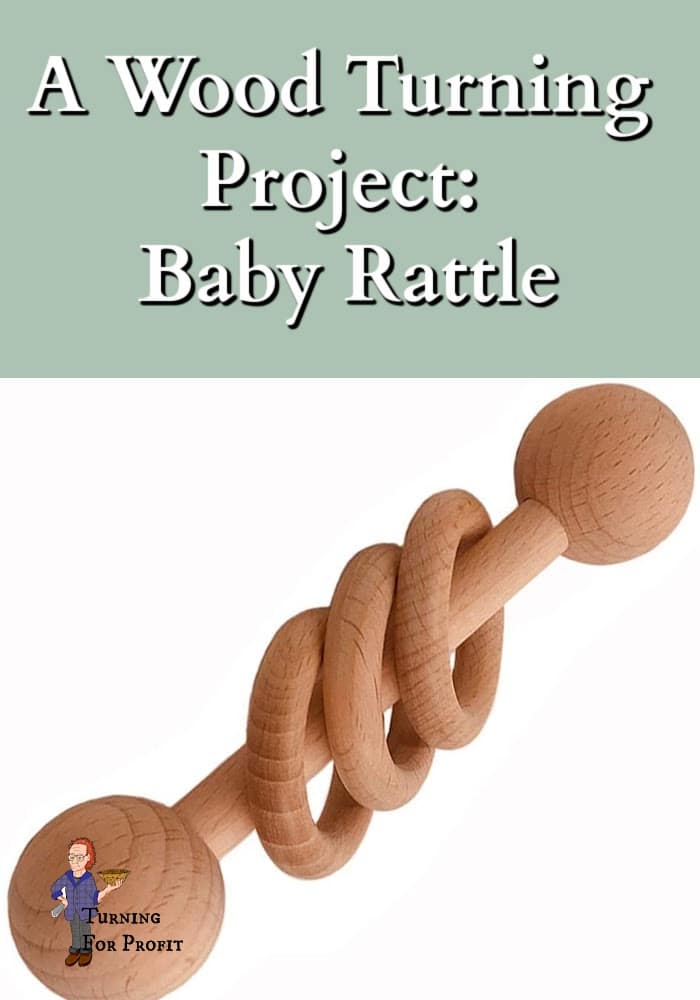
Wooden Baby Rattle with Captive Rings
Wooden toys, in my mind, feel right. They are natural and appropriate for children. However, for turning baby rattles you need to research toy safety regulations, because each country will have rules on the size for toys depending on the age of the children playing with them. In Canada for toys made for children under the age of three, the toy must be larger than 35mm or just slightly larger than 1 3/8” in diameter. While delicate and thin captive rings shows the skill of the turner, for a baby rattle I prefer thicker more robust rings. This is one situation where safety takes precedent over aesthetics.
Wood Selection
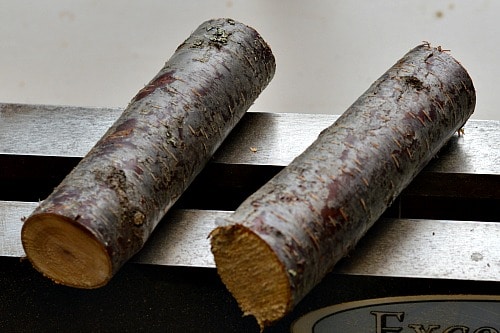
Make sure you pick a fine grain hardwood and a wood that is not toxic. I turn baby rattles out of Black Birch and Douglas Maple. Both are native species, fine grained, and non-toxic. You want a wood that will put up with the wear and tear of little fingers and teeth. So a wood that is soft or easily splinters would not be suitable.
General Dimensions / Considerations
With the safety guidelines for your jurisdiction in hand, determine the diameter of the two ends of the rattle. The length of the rattle is up to you. For the diameter I needed I thought a 4” to 5” long rattle would look good. It is a bit of a balancing act as a too small rattle is dangerous for the baby and one that is too large is awkward for the baby to play with. You may have to try several different sizes and styles to see which work for you.
Procedures for Turning a Baby Rattle
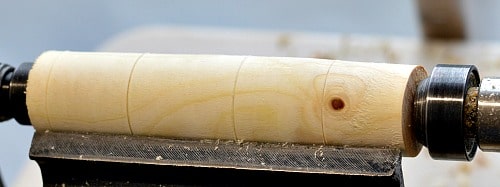
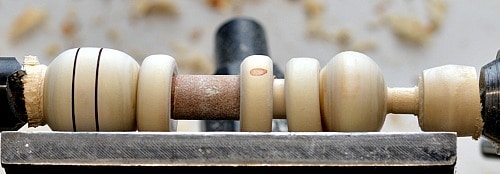
Select a turning blank or a branch of suitable dimension. These are from a Black Birch on our property.
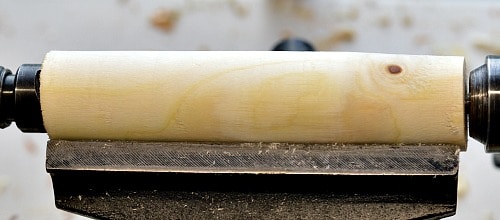
Turn the blank round between centers. I used a roughing gouge to do this.
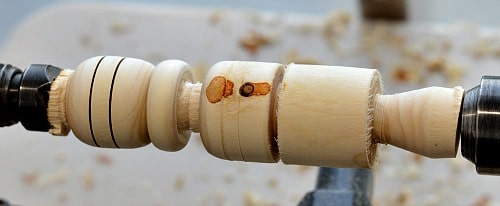
Mark out the general dimensions for the rattle. That is, mark each end and how many captive rings you will have. You want to leave about 3/8ths inch between each ring for the captive ring tool. On this rattle I turned it a bit smaller to avoid the knot at the tailstock end. The three sections mark out the ends and the captive ring area.
I shaped the one end as a spherical shape and separated the first ring. I then realized, as I was working with the rings, that I would have more room if I did concave shapes on the ends. So that is how I turned the other end. The concave shape gives you more room to work with the captive rings.
Use a skew chisel to shape the tops of the captive rings. Your general procedure with the rings is to shape the top and side surfaces while the rings are attached to the wood. Take the top side of the rings through all the sanding steps and apply the food safe finish you want at this time as well. Once the rings are detached it is much harder to sand and finish them.
Use a parting tool to reduce the middle sections down to a common diameter. This is what you will use as a guide for the bottom of your rings so it should be larger than the final dimension you want. Use the captive ring tool to start the underside of each ring. With the ring tool gently touch the bottom of each parted section and move under each ring.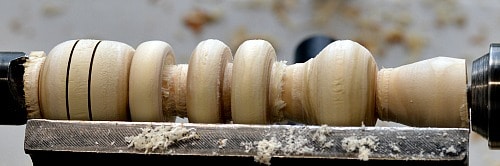
Focus on the underside of the rings to get a nice smooth shape from the ring tool. Take your time and work in from both sides. When the ring separates it will stop turning and bounce on the rattle. The center portion of the rattle will be quite rough at this point. You will shape it later when all the rings have been separated.
As the ring is loosened from the body of the rattle, move the ring to the side. If the ring gets in your way you can tape it to the end wood of the rattle. Continue and loosen each of your captive rings.
At this point finish the center portion of the baby rattle by working with a spindle gouge. (I did not have enough room for a skew chisel here.) As you get one section flat move a ring over and continue turning the center area.

Once you have the dimension you want for the center and the shapes you want on the ends, sand the body of the rattle.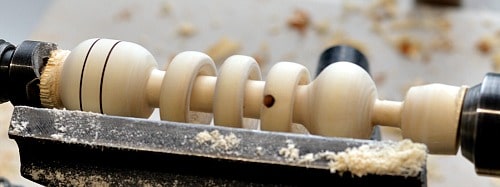
To finish the underside of the rings use a little sanding trick. Cut a coarse grit of sandpaper (150), tape the sandpaper to the body of the baby rattle so that the sand paper rotates around the rattle in the opposite direction that the lathe turns. (Sand paper grit side up, back of the lathe, tape to the rattle, wrap the paper down, under, up and over the rattle. The key is that when you turn the lathe on the friction between the ring and the paper will keep the sandpaper on the rattle.)
If you get the paper on backwards it won’t sand the underside of the ring so take it off and do it the other way!
By taping the sandpaper to the rattle you can move each captive ring over the sandpaper and finish the bottom. I only did three grits (150, 220, and 320). This finishes the rings and everything is ready to go.
You can add a burn line like I did when ever you would like when you are turning. I was basically finished when my daughter thought it would look better with an burn line on the other end of the baby rattle. A quick cut with the skew and a bit of wire and the burn line was done.
Part the rattle from the lathe. Use a knife to shape the ends. Then sand and finish to complete.

You have completed a baby rattle with captive rings. Other projects for children that you might be interested in would be spinning tops, and the Tower of Hanoi. The Tower of Hanoi is a bit of a brain teaser and has some smaller parts so it is better suited for older children.
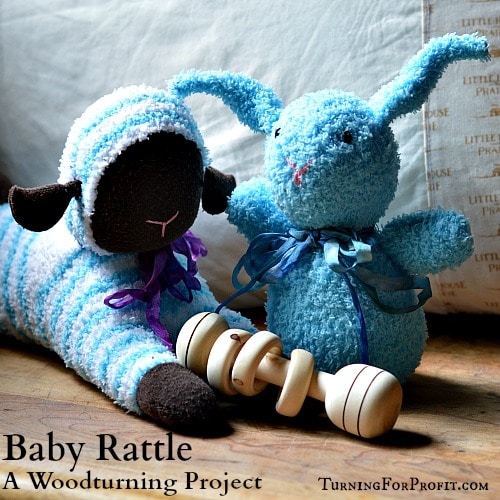
If you also like the little lamb and bunny you can make them as well. The instructions for the sock lamb are from Joybilee Farm, and the sock bunny comes from Wearing Woad.
I hope you have enjoyed this project. Please sign up for my newsletter so you will receive regular notices of new projects and posts. I would love to hear from you and see what you have turned.


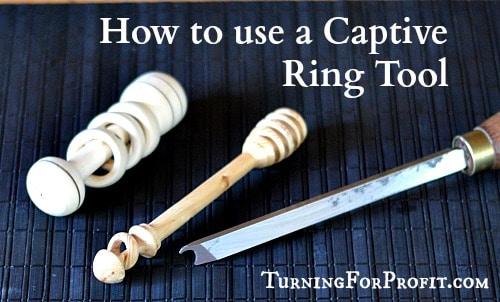

[…] rings on numerous spindle turnings which include Honey dippers, crochet hooks, bottle stoppers, and baby rattles. The rings on a baby rattle are there to make noise; otherwise the captive ring is more […]