• Menu
  • Skip to right header navigation
  • Skip to main content
  • Skip to secondary navigation
  • Skip to primary sidebar
  • Skip to footer

Before Header

  • Facebook
  • Instagram
  • Pinterest
  • RSS
  • Twitter

Turning for Profit | Woodturning | Lathe |

Helping woodturners make more money

  • Blog
  • Projects
    • Library
      • Turned Bowls
      • Christmas Projects
  • Inspiration
  • Make Money
  • Woodturning Techniques
  • Workshop Expertise
    • Splinters
  • Shop
  • Blog
  • Projects
    • Library
      • Turned Bowls
      • Christmas Projects
  • Inspiration
  • Make Money
  • Woodturning Techniques
  • Workshop Expertise
    • Splinters
  • Shop
You are here: Home / Workshop / Mini Lathe Tip: Changing Pulleys
Wood Lathe Pulley Tip

Mini Lathe Tip: Changing Pulleys

By //  by Robin 6 Comments

divider
This post contains affiliate links. If you use these links to buy something we may earn a commission. Thanks.

picture of the Excelsior Mini Lathe


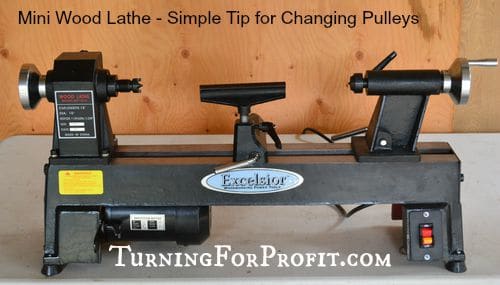
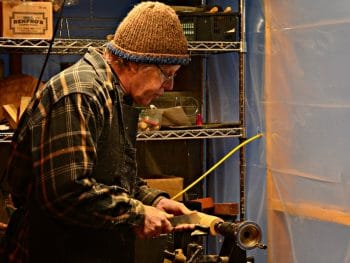
Playing with my new mini wood lathe has been fun.  You do have to change the pulley frequently as you go from roughing to shaping to sanding your project.  As I was informed in the product reviews there was a process to changing the pulley on the Excelsior Mini Wood Lathe.  Removing and replacing the pulley covers took some time.


Wood Lathe – Original Set Up

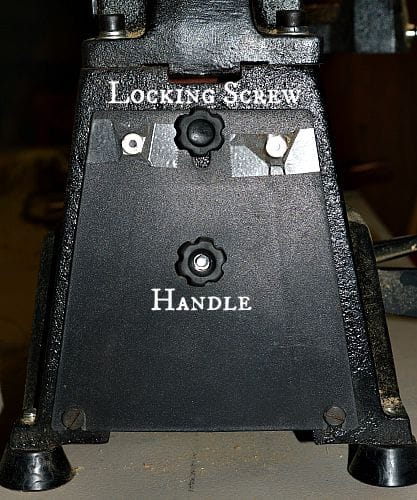
The two access panels, (one on the back of the head stock and the other on the end), have two screw knobs.  The handle is in the middle.  While the locking screw is at the top of the plate and takes a bit of time to screw out or in as you are removing or replacing the pulley cover.  Getting the screw to center in the screw hole was a challenge on the back of the wood lathe.  This is the lower pulley cover on the end of the lathe.

mini lathe close up

Wood Lathe – Adaptation

Remove the locking screw completely.  Attach two rare earth magnets to the cover.  The body of the mini wood lathe is cast iron so the magnets will have metal to attract them.  I used 3/8ths inch rare earth magnets and attached them with scotch tape.  Do this on both pulley covers.  As you can see the magnets hold the cover in place.

Mini lathe close up

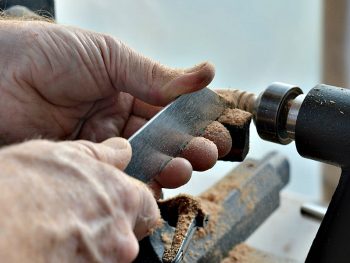
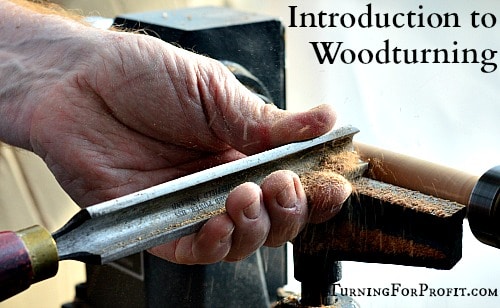
Wood Lathe – How to Use

Now to remove the cover you simply grab the handle and lift.  To replace slide the slots on the bottom of the plate over the respective screws on the lathe and the rare earth magnets hold the cover in place.

Mini lathe close up

Wrap It Up

This simple tip will enable you to remove and replace the pulley covers easily with one hand. No more fiddling with the locking screw and having to have the plate in the right position to find the screw hole.  I am going to adjust my set up slightly by buying four 1/2″ rare earth magnets and using super glue to hold them in place.  So far the smaller taped magnets are working great. I rough turned a bowl and a face plate chuck that increased the vibration of the lathe.  The covers stayed in place with no problems.

I would also check occasionally to remove excess dust that might build up between the cover and the lathe.  For actually changing the pulley the best tip I read was to always move the pulley to the smaller wheel first.

What tip have you got for improving the use of your wood lathe?

excelsior mini lathe

Filed Under: Workshop Tagged With: lathe set up, safety, turning tips

Related Posts:

You may also be interested in these posts:
Turning Blanks: How to cut dimensional lumber on your table saw to make turning blanks

Turning Blanks from your Table Saw

Shop notes are a great aid in your woodturning projects

Woodturning Shop Notes

Woodturner Shop Safety

9 Shop Safety Tips for Woodturners

Before you start teaching woodturning to children ask yourself 3 important questions

Teaching woodturning to children – 3 preliminary questions

Parting tool is versatile

Parting Tool – More versatile than you thought

Woodturning lathe set up

Introduction to Woodturning – What you need to get started

Previous Post: « Ball Winder A Wood Turning Project: Yarn Ball Winder
Next Post: Mini-Lathe – Wooden Top Wooden spinning tops »

Reader Interactions

Comments

  1. Marc

    November 2, 2017 at 2:51 pm

    First, thank you for these wonderful articles. I am just starting a hobby/part time wood turning business and you are helping tremendously as a resource. One thing I have done that has helped me keep things in order, is I put a magnet on the front of lathe. It is large enough to hold my Allen wrench for the chuck, Jacobs chuck key, and any other small metal part that I use often and want to keep within reach.

    Reply
    • Robin

      November 6, 2017 at 11:20 pm

      That is a really good idea. Thanks for sharing.

      Reply
  2. Robbie

    December 22, 2018 at 4:46 am

    Where is one of those dam pencils?

    Lost again in the pile og wood chips

    Tape or glue a small magnet to the top end of those pencils. Now just put them in plain sight sight and they stay there, till needed.

    Reply

Trackbacks

  1. Mini-Lathe - Wooden Top - Turning for Profit says:
    September 6, 2015 at 2:03 pm

    […] I had to change the speeds going from turning to sanding and finishing for both the bottom and handle of the top.  Here’s a tip to make changing the pulley easier. […]

    Reply
  2. Kraut Pounder - A Woodturning Project - Turning for Profit says:
    June 21, 2016 at 11:32 pm

    […] Once you have it mainly round the turning goes much faster, and safer.  At this point I increased the speed on my lathe to the next level.  It is nice having a quick way to change speeds on the lathe. […]

    Reply
  3. Unpacking the Excelsior Mini-Lathe - Review says:
    February 22, 2018 at 11:11 pm

    […] There are slight differences between my full size lathe and the mini-lathe. The locking lever on the tail stock is behind the lathe so I’m getting used to that. The turn off switch is on the right and that is a change from my full sized lathe where it is on the left. The biggest change is having to move the drive belt every time I want to change the speed of the turning. The covers to access the drive pulley and the motor pulley are on the back and side of the lathe. To make removal easier I removed the locking screw and put rare earth magnets on the covers. […]

    Reply

Leave a Reply Cancel reply

Your email address will not be published. Required fields are marked *

CAPTCHA
Refresh

*

Primary Sidebar

Welcome

About me:

Welcome to the Turning For Profit Community! I'm Robin. Turning for Profit is about helping you find hope and joy in your woodturning hobby. It's about projects that fill your inventory and inspire your creativity. It's business help to get you set up and making a profit quickly. If you've always wanted to work from home playing with wood, let me help you realize your dream of Turning for Profit. Read More…

Help for Beginner Woodturners

Learn to use 5 different wood turning tools, with confidence, while you turn 7 projects, building your wood turning skills sequentially.  Includes tips and ideas for marketing your wood turning, when you are ready to move forward.


Footer

Inspiration:

You don’t have to be good to start.  You just have to START to be good. — Joe Sabah

Handmade with Care Stamp

7 Gifts for Men Made on the Lathe

7 Gifts for Men Made on the Lathe
Christmas Projects Title

Christmas Ornaments: Build Your Inventory Fast

Christmas Ornaments: Build Your Inventory Fast
Finished Niddy Noddy with yarn.

Niddy Noddy – A Woodturning Project

Niddy Noddy – A Woodturning Project
  • Start Here
  • About me
  • Contact
  • Privacy Policy
  • Terms and Conditions
  • Disclosure

Site Footer

  • Email
  • Facebook
  • Instagram
  • Pinterest
  • RSS
  • Twitter

Copyright © 2023 · Mai Lifestyle Pro On Genesis Framework · WordPress · Log in

Picture of the Excelsior Mini Lathe
excelsior mini lathe