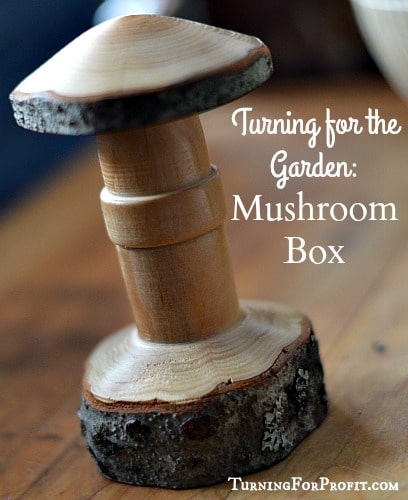
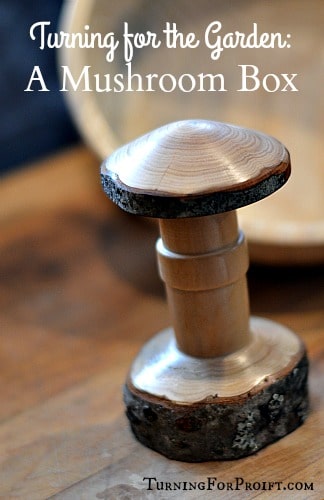
Mushroom Box – A Turned Garden Ornament
Turned mushrooms make great garden ornaments. You can turn them in a variety of shapes and sizes. These mushrooms are perfect compliments to a garden gnome or a water feature. Made out of wood they are not harmful to the environment and no one is likely to eat them. The extra twist is to make room inside your mushroom. Turn it into a box.
So grab a branch and turn a mushroom box for your garden. Why a box? Because you can! Turn a few other branches into mushrooms as well. Then you will have several mushrooms as garden ornaments.
The addition of a box allows you to store keys or other items outside in plain sight. Tell your house sitter where the mushroom box is and they can pick up a key and/or instructions. You might want a spare key just in case you get busy in the garden with your row markers and dibblers and you get locked out of the house.
This is a natural edged project and will require a bit of planning to turn.
Mushroom Box Design Considerations
You need to make the box look like a mushroom. There are lots of different mushrooms that you can get your inspiration from. Pick a style you like.
The box component is affected by how large a stem you want on your mushroom. I wanted to be able to store a 1” diameter container (available from Lee Valley in Canada) in the stem so I planned on a 1.25 to 1.5 inch diameter stem. If you don’t have anything specific to fit in the box then you can make it any width you like. If you are going to hide something, like a key, then make sure it will fit.
I learned after the project was finished that a slightly dryer box made it very difficult to remove the capsule. I have to do more sanding by hand to make it fit. Lesson learned, if you are putting wood around a non-wood object you have to leave room for the wood to expand and to contract.
While you can hollow the inside of the box I choose to use a Forstner drill bit held by a chuck in my tail stock. This allowed me to get a thin wall on the mushroom box. The only trick was to plan the separation for the box at the middle of the mushroom. Then I can maximize the length of the box down into the base of the mushroom and also into the top. If you are willing to hollow out the box then you can make the joint closer to the top of the mushroom. This would also be easier to do if you were turning a larger diameter mushroom.
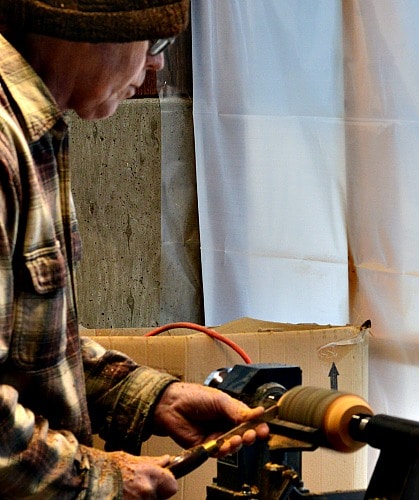
How to turn a Mushroom Box
My blank was 7” in length and about 3 1/2” in diameter. Fortunately I had more than one blank. Habit kicked in as I centered the first blank in the lathe. I immediately grabbed my roughing gouge and turned the blank round. Oops. No more natural bark! Grab the next blank and start over. The first blank will become something else!
Before you start turning, plan where the natural sections of the box will be. How thick will the base be and where do you want the edge on the cap of the mushroom. I also used a narrow parting tool to show the division between the top and bottom of the box.
-
Turn the blank between centers
Put a drive spur in your head stock, and a live center in your tail stock, and then mount your blank between them. With boxes it is much easier to hold each section in a multi jawed chuck. So first turn a tenon on either end of your blank. Take your time to get a very clean cut on the natural bark. Once you have defined where you want the bark then you can turn away the rest!
Warning. Do as I say not as I did! Turn your tenon the size to fit your jaws on your chuck. If each tenon is the same size then you don’t have to change your jaws in the chuck. I’ll point out my challenges with this as we go through the project. I turned a big tenon on one end and a small tenon on the top.
-
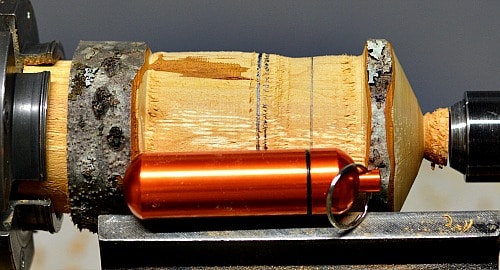
Put the blank in your multi-jawed chuck
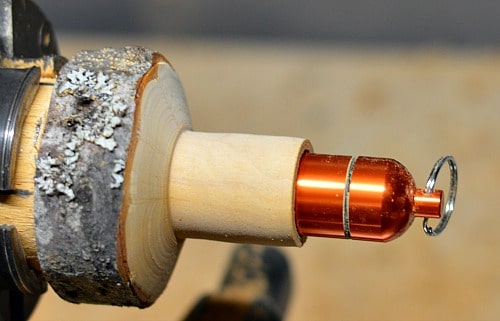
This will let you mark the blank for where the joint is between halves and shape the crown of the box. You can see the capsule on the lathe. The two lines close together is where I will separate the two halves of the box. The line to the right is the top of the gill marking on the mushroom. (See the difference in tenon size!)
I decided to leave a good portion of the bottom as natural bark. When it is placed in the garden it can be settled in the ground. Otherwise I would have had a smaller amount of natural bark on the base. If this was to go on a dresser to hold rings and things then I would have turned the base just a bit deeper than the cap of the mushroom.
-
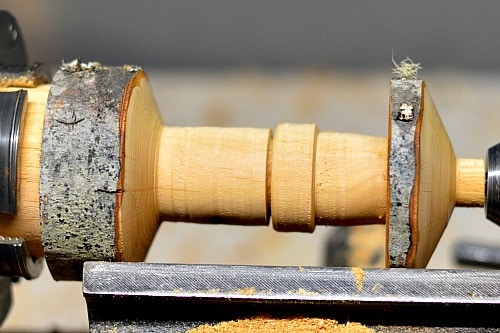
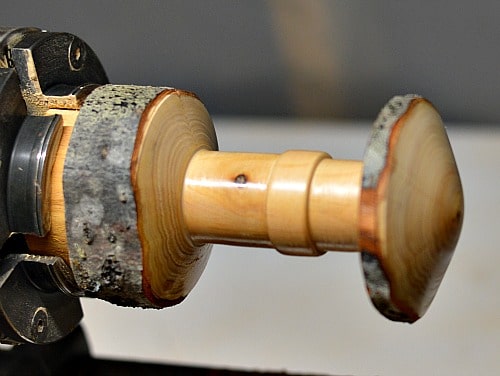
Shape the top and body of the mushroom
I angled the cut on the underside of the mushroom cap with my spindle gouge. I think this looks better for your mushroom. The amount you undercut is up to you but I think a little bit looks good.
I used a spindle gouge to shape the top of the mushroom. You can see how much smaller the tenon is compared to the tenon being held in the chuck. The body is basically straight and a little thicker for the gill ring. The box will attach just below the gill ring which will give me a little more room for the cap. The little piece of lichen on the cap made it through all of the turning but fell off shortly thereafter.
-
Separate the two parts and drill the hole in the base
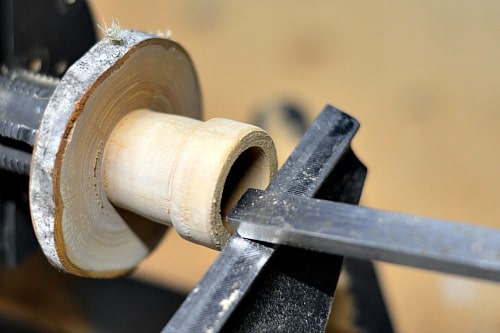
I used a narrow parting tool to separate the top and bottom portions of the box. The top of the box is shown on the lathe. The Forstner bit is in place and ready to be advanced into the wood. Take your time with this process backing the bit out frequently to clear all of the sawdust. When you reach the maximum extension of your quill (on a mini-lathe) you will have to advance the tail stock to resume drilling. I was able to go to the full depth of the drill on the base.
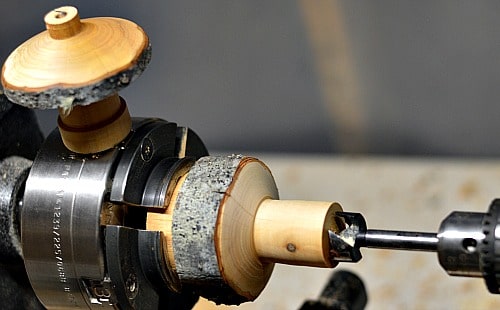
You can see the capsule in the bottom of the box. I turned a 1” diameter hole that the capsule slid into fairly easily. I would recommend a bit larger hole as when the mushroom dried I could barely get the capsule out. So I should have used a drill bit of 1 1/16 to 1 1/8 inches in diameter.
-
Drill the top and shape the box joint
Remove the bottom section off of the lathe and fit the top into your multi-jawed chuck. Here I had to change the jaws on my chuck to hold the smaller tenon on the top of the mushroom. Here you can see the slight under cut on the cap. Again slowly drill out the box.
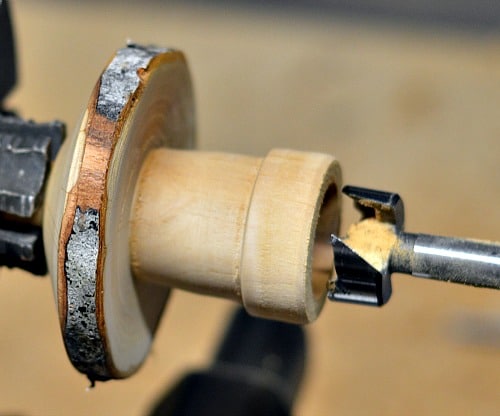
So the lid (top of mushroom) will fit over the base, I used a square scraper to cut a rabbet on the inside of the joint. I would leave an 1/8th of an inch thickness for the joint.
-
Return the bottom of the mushroom to the lathe
Yep, I had to change the jaws one more time. Now we are going to fit the lid to the base by slowly removing the outside edge of the wood at the joint. Take your time. There is a lot of stopping the lathe and moving the rest so you can test fit the lid of the mushroom. My initial cut was too long so the lid did not close tight on the base. I used sand paper to wear the wood down slowly so I had a perfect fit when finished. The joint is under the tape. The penultimate picture shows the bottom of the box joint.
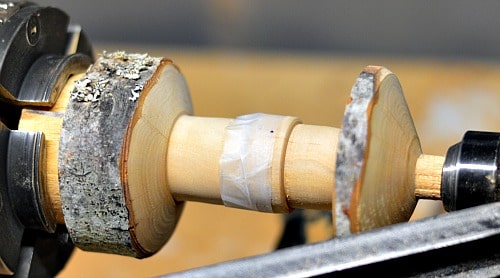
Tape the two halves of the box together just to keep it secure. Then slowly, with fine cuts, finish the top of the mushroom.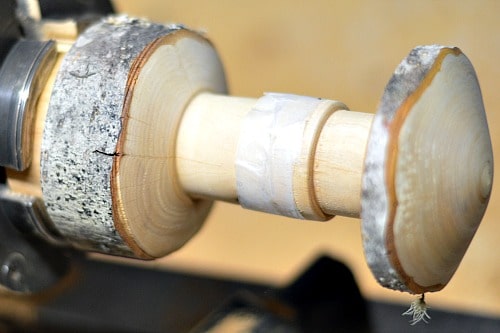
-
Sand the Mushroom Box on the lathe
Depending on how well it went with your tools and your shaping you can start with a finer grit of sand paper. However, if you don’t like the feel of your box or cap then use a coarse grit like 80 or 120 to quickly smooth out those challenges. Move on to 220, 320, 400, 600, and 800 grit sanding. Remember to wipe the Mushroom Box down with a paper towel or soft cloth between each grit. (I like the feel of the extra fine grits but as this will be an outside garden ornament you could stop much earlier.)
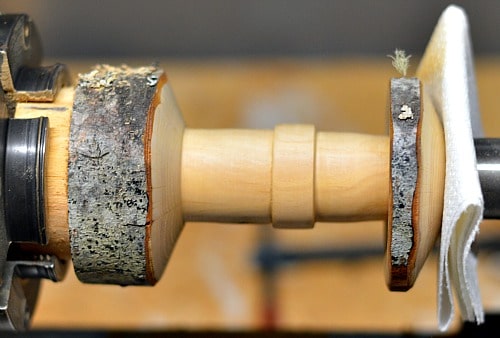
I sanded the top of the mushroom first with the tape still there as extra support. When that was finished, including the finishing with carnauba wax, I removed my live center from the lathe and brought the quill up to the mushroom. I folded a paper towel and inserted that between the mushroom and the quill. This supports the mushroom as I sand and finish the body.
-
Part the mushroom off of the lathe
Take the cap off of the mushroom and set it aside. Using a parting tool, angled towards the tail stock, (handle towards the head stock), part the mushroom off of the lathe. I didn’t finish the bottom at all as this will be hidden in the garden.
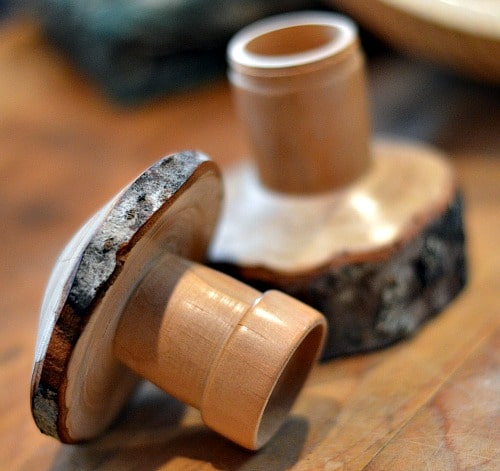
Now you have a turned mushroom box. I’m sure it will be a favorite so make sure to turn lots of mushrooms as garden ornaments.
Selling Garden Ornaments
Turned mushrooms are an easy turning project. Making them into a box presents a good challenge. These can be sold at the Farmer’s Market as decorations for the house, weights for napkins on picnic tables, or as garden ornaments. You can have a selection of sizes as well as box and non-box mushrooms. Using the gill marking on the mushroom will help to hid the joint of the box!
How big or how small will depend on you. You can be very creative in designing your mushrooms. I would recommend selling a selection of box and non-box mushrooms as garden ornaments.
If you are selling your mushrooms here’s two blog posts to help you. What you should do (Mastering the craft show) and what you shouldn’t do (seven mistakes to avoid). You might find that your friends at the farmer’s market who are selling bedding plants would be willing to sell these on a commission basis. This would let you sell your product without having to set up a display.
Let me know how you make out. I would love to see what you have turned.
Thanks, Robin.

[…] coin bank was the result. If you want to turn a box that is not quite as finicky you can try a mushroom box for your […]