When you list your hand turned bowls, spindles, and other work in your online store, Etsy store, Facebook, or Pinterest use these product photography tips to get the attention you deserve.
So often when I’m looking through turning blogs or checking out what my fellow turners are doing on Facebook, I realize their sales are being curtailed by bad lighting or haphazard product photos. In fact, looking back at some of my own photos on this blog, and where I sell online, I realize I would have benefited from some product photography tips when I first started.
A few years ago, the Boundary Artisan Association, a craft cooperative that I started for my fellow artisans, brought in a professional product photographer to give us some pointers on how to take product photos that sell.
He showed us how to set up a light box and how to position the lights to highlight the best in each artisans products, whether pottery, fiber, glass, or wood. Since then I’ve worked haphazardly with my product photography and I realized that it wasn’t helping my sales. So lately I’ve become a little more intentional in learning and applying some rules or tips that have improved not just my woodturning pictures but also my sales. I think they’ll help you up your game, too.
Natural light reveals the grain patterns
Natural light makes wood turned art look amazing. It reveals the wood grain, the colours, and the smoothness or texture and hue of the wood better than any other light source. Whenever you can, forego the kitchen table or workbench and take your bowls and spindles outside. Hang the icicle in a pine tree or place the bowl on a stump or on patio stones. And get down at the level of your product to take your shots.
Photograph early in the morning or a couple hours before sunset to give definition to the smooth finish and awesome grain patterns.
High noon gives a lot of shadows to your work and makes the grain patterns look flat and washed out. Instead get outside in the early morning just a few hours after sunrise. The sun’s rays will be slanting and give perfect depth to your bowls and other wooden tools. In late afternoon the sun’s rays are perfect for making the focus and textures of your work sharp, too.
Take your product pictures outside on an overcast day.
When the sky is overcast the clouds act like a giant light box. The light is diffused and the shadows are minimized. Overcast days offer the definition that you are looking for to make your wood finish glow. Glowing wood attracts attention and begs to be touched. You’ll sell more by choosing the best light conditions.
Get rid of the distracting background
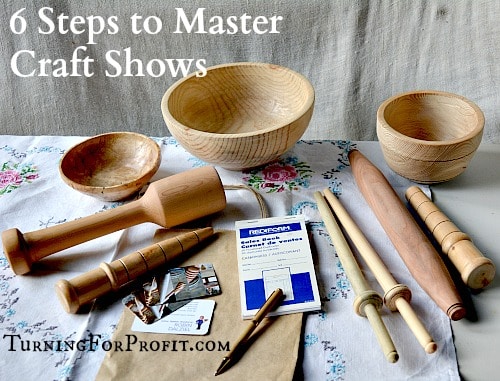
While it might be tempting to throw some shavings on the workbench and photograph your work right in the shop, don’t. If you’re like most of us, the shop has a lot of distraction. Tools hanging on the wall, shavings, and poor lighting won’t highlight the best in your work. If your workshop is your only option, clean up the workbench, place your tools out of the way, or use a cardstock background to create the clutter free background that will best highlight your art.
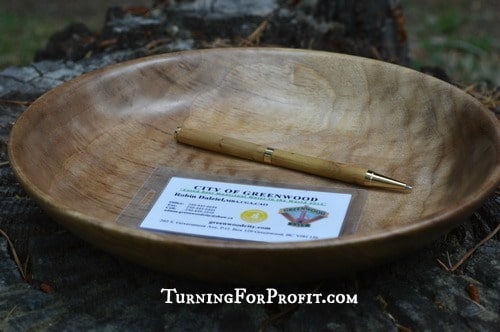
Use appropriate props to add interest, texture, and contrast.
Stark white or velvety black backgrounds take the distraction out of the photo. However, they also make your work look just like everyone elses’ product photos. Add some texture or contrast with props to make your bowls and spindles really pop. Try contrasting the smooth finish of a maple bowl with the rough texture of red patio bricks. Or lay some shiny steel salad tongs beside your salad bowl to reflect a bit of light, and position it on a weathered wood plank, for contrast.
Take your time. And compose your photo-shoot with the same attention to detail that you paid to making your work. I find that it’s a good investment to set up a photo-shoot and take a full product line of photos all at once. Use similar backgrounds and props for consistency with similar products. This saves me time in the long run, and gives me the pictures I need to edit and upload in one session. And time saved on the computer end of things, gives me more time to play at the lathe.
Use a light box to diffuse the light with a white or black background
As a minimum, have a light box and two full spectrum lights for those times when the weather won’t cooperate. (This is the setup I have.) Set up the lights right against the fabric of the box. Be sure that your background is clean and lint free. Add your props and your product. Then take the pictures that you need. It helps to keep your light box set up and the lights at the ready. Then you will be more likely to use it.
I find if my light box is put away, it’s a hassle to get it out each time I need to use it. And if I’m in too much of a hurry to properly set up my lighting, I’m losing sales.
Learn to use your SLR camera manually to control shutter speed, aperture, and focus.
You can learn to take amazing, shareable photos with the camera that you have. But some cameras take better, higher resolution photos than others. You could take all your product photos with your phone camera. And if that’s your best choice, do it. Learn to use your phone camera to the max. At the end of this post I’m going to list a few resources to help you do just that.
The higher resolution pictures that your camera will take, the easier it is to edit out the noise and crop for the best composition. A phone camera takes a picture that is 2000 x 3000 px, approximately. An slr camera gives you a photo that’s 4,000 x 6,000 with lots of definition and room to edit. SLR cameras also let you play with manual settings to control shutter speed, aperture, and focus. This gives you the ability to take stand-out photos of your work using light effects. When you are selling your work you want photos that stand out. Photos that are share worthy.
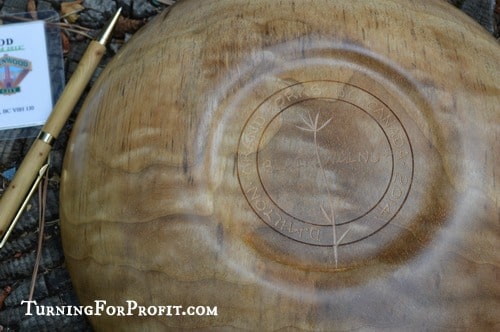
Make sure the wood grain is in focus
You’ve gone through all the trouble of setting up the ideal light conditions, planning a distraction free background, adding texture and contrast, and choosing the ideal props. Don’t forget to bring that wood grain into sharp focus. You want vibrant photos that beg the viewer to reach out and touch that bowl. Take the time to focus. If your hands are a little shaky, turn on the anti-shake feature of your camera. If you need to, use a tripod to steady the camera.
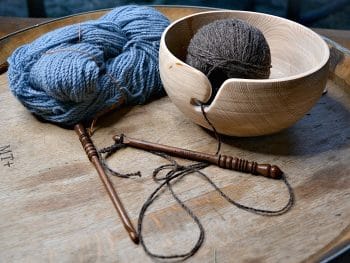
Use the light and shadows in the background to highlight your product in the foreground by playing with focus.
Use the bokeh technique to blur the background. This will draw the viewers eye to the foreground of the photo, where your work shows it’s best features. If you don’t have an SLR camera you can play with the auto settings of your point and shoot digital camera. Usually the flower icon will give you sharp focus for your bowl and blur the background. Add a little bit of light in the background and you’ll get the bokeh effect. This will really make your product images pop.

Disclaimer: This post contains affiliate links.


Very useful
Thank you for this blog. I am always looking for new ways to photograph my bowls and display them. I work in cement (www.finecementcraft.com) but your information is equally relevant.
Jessica